On this page
- Setup
- Adding a Router
- The Root Route
- Handling Not Found Errors
- The Contact Route UI
- Nested Routes
- Client Side Routing
- Loading Data
- Data Writes + HTML Forms
- Creating Contacts
- URL Params in Loaders
- Updating Data
- Updating Contacts with FormData
- Mutation Discussion
- Redirecting new records to the edit page
- Active Link Styling
- Global Pending UI
- Deleting Records
- Contextual Errors
- Index Routes
- Cancel Button
- URL Search Params and GET Submissions
- GET Submissions with Client Side Routing
- Synchronizing URLs to Form State
- Submitting Forms
onChange - Adding Search Spinner
- Managing the History Stack
- Mutations Without Navigation
- Optimistic UI
- Not Found Data
- Pathless Routes
- JSX Routes
Tutorial
Welcome to the tutorial! We'll be building a small, but feature-rich app that lets you keep track of your contacts. We expect it to take between 30-60m if you're following along.
👉 Every time you see this it means you need to do something in the app!
The rest is just there for your information and deeper understanding. Let's get to it.
Setup
We'll be using Vite for our bundler and dev server for this tutorial. You'll need Node.js installed for the npm command line tool.
👉️ Open up your terminal and bootstrap a new React app with Vite:
npm create vite@latest name-of-your-project -- --template react
# follow prompts
cd <your new project directory>
npm install react-router-dom localforage match-sorter sort-by
npm run dev
You should be able to visit the URL printed in the terminal:
 VITE v3.0.7  ready in 175 ms

  ➜  Local:   http://127.0.0.1:5173/
  ➜  Network: use --host to expose
We've got some pre-written CSS for this tutorial so we can stay focused on React Router. Feel free to judge it harshly or write your own 😅 (We did things we normally wouldn't in CSS so that the markup in this tutorial could stay as minimal as possible.)
👉 Copy/Paste the tutorial CSS found here into src/index.css
This tutorial will be creating, reading, searching, updating, and deleting data. A typical web app would probably be talking to an API on your web server, but we're going to use browser storage and fake some network latency to keep this focused. None of this code is relevant to React Router, so just go ahead and copy/paste it all.
👉 Copy/Paste the tutorial data module found here into src/contacts.js
All you need in the src folder are contacts.js, main.jsx, and index.css. You can delete anything else (like App.js and assets, etc.).
👉 Delete unused files in src/ so all you have left are these:
src
├── contacts.js
├── index.css
└── main.jsx
If your app is running, it might blow up momentarily, just keep going 😋. And with that, we're ready to get started!
Adding a Router
First thing to do is create a Browser Router and configure our first route. This will enable client side routing for our web app.
The main.jsx file is the entry point. Open it up and we'll put React Router on the page.
👉 Create and render a browser router in main.jsx
import React from "react";
import ReactDOM from "react-dom/client";
import {
  createBrowserRouter,
  RouterProvider,
} from "react-router-dom";
import "./index.css";

const router = createBrowserRouter([
  {
    path: "/",
    element: <div>Hello world!</div>,
  },
]);

ReactDOM.createRoot(document.getElementById("root")).render(
  <React.StrictMode>
    <RouterProvider router={router} />
  </React.StrictMode>
);
This first route is what we often call the "root route" since the rest of our routes will render inside of it. It will serve as the root layout of the UI, we'll have nested layouts as we get farther along.
The Root Route
Let's add the global layout for this app.
👉 Create src/routes and src/routes/root.jsx
mkdir src/routes
touch src/routes/root.jsx
(If you don't want to be a command line nerd, use your editor instead of those commands 🤓)
👉 Create the root layout component
export default function Root() {
  return (
    <>
      <div id="sidebar">
        <h1>React Router Contacts</h1>
        <div>
          <form id="search-form" role="search">
            <input
              id="q"
              aria-label="Search contacts"
              placeholder="Search"
              type="search"
              name="q"
            />
            <div
              id="search-spinner"
              aria-hidden
              hidden={true}
            />
            <div
              className="sr-only"
              aria-live="polite"
            ></div>
          </form>
          <form method="post">
            <button type="submit">New</button>
          </form>
        </div>
        <nav>
          <ul>
            <li>
              <a href={`/contacts/1`}>Your Name</a>
            </li>
            <li>
              <a href={`/contacts/2`}>Your Friend</a>
            </li>
          </ul>
        </nav>
      </div>
      <div id="detail"></div>
    </>
  );
}
Nothing React Router specific yet, so feel free to copy/paste all of that.
👉 Set <Root> as the root route's element
/* existing imports */
import Root from "./routes/root";

const router = createBrowserRouter([
  {
    path: "/",
    element: <Root />,
  },
]);

ReactDOM.createRoot(document.getElementById("root")).render(
  <React.StrictMode>
    <RouterProvider router={router} />
  </React.StrictMode>
);
The app should look something like this now. It sure is nice having a designer who can also write the CSS, isn't it? (Thank you Jim 🙏).
Handling Not Found Errors
It's always a good idea to know how your app responds to errors early in the project because we all write far more bugs than features when building a new app! Not only will your users get a good experience when this happens, but it helps you during development as well.
We added some links to this app, let's see what happens when we click them?
👉 Click one of the sidebar names
Gross! This is the default error screen in React Router, made worse by our flex box styles on the root element in this app 😂.
Anytime your app throws an error while rendering, loading data, or performing data mutations, React Router will catch it and render an error screen. Let's make our own error page.
👉 Create an error page component
touch src/error-page.jsx
import { useRouteError } from "react-router-dom";

export default function ErrorPage() {
  const error = useRouteError();
  console.error(error);

  return (
    <div id="error-page">
      <h1>Oops!</h1>
      <p>Sorry, an unexpected error has occurred.</p>
      <p>
        <i>{error.statusText || error.message}</i>
      </p>
    </div>
  );
}
👉 Set the <ErrorPage> as the errorElement on the root route
/* previous imports */
import ErrorPage from "./error-page";

const router = createBrowserRouter([
  {
    path: "/",
    element: <Root />,
    errorElement: <ErrorPage />,
  },
]);

ReactDOM.createRoot(document.getElementById("root")).render(
  <React.StrictMode>
    <RouterProvider router={router} />
  </React.StrictMode>
);
The error page should now look like this:

(Well, that's not much better. Maybe somebody forgot to ask the designer to make an error page. Maybe everybody forgets to ask the designer to make an error page and then blames the designer for not thinking of it 😆)
Note that useRouteError provides the error that was thrown. When the user navigates to routes that don't exist you'll get an error response with a "Not Found" statusText. We'll see some other errors later in the tutorial and discuss them more.
For now, it's enough to know that pretty much all of your errors will now be handled by this page instead of infinite spinners, unresponsive pages, or blank screens 🙌
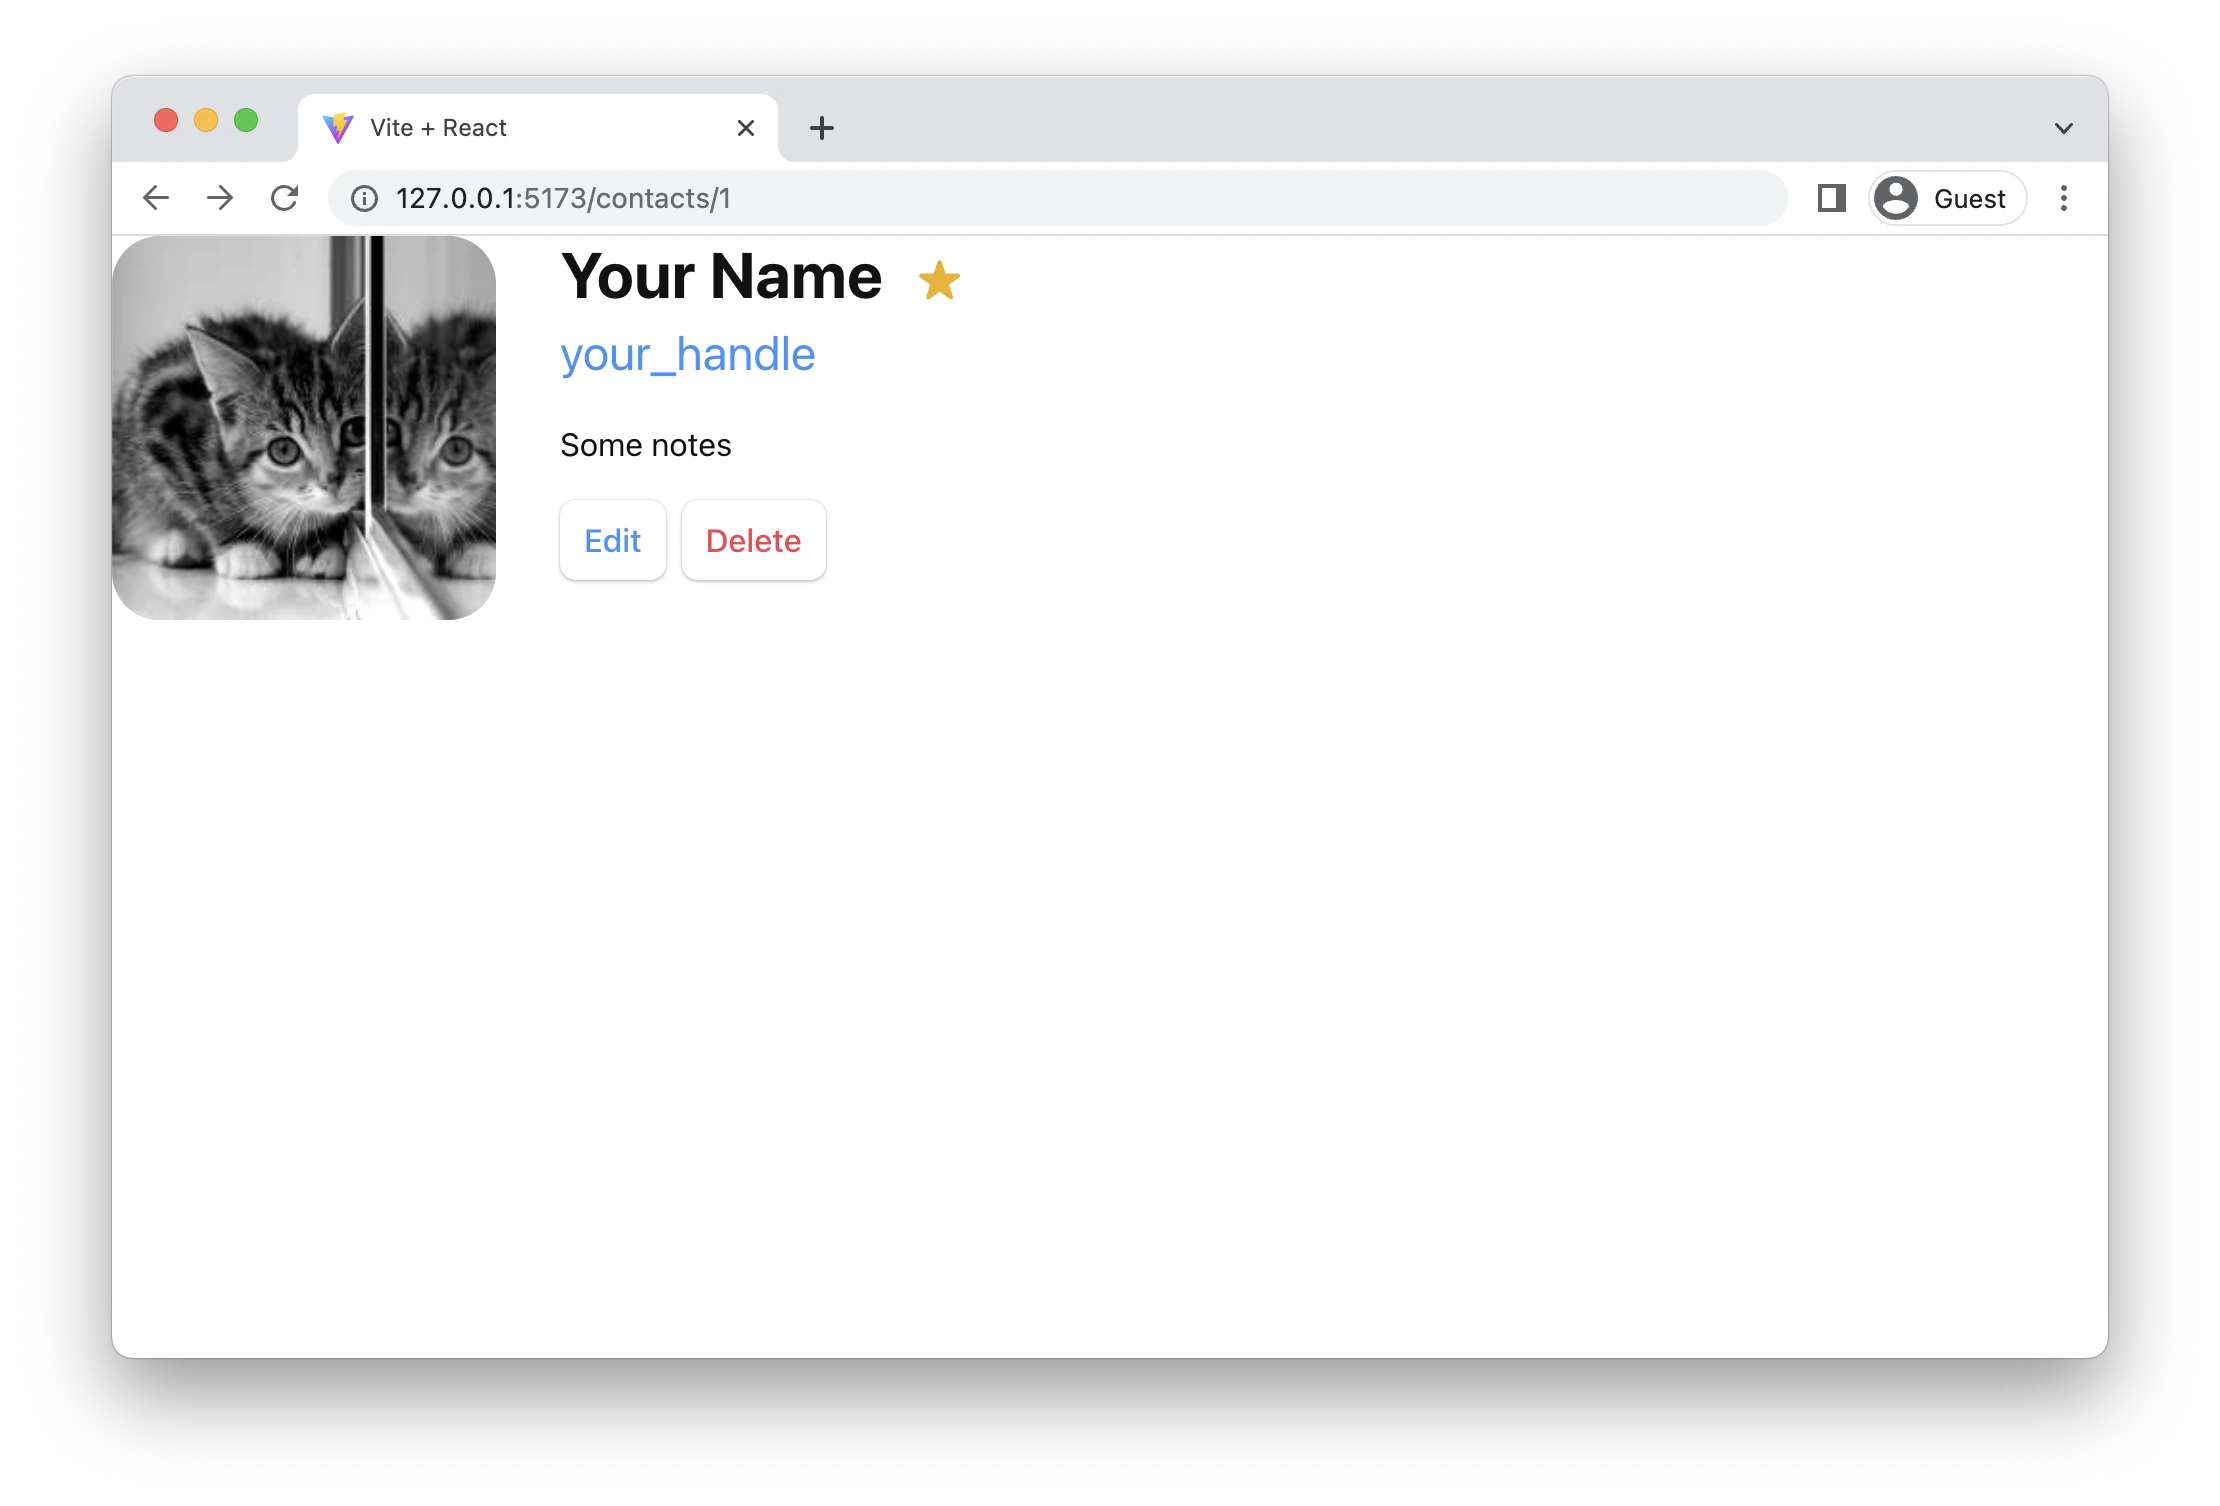
The Contact Route UI
Instead of a 404 "Not Found" page, we want to actually render something at the URLs we've linked to. For that, we need to make a new route.
👉 Create the contact route module
touch src/routes/contact.jsx
👉 Add the contact component UI
It's just a bunch of elements, feel free to copy/paste.
import { Form } from "react-router-dom";

export default function Contact() {
  const contact = {
    first: "Your",
    last: "Name",
    avatar: "https://placekitten.com/g/200/200",
    twitter: "your_handle",
    notes: "Some notes",
    favorite: true,
  };

  return (
    <div id="contact">
      <div>
        <img
          key={contact.avatar}
          src={contact.avatar || null}
        />
      </div>

      <div>
        <h1>
          {contact.first || contact.last ? (
            <>
              {contact.first} {contact.last}
            </>
          ) : (
            <i>No Name</i>
          )}{" "}
          <Favorite contact={contact} />
        </h1>

        {contact.twitter && (
          <p>
            <a
              target="_blank"
              href={`https://twitter.com/${contact.twitter}`}
            >
              {contact.twitter}
            </a>
          </p>
        )}

        {contact.notes && <p>{contact.notes}</p>}

        <div>
          <Form action="edit">
            <button type="submit">Edit</button>
          </Form>
          <Form
            method="post"
            action="destroy"
            onSubmit={(event) => {
              if (
                !confirm(
                  "Please confirm you want to delete this record."
                )
              ) {
                event.preventDefault();
              }
            }}
          >
            <button type="submit">Delete</button>
          </Form>
        </div>
      </div>
    </div>
  );
}

function Favorite({ contact }) {
  // yes, this is a `let` for later
  let favorite = contact.favorite;
  return (
    <Form method="post">
      <button
        name="favorite"
        value={favorite ? "false" : "true"}
        aria-label={
          favorite
            ? "Remove from favorites"
            : "Add to favorites"
        }
      >
        {favorite ? "★" : "☆"}
      </button>
    </Form>
  );
}
Now that we've got a component, let's hook it up to a new route.
👉 Import the contact component and create a new route
/* existing imports */
import Contact from "./routes/contact";

const router = createBrowserRouter([
  {
    path: "/",
    element: <Root />,
    errorElement: <ErrorPage />,
  },
  {
    path: "contacts/:contactId",
    element: <Contact />,
  },
]);

/* existing code */
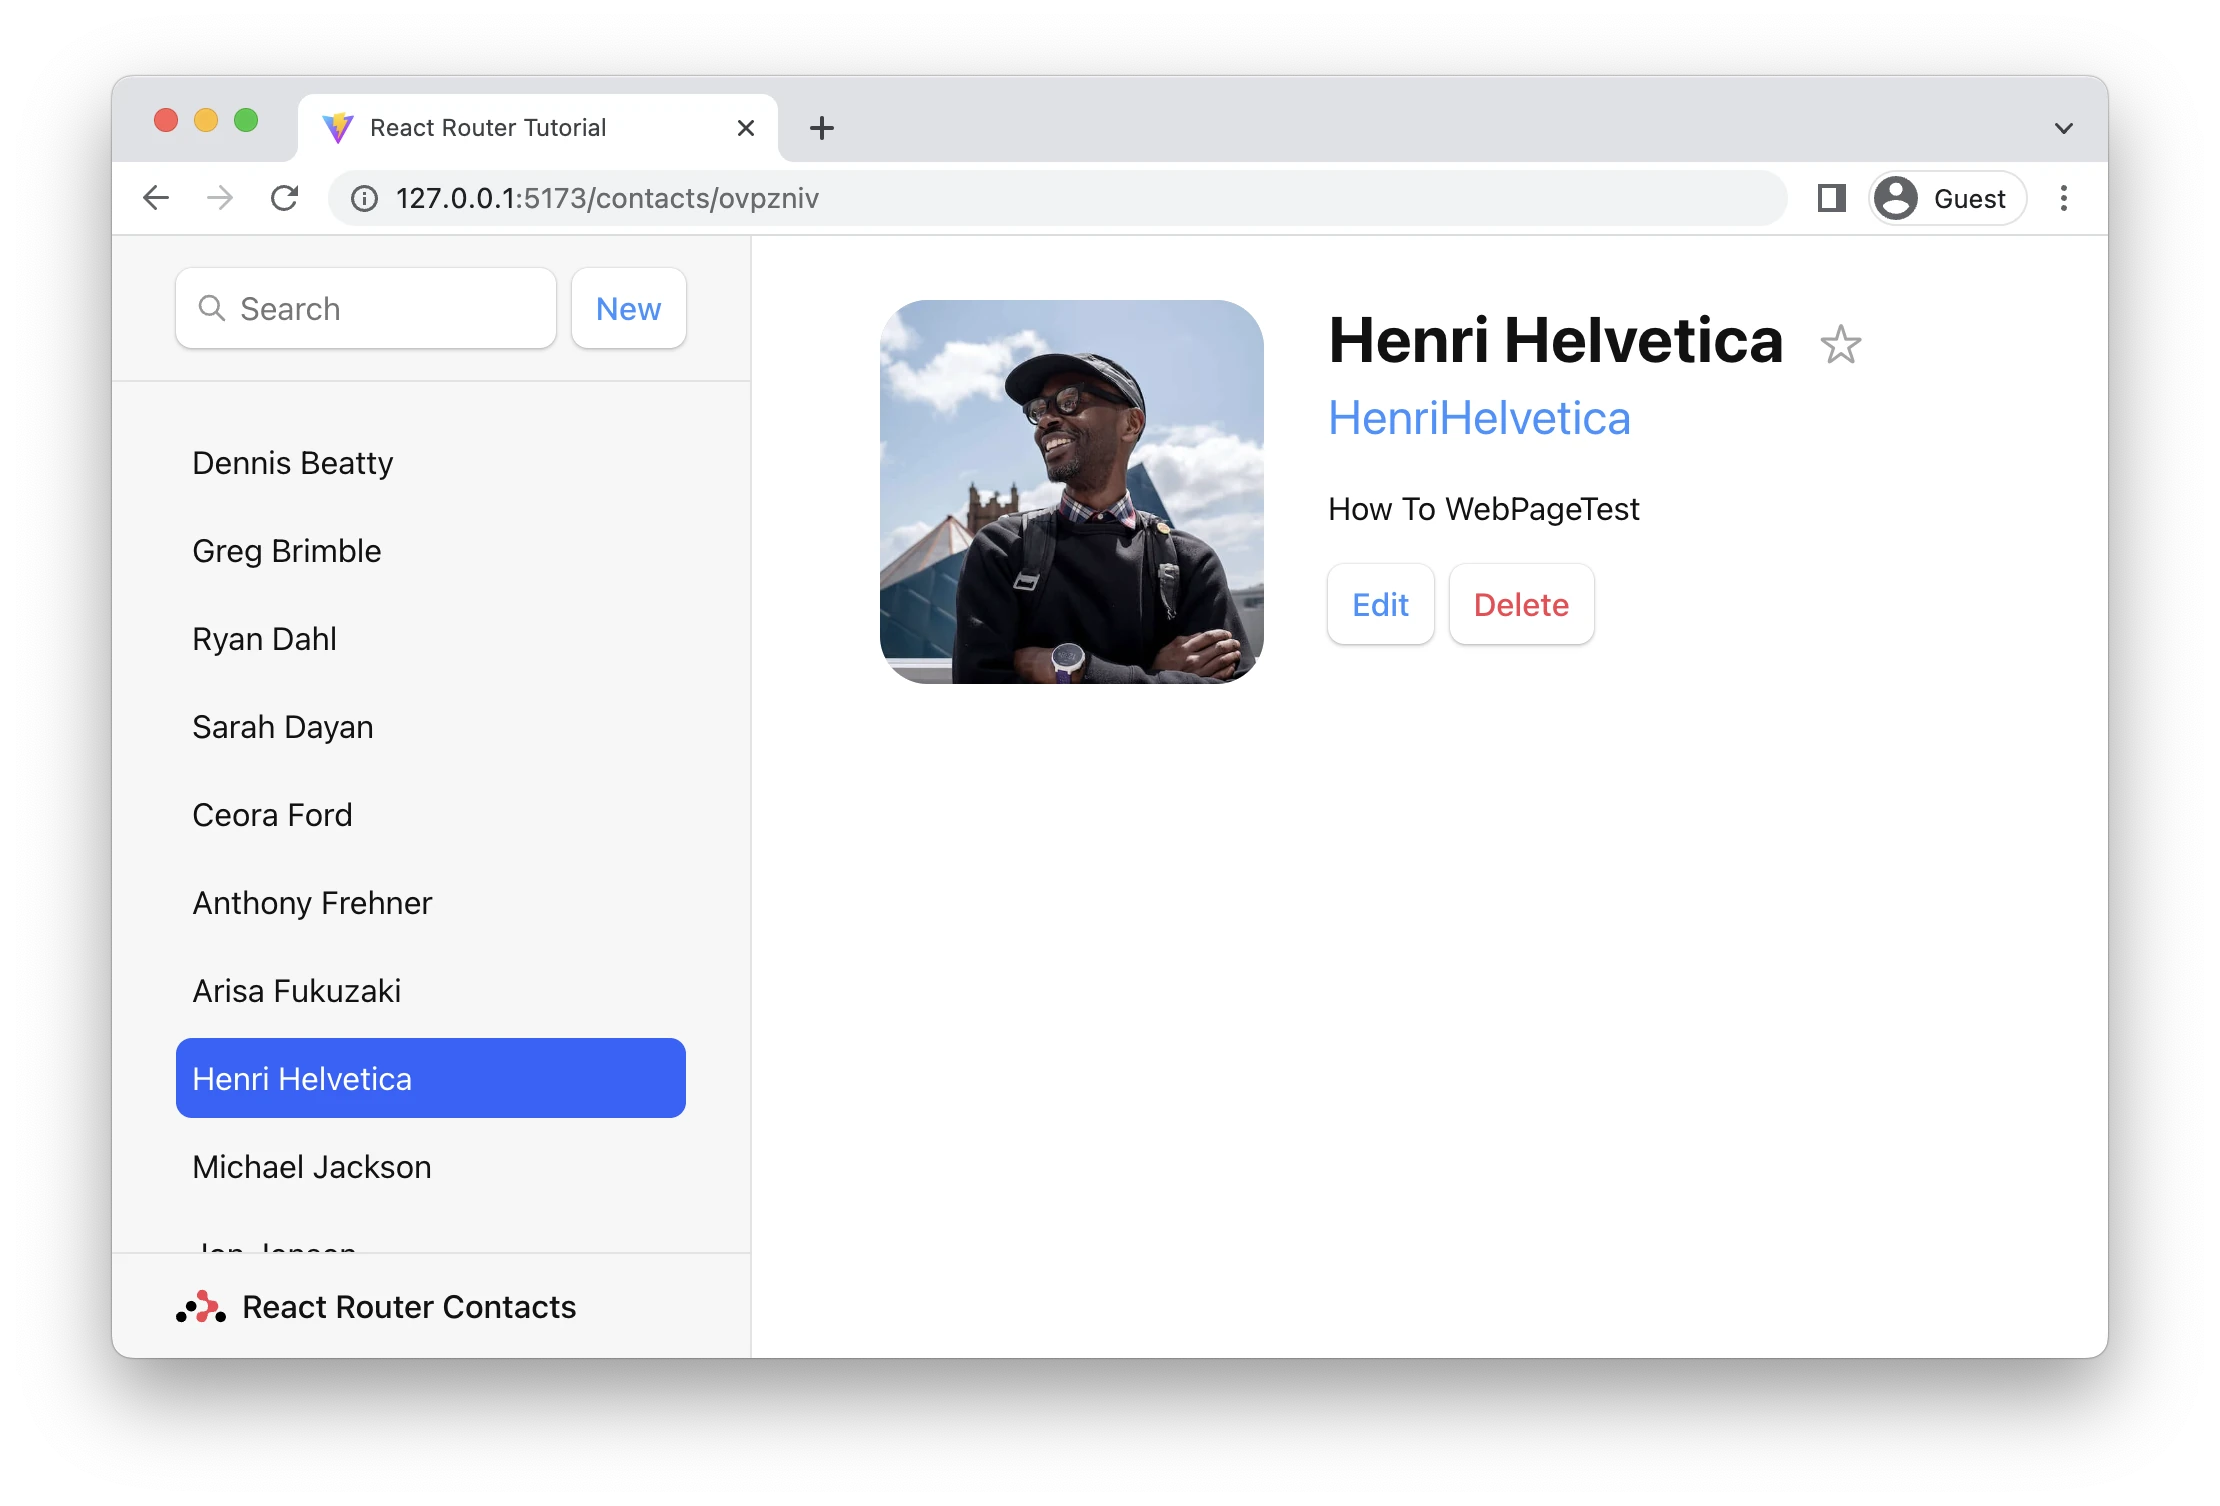
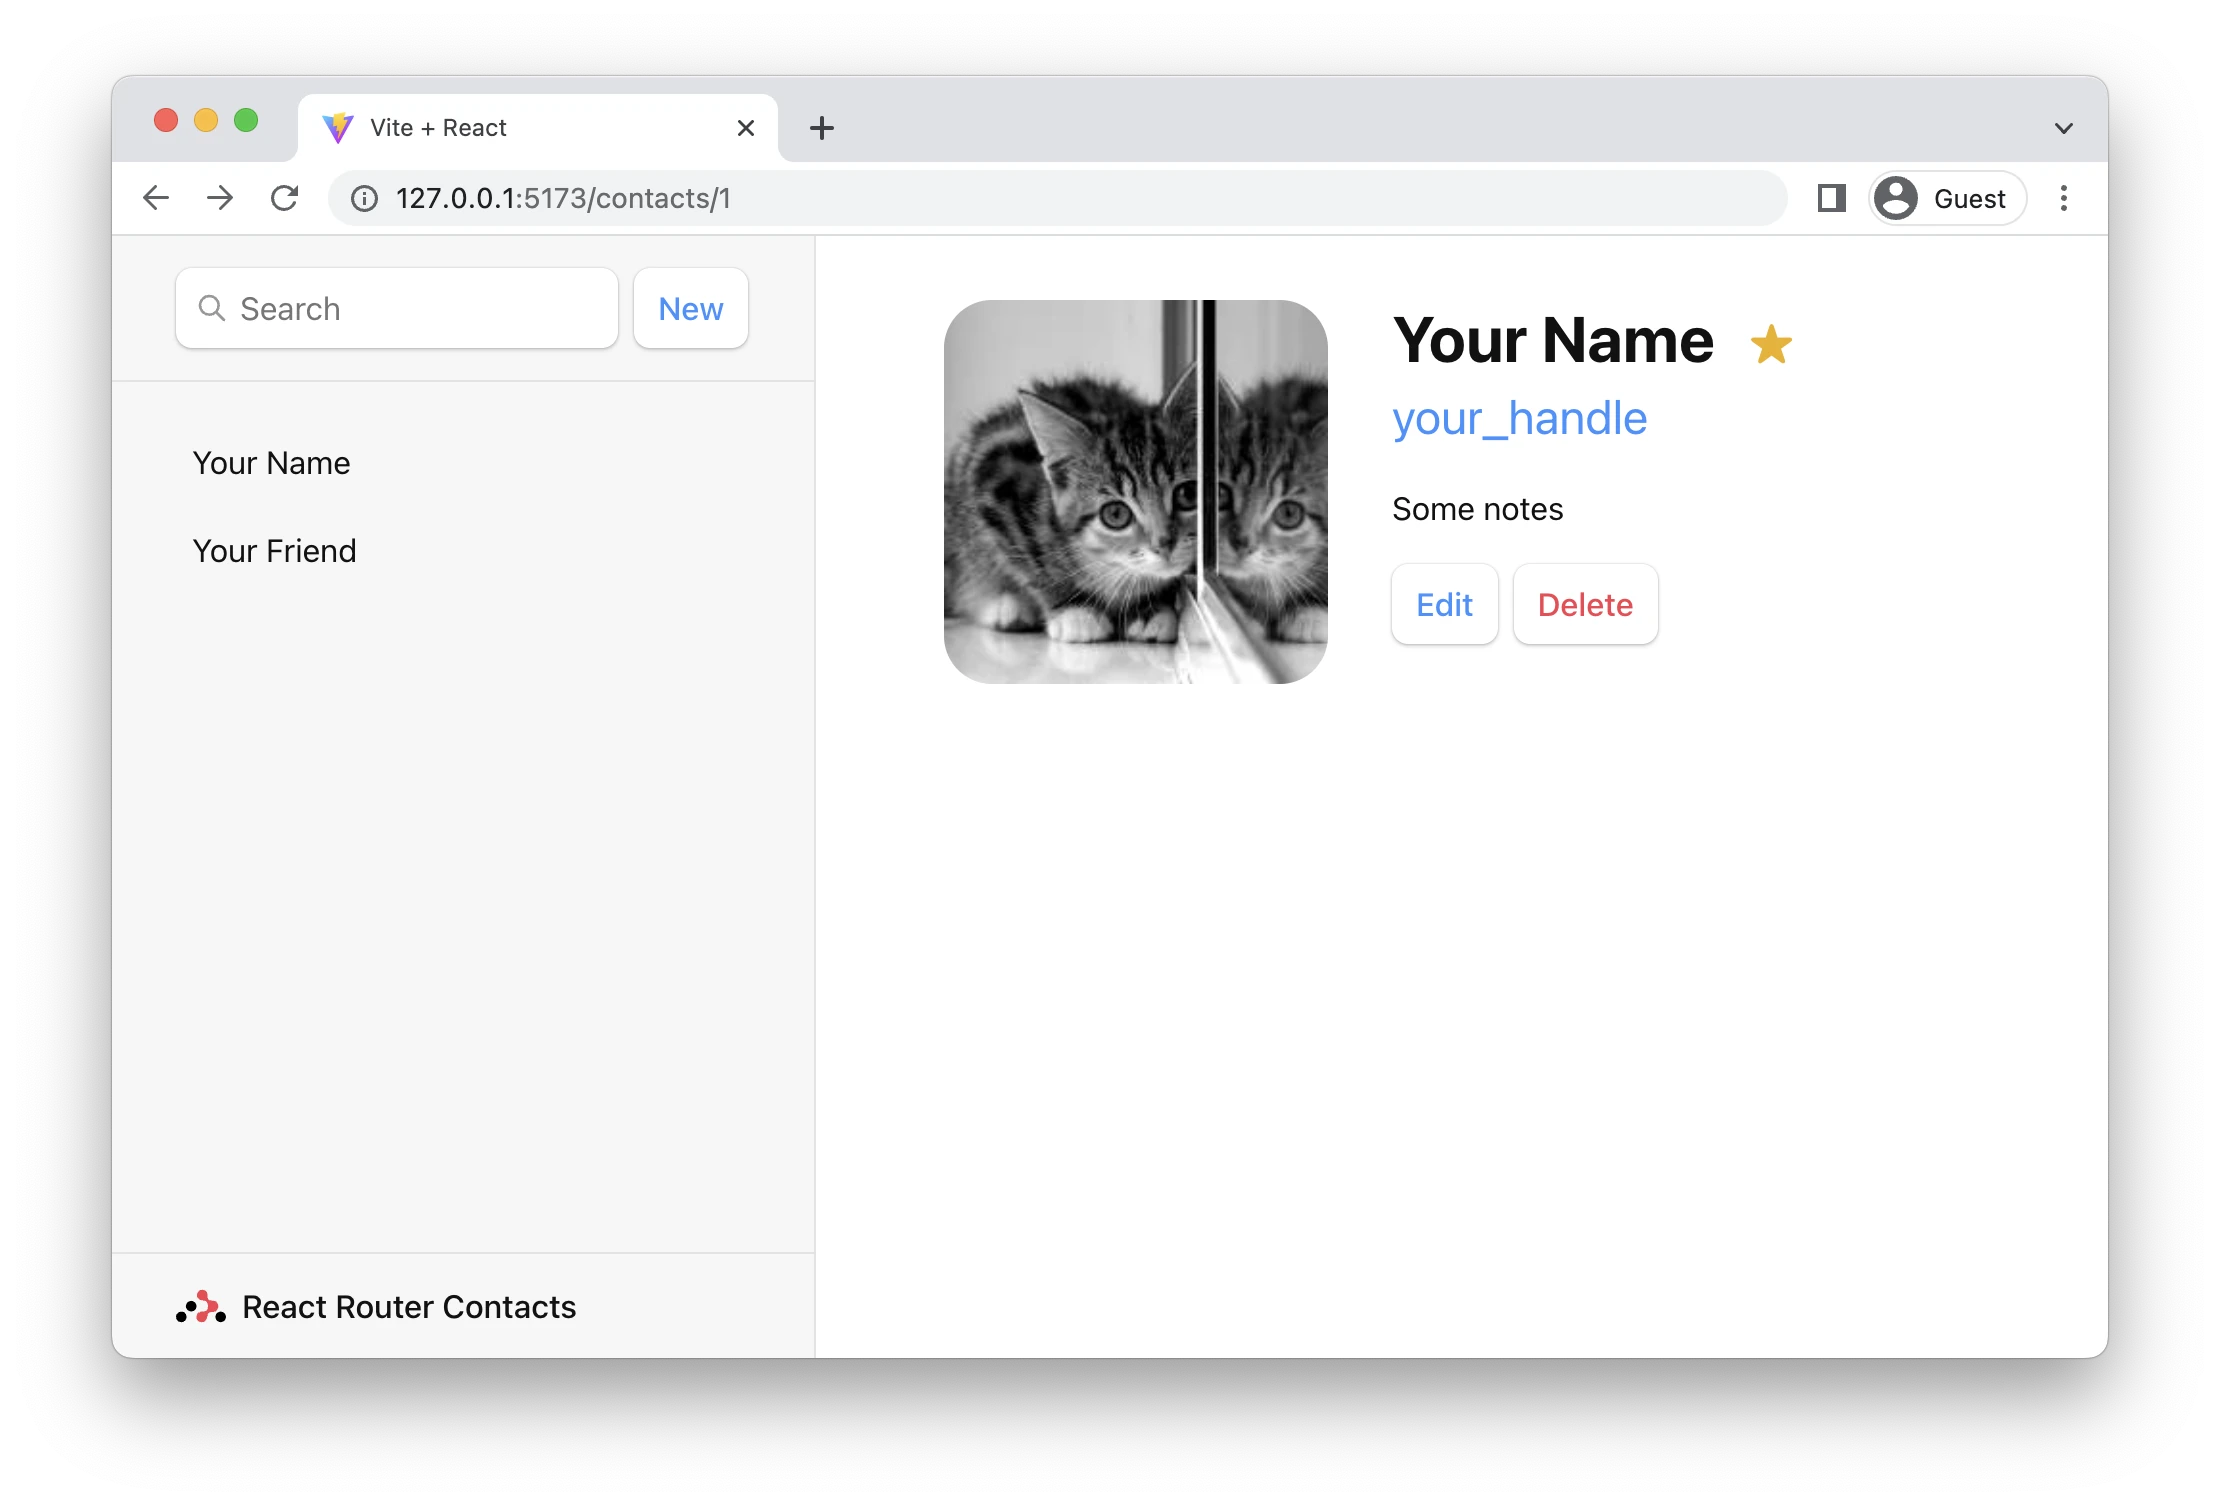
Now if we click one of the links or visit /contacts/1 we get our new component!
However, it's not inside of our root layout 😠
Nested Routes
We want the contact component to render inside of the <Root> layout like this.
We do it by making the contact route a child of the root route.
👉 Move the contacts route to be a child of the root route
const router = createBrowserRouter([
  {
    path: "/",
    element: <Root />,
    errorElement: <ErrorPage />,
    children: [
      {
        path: "contacts/:contactId",
        element: <Contact />,
      },
    ],
  },
]);
You'll now see the root layout again but a blank page on the right. We need to tell the root route where we want it to render its child routes. We do that with <Outlet>.
Find the <div id="detail"> and put an outlet inside
👉 Render an <Outlet>
import { Outlet } from "react-router-dom";

export default function Root() {
  return (
    <>
      {/* all the other elements */}
      <div id="detail">
        <Outlet />
      </div>
    </>
  );
}
Client Side Routing
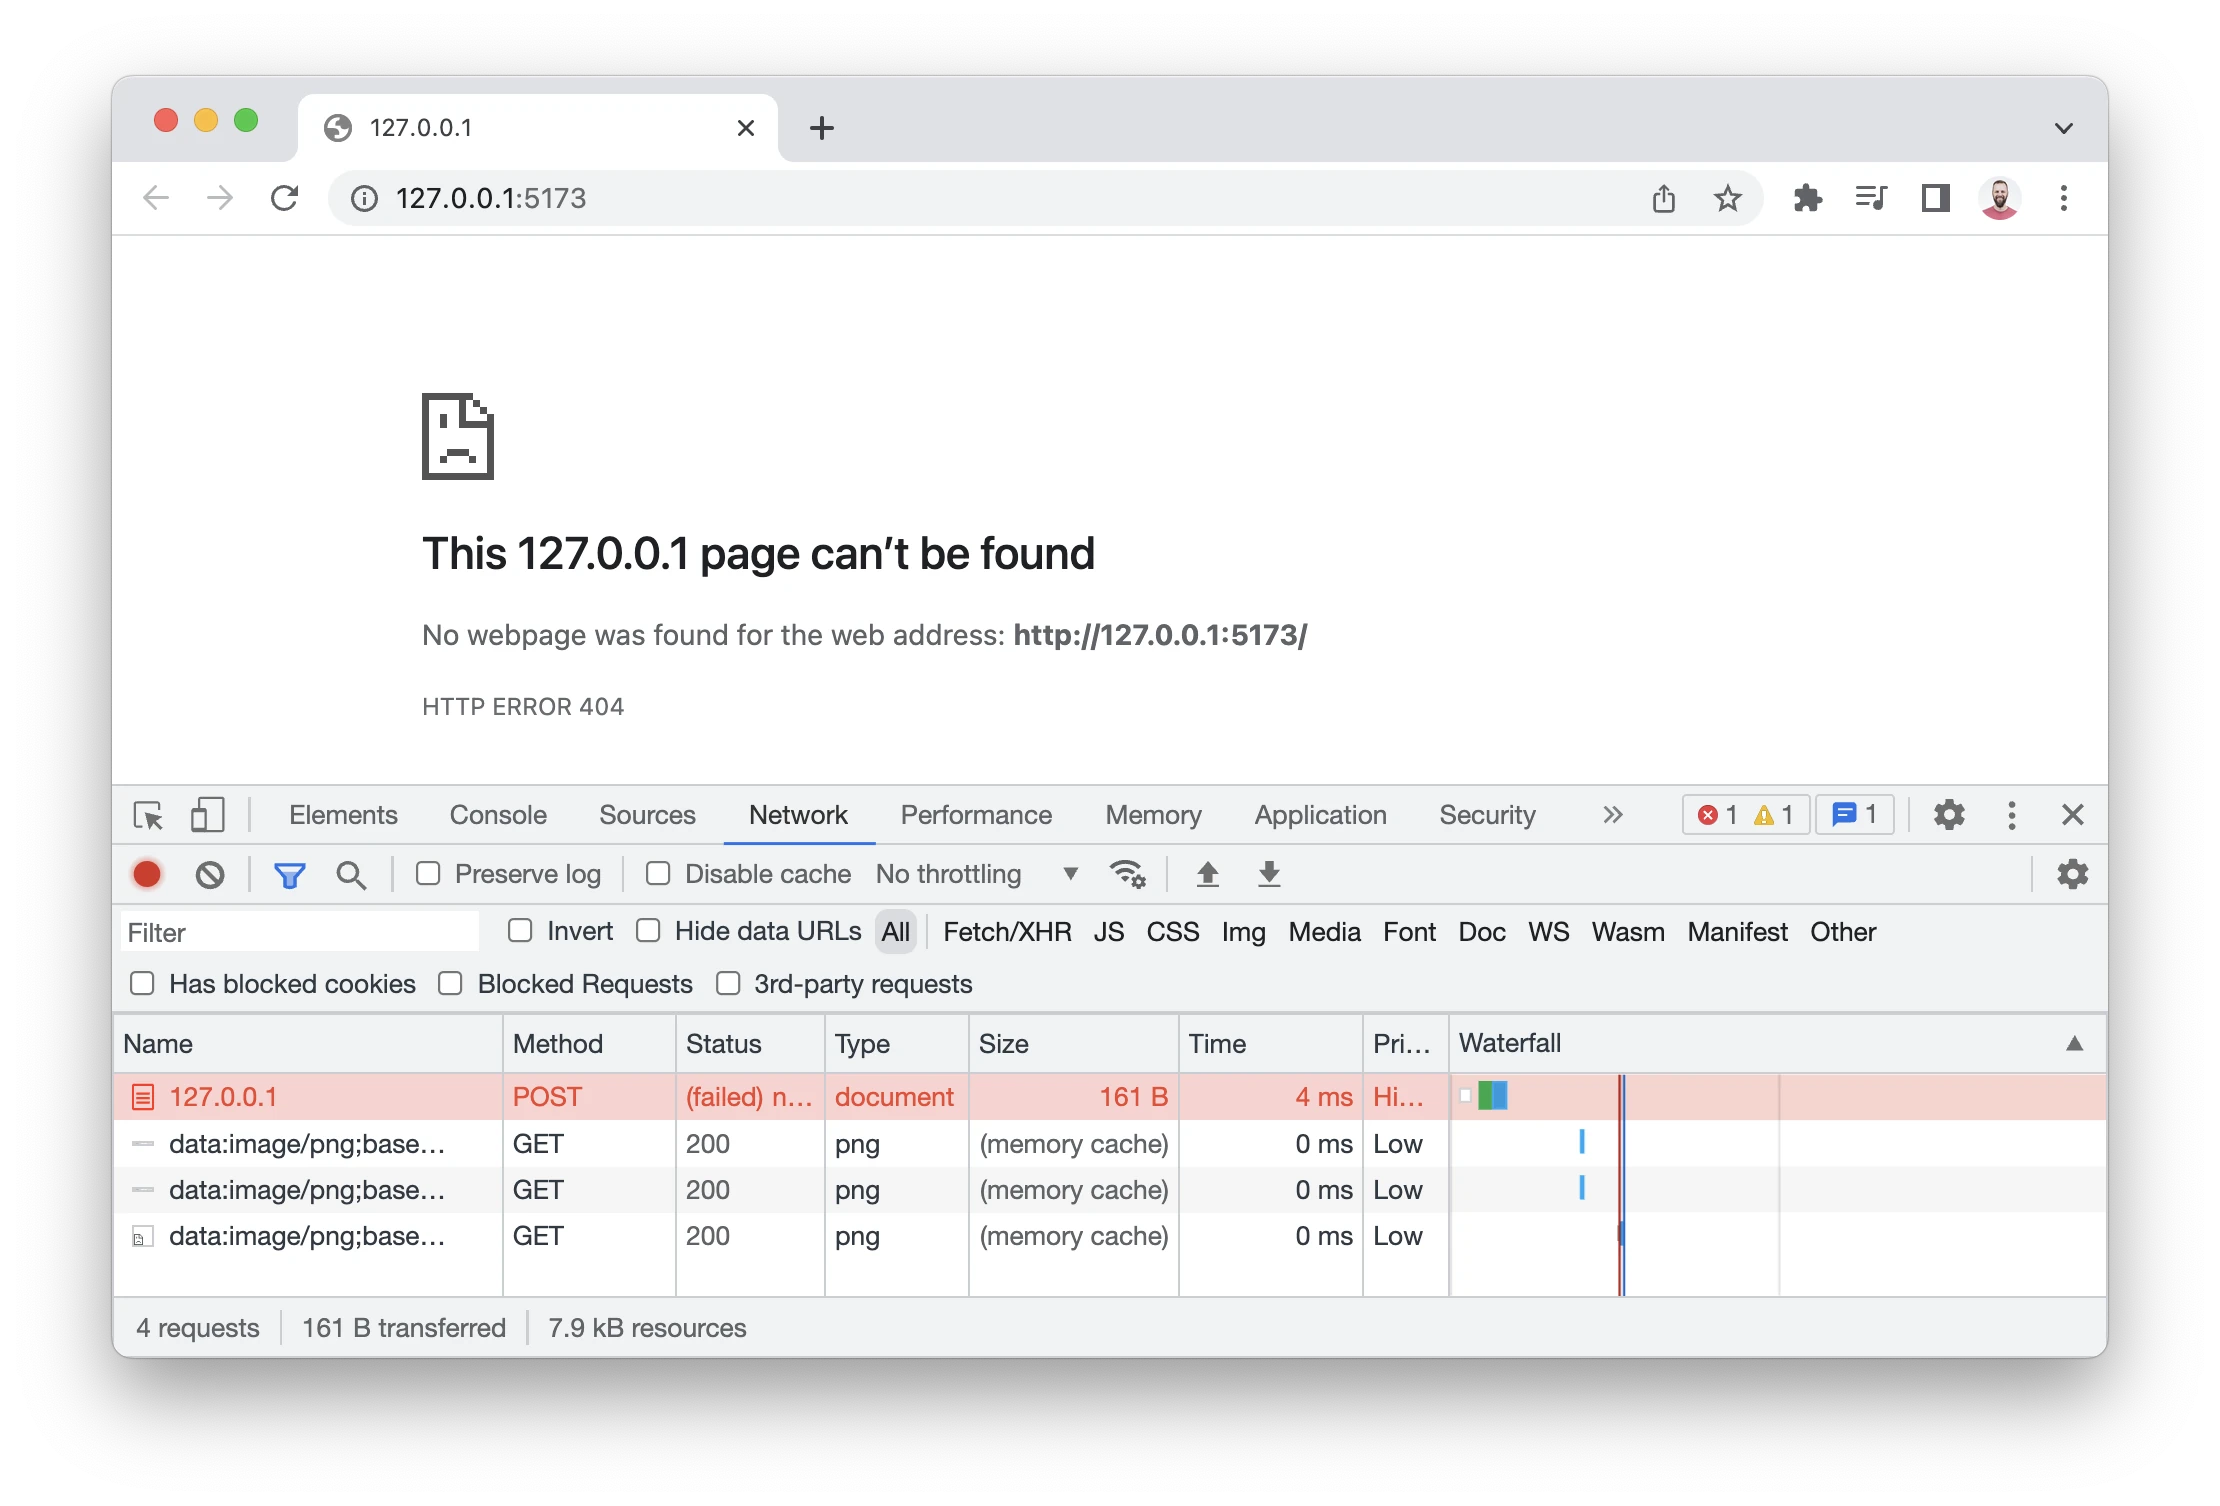
You may or may not have noticed, but when we click the links in the sidebar, the browser is doing a full document request for the next URL instead of using React Router.
Client side routing allows our app to update the URL without requesting another document from the server. Instead, the app can immediately render new UI. Let's make it happen with <Link>.
👉 Change the sidebar <a href> to <Link to>
import { Outlet, Link } from "react-router-dom";

export default function Root() {
  return (
    <>
      <div id="sidebar">
        {/* other elements */}

        <nav>
          <ul>
            <li>
              <Link to={`contacts/1`}>Your Name</Link>
            </li>
            <li>
              <Link to={`contacts/2`}>Your Friend</Link>
            </li>
          </ul>
        </nav>

        {/* other elements */}
      </div>
    </>
  );
}
You can open the network tab in the browser devtools to see that it's not requesting documents anymore.
Loading Data
URL segments, layouts, and data are more often than not coupled (tripled?) together. We can see it in this app already:
| URL Segment | Component | Data |
|---|---|---|
| / | <Root> |
list of contacts |
| contacts/:id | <Contact> |
individual contact |
Because of this natural coupling, React Router has data conventions to get data into your route components easily.
There are two APIs we'll be using to load data, loader and useLoaderData. First we'll create and export a loader function in the root module, then we'll hook it up to the route. Finally, we'll access and render the data.
👉 Export a loader from root.jsx
import { Outlet, Link } from "react-router-dom";
import { getContacts } from "../contacts";

export async function loader() {
  const contacts = await getContacts();
  return { contacts };
}
👉 Configure the loader on the route
/* other imports */
import Root, { loader as rootLoader } from "./routes/root";

const router = createBrowserRouter([
  {
    path: "/",
    element: <Root />,
    errorElement: <ErrorPage />,
    loader: rootLoader,
    children: [
      {
        path: "contacts/:contactId",
        element: <Contact />,
      },
    ],
  },
]);
👉 Access and render the data
import {
  Outlet,
  Link,
  useLoaderData,
} from "react-router-dom";
import { getContacts } from "../contacts";

/* other code */

export default function Root() {
  const { contacts } = useLoaderData();
  return (
    <>
      <div id="sidebar">
        <h1>React Router Contacts</h1>
        {/* other code */}

        <nav>
          {contacts.length ? (
            <ul>
              {contacts.map((contact) => (
                <li key={contact.id}>
                  <Link to={`contacts/${contact.id}`}>
                    {contact.first || contact.last ? (
                      <>
                        {contact.first} {contact.last}
                      </>
                    ) : (
                      <i>No Name</i>
                    )}{" "}
                    {contact.favorite && <span>★</span>}
                  </Link>
                </li>
              ))}
            </ul>
          ) : (
            <p>
              <i>No contacts</i>
            </p>
          )}
        </nav>

        {/* other code */}
      </div>
    </>
  );
}
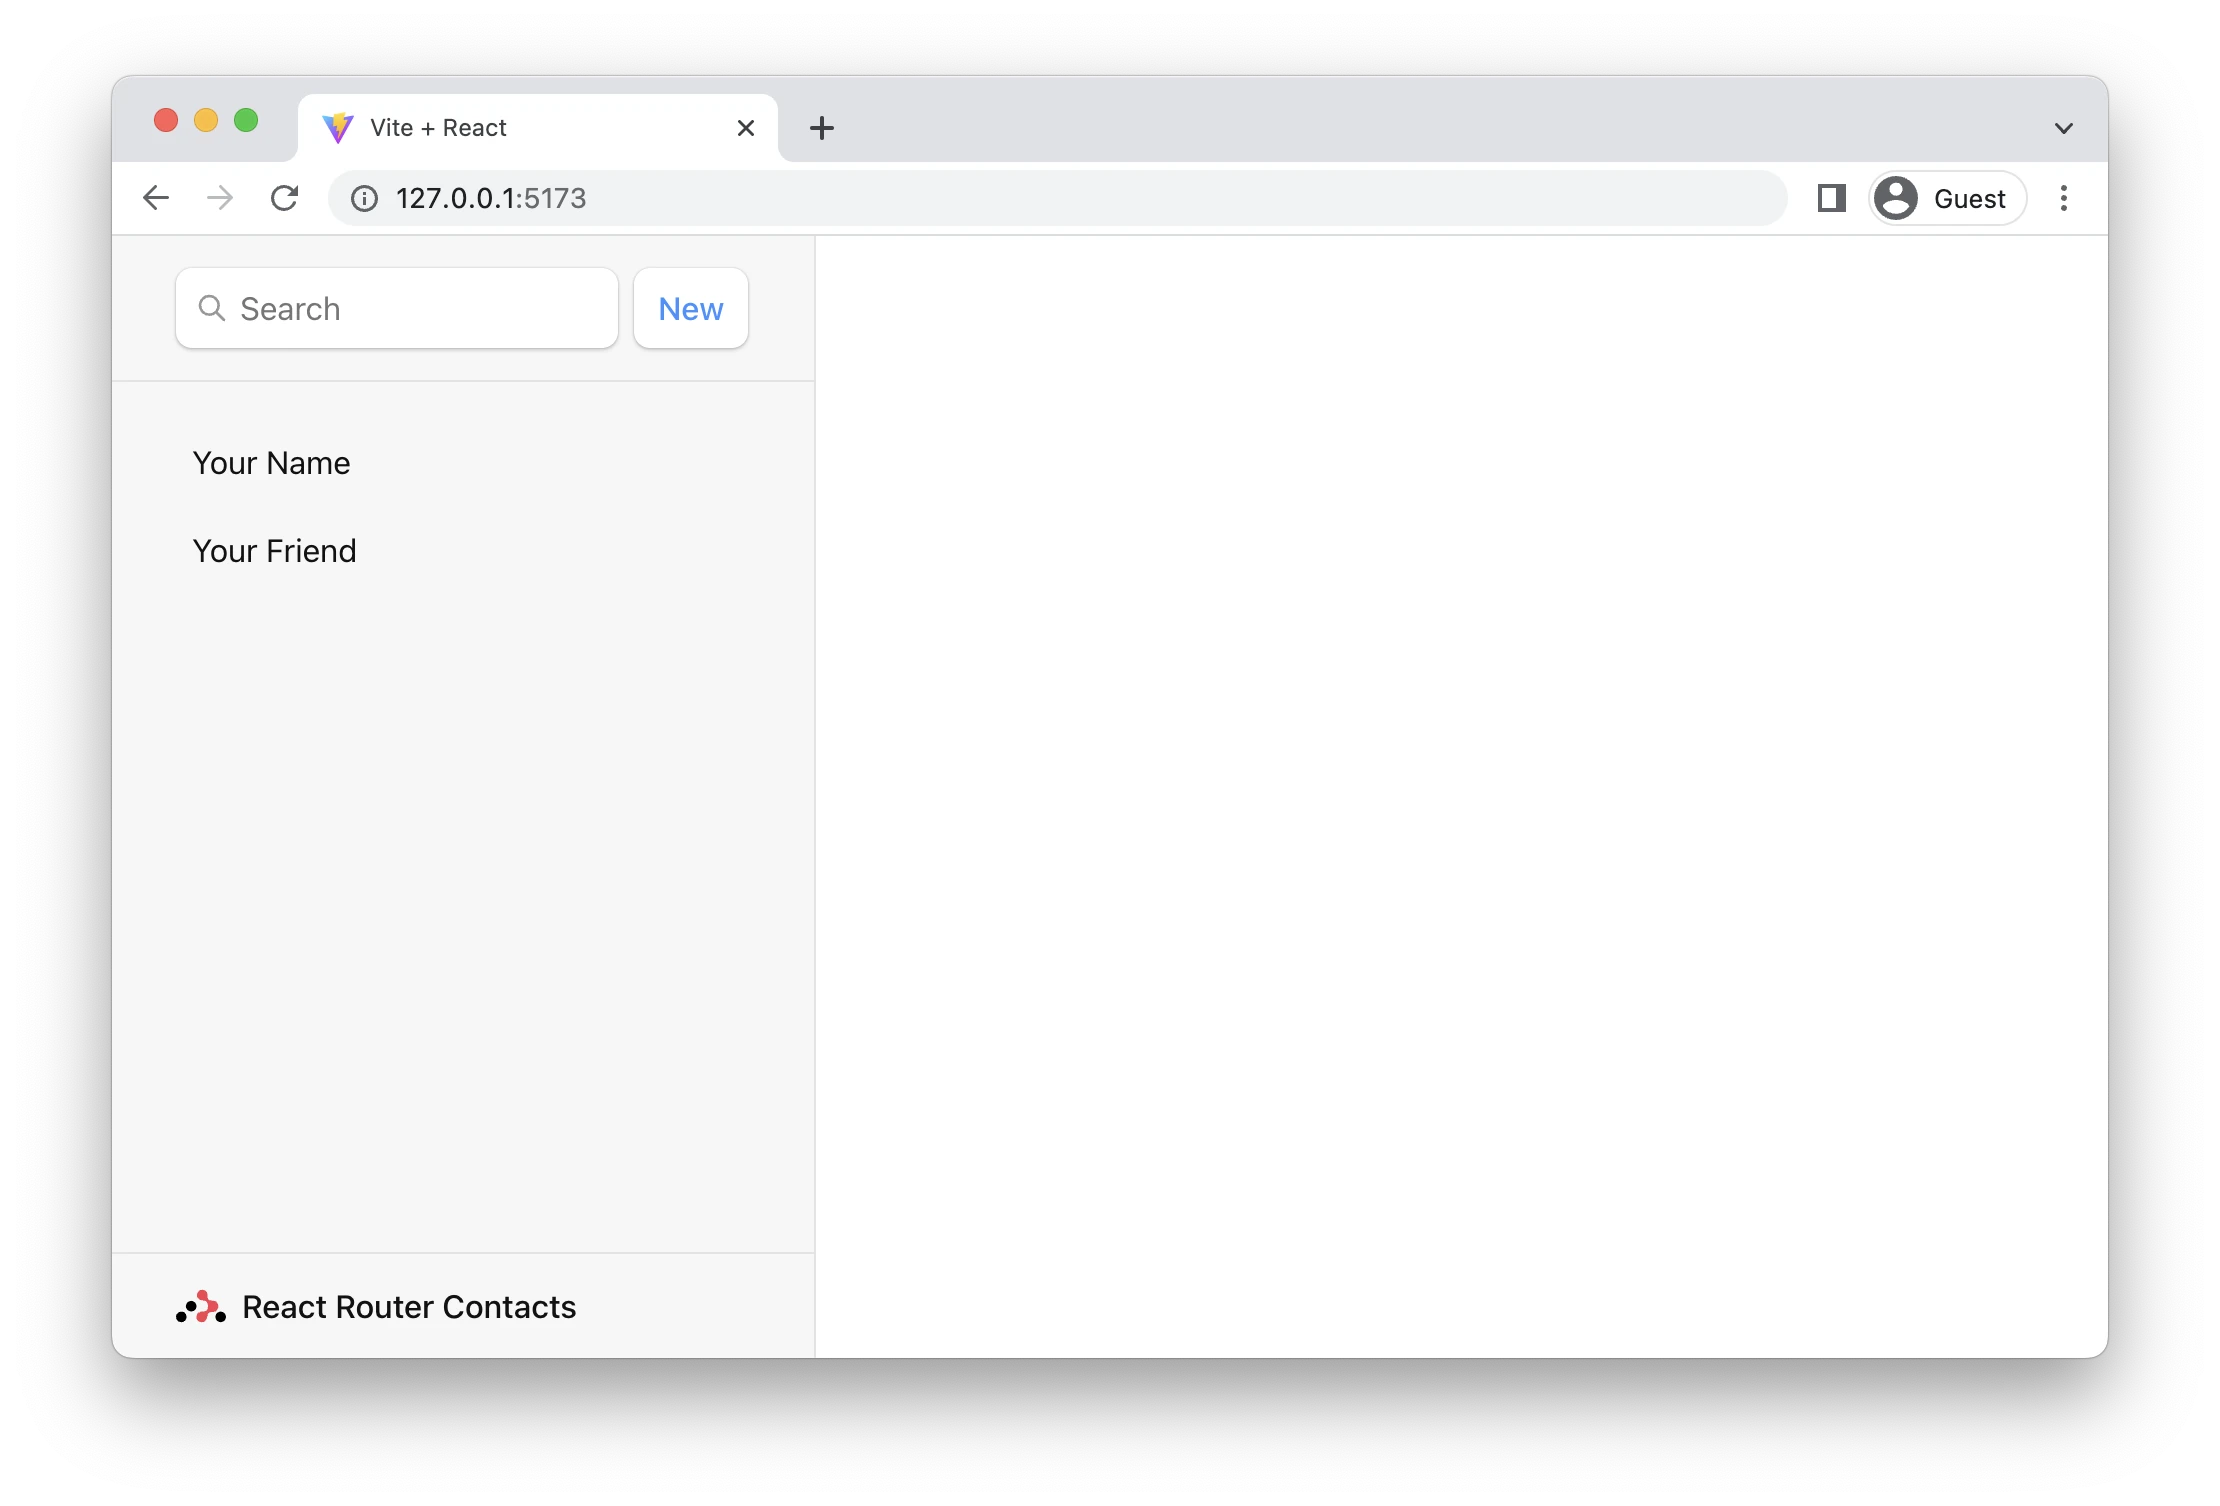
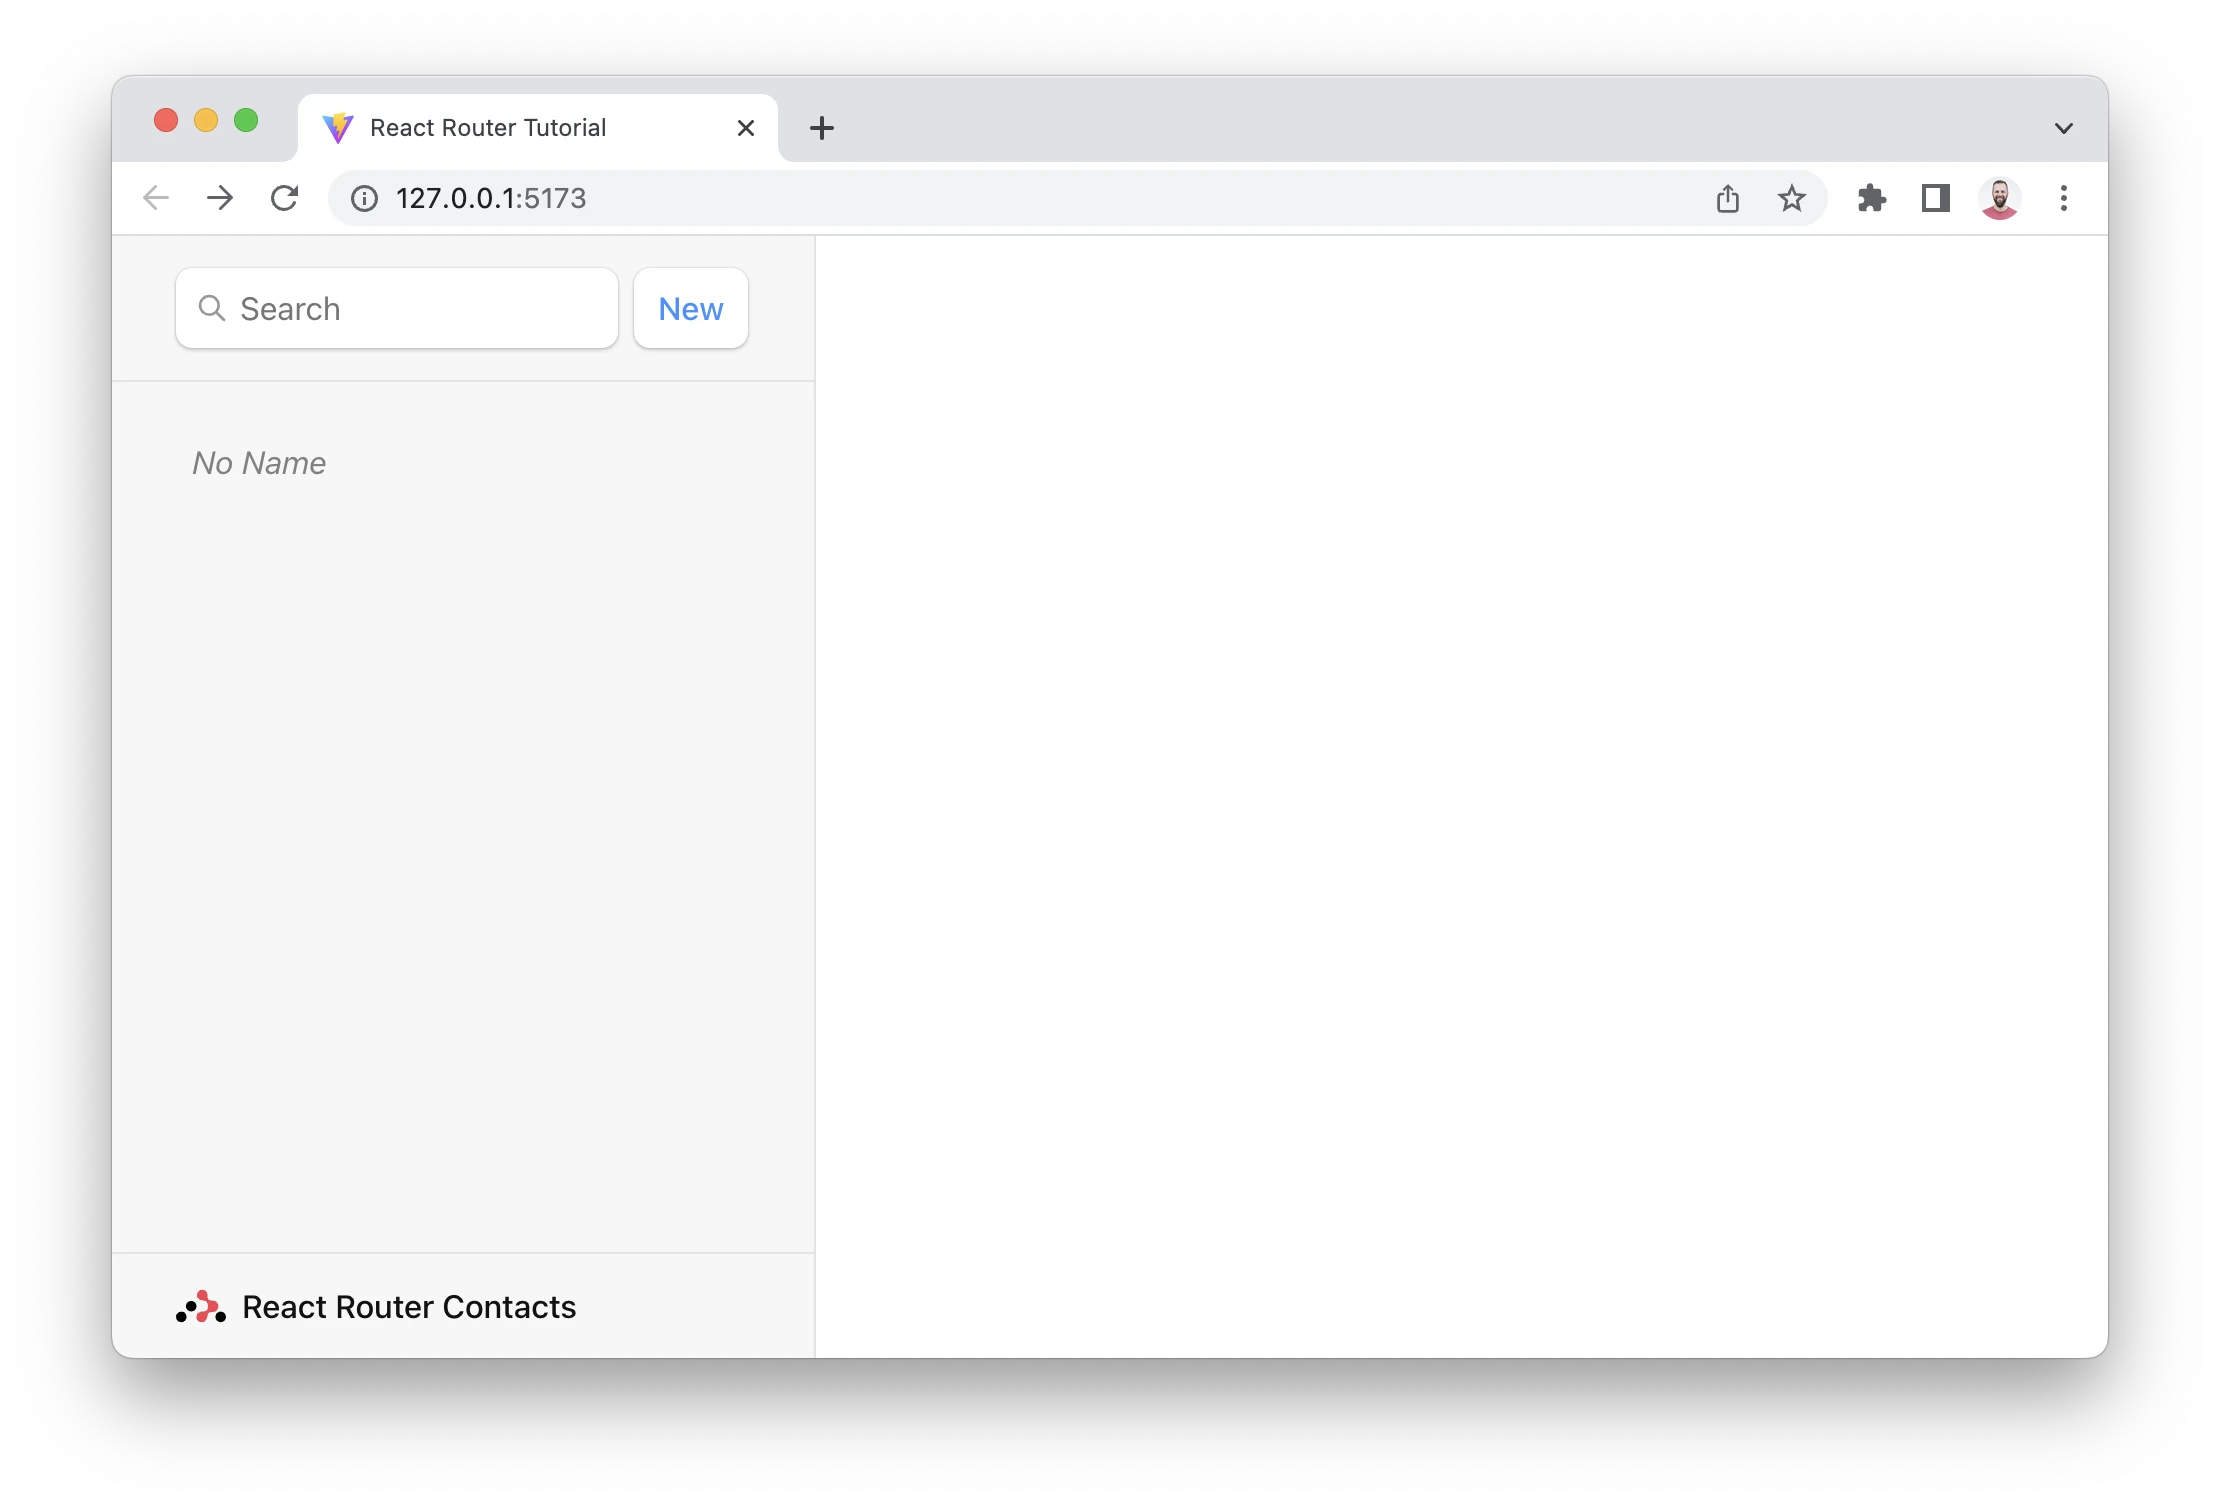
That's it! React Router will now automatically keep that data in sync with your UI. We don't have any data yet, so you're probably getting a blank list like this:

Data Writes + HTML Forms
We'll create our first contact in a second, but first let's talk about HTML.
React Router emulates HTML Form navigation as the data mutation primitive, according to web development before the JavaScript cambrian explosion. It gives you the UX capabilities of client rendered apps with the simplicity of the "old school" web model.
While unfamiliar to some web developers, HTML forms actually cause a navigation in the browser, just like clicking a link. The only difference is in the request: links can only change the URL while forms can also change the request method (GET vs POST) and the request body (POST form data).
Without client side routing, the browser will serialize the form's data automatically and send it to the server as the request body for POST, and as URLSearchParams for GET. React Router does the same thing, except instead of sending the request to the server, it uses client side routing and sends it to a route action.
We can test this out by clicking the "New" button in our app. The app should blow up because the Vite server isn't configured to handle a POST request (it sends a 404, though it should probably be a 405 🤷).
Instead of sending that POST to the Vite server to create a new contact, let's use client side routing instead.
Creating Contacts
We'll create new contacts by exporting an action in our root route, wiring it up to the route config, and changing our <form> to a React Router <Form>.
👉 Create the action and change <form> to <Form>
import {
  Outlet,
  Link,
  useLoaderData,
  Form,
} from "react-router-dom";
import { getContacts, createContact } from "../contacts";

export async function action() {
  const contact = await createContact();
  return { contact };
}

/* other code */

export default function Root() {
  const { contacts } = useLoaderData();
  return (
    <>
      <div id="sidebar">
        <h1>React Router Contacts</h1>
        <div>
          {/* other code */}
          <Form method="post">
            <button type="submit">New</button>
          </Form>
        </div>

        {/* other code */}
      </div>
    </>
  );
}
👉 Import and set the action on the route
/* other imports */

import Root, {
  loader as rootLoader,
  action as rootAction,
} from "./routes/root";

const router = createBrowserRouter([
  {
    path: "/",
    element: <Root />,
    errorElement: <ErrorPage />,
    loader: rootLoader,
    action: rootAction,
    children: [
      {
        path: "contacts/:contactId",
        element: <Contact />,
      },
    ],
  },
]);
That's it! Go ahead and click the "New" button and you should see a new record pop into the list 🥳
The createContact method just creates an empty contact with no name or data or anything. But it does still create a record, promise!
🧐 Wait a sec ... How did the sidebar update? Where did we call the
action? Where's the code to refetch the data? Where areuseState,onSubmitanduseEffect?!
This is where the "old school web" programming model shows up. As we discussed earlier, <Form> prevents the browser from sending the request to the server and sends it to your route action instead. In web semantics, a POST usually means some data is changing. By convention, React Router uses this as a hint to automatically revalidate the data on the page after the action finishes. That means all of your useLoaderData hooks update and the UI stays in sync with your data automatically! Pretty cool.
URL Params in Loaders
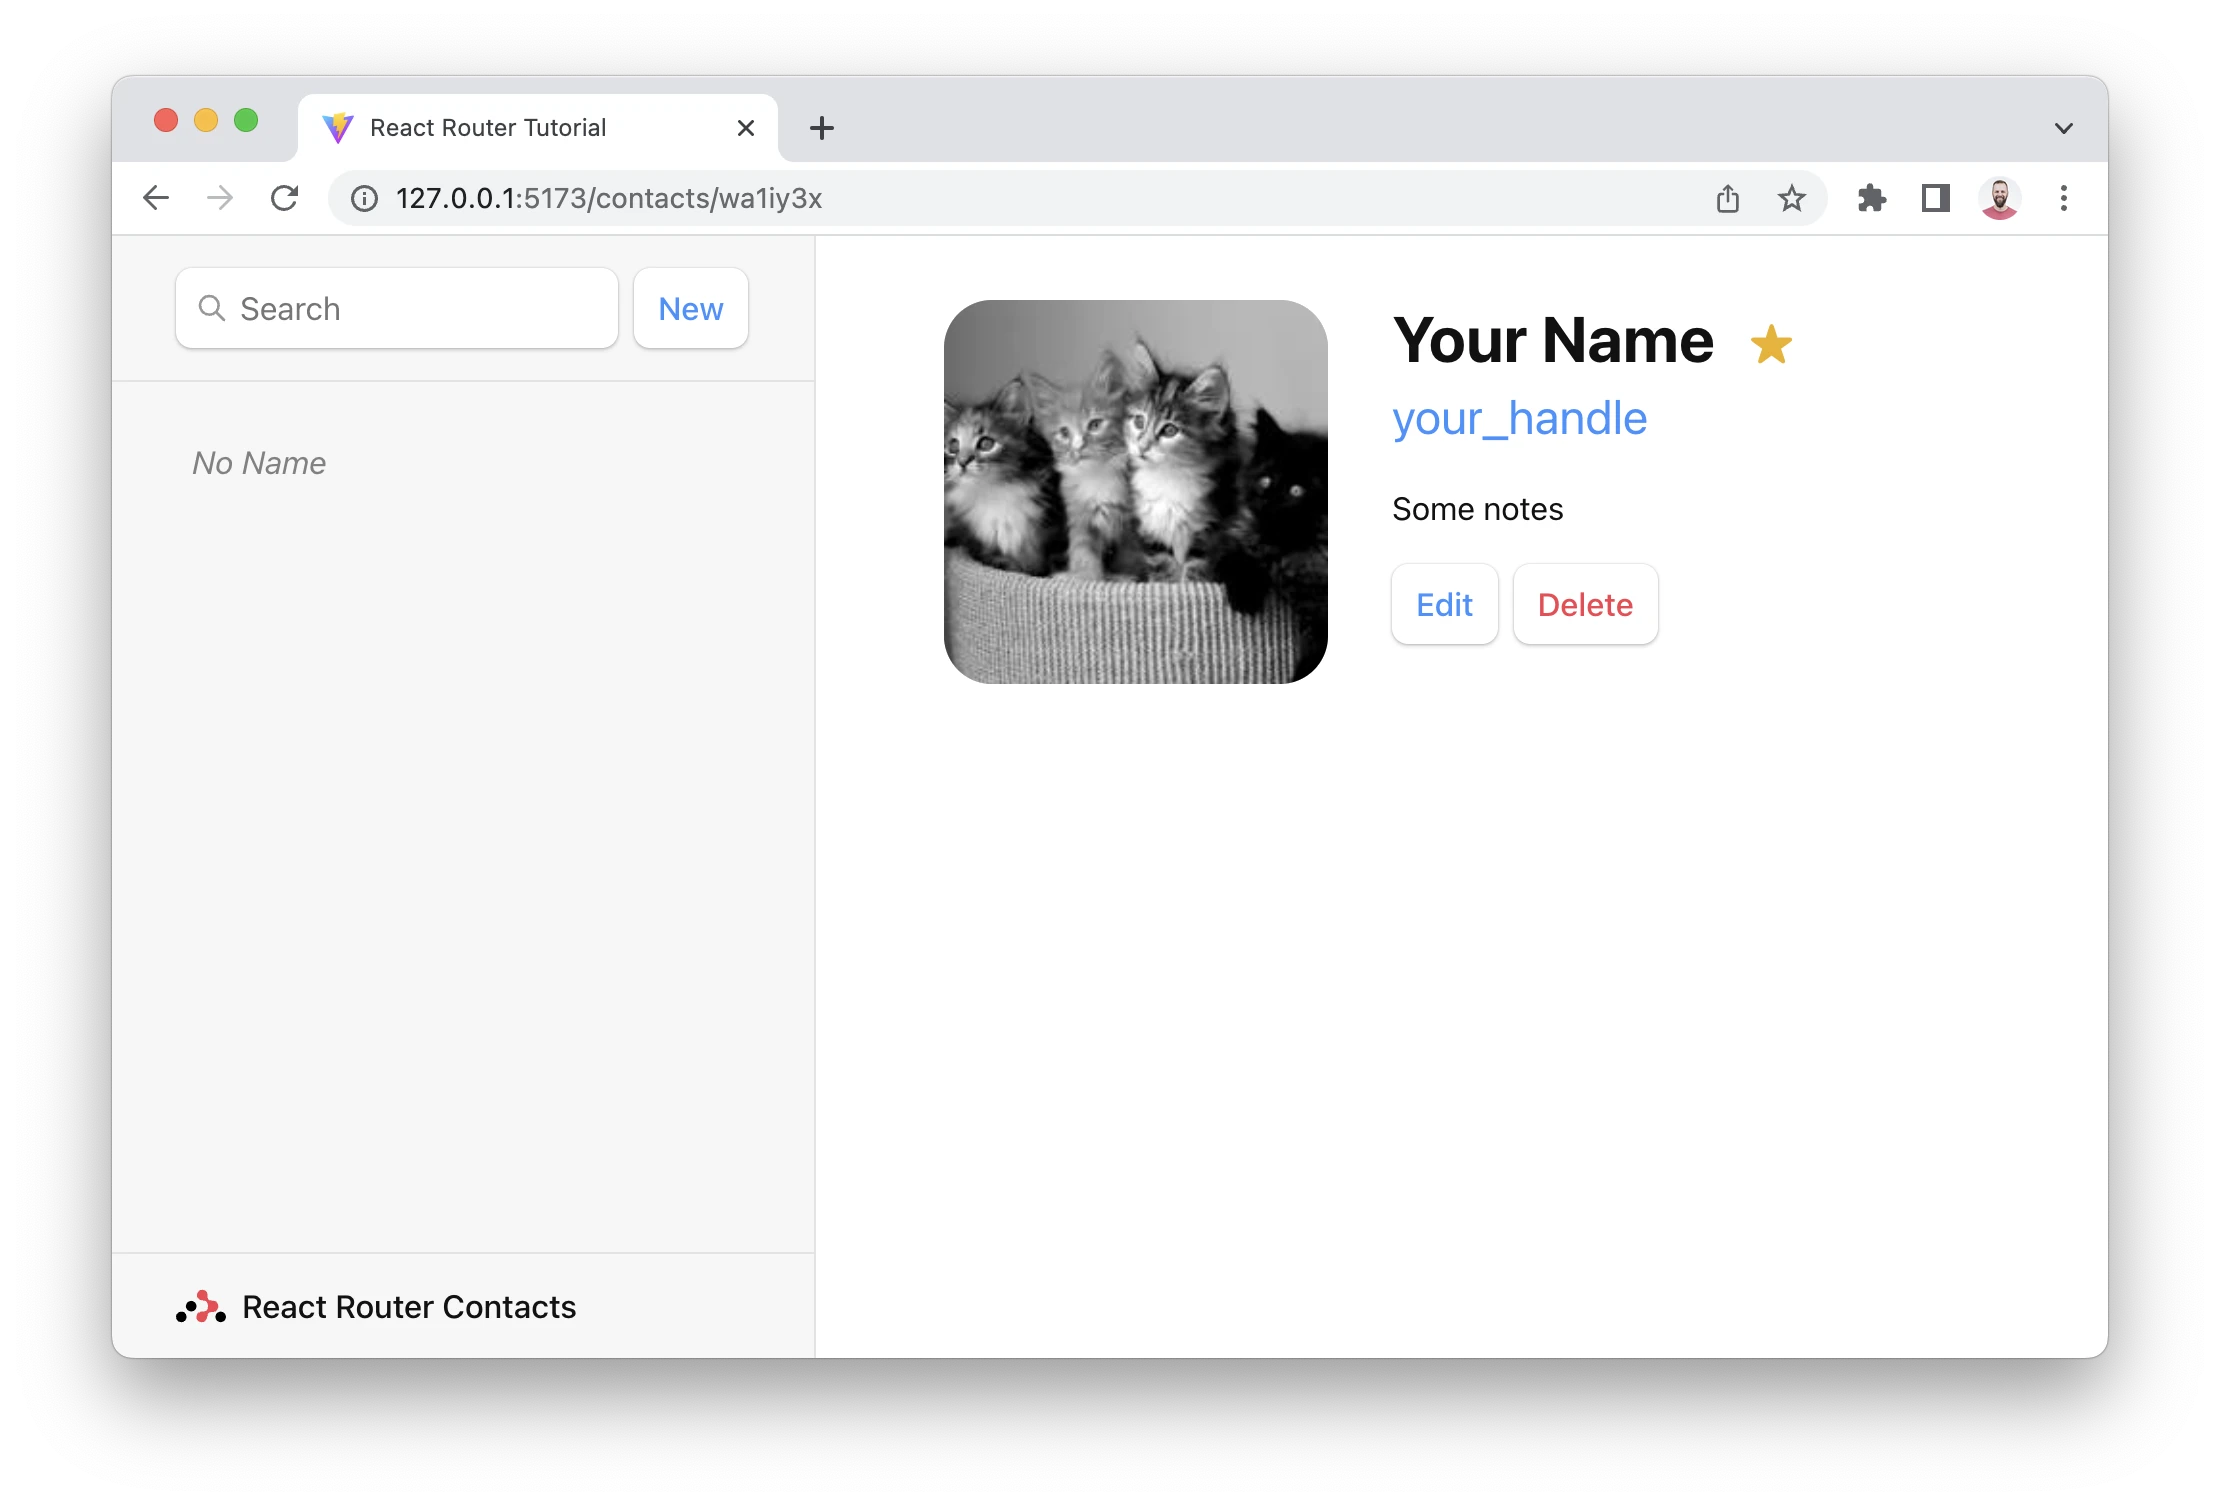
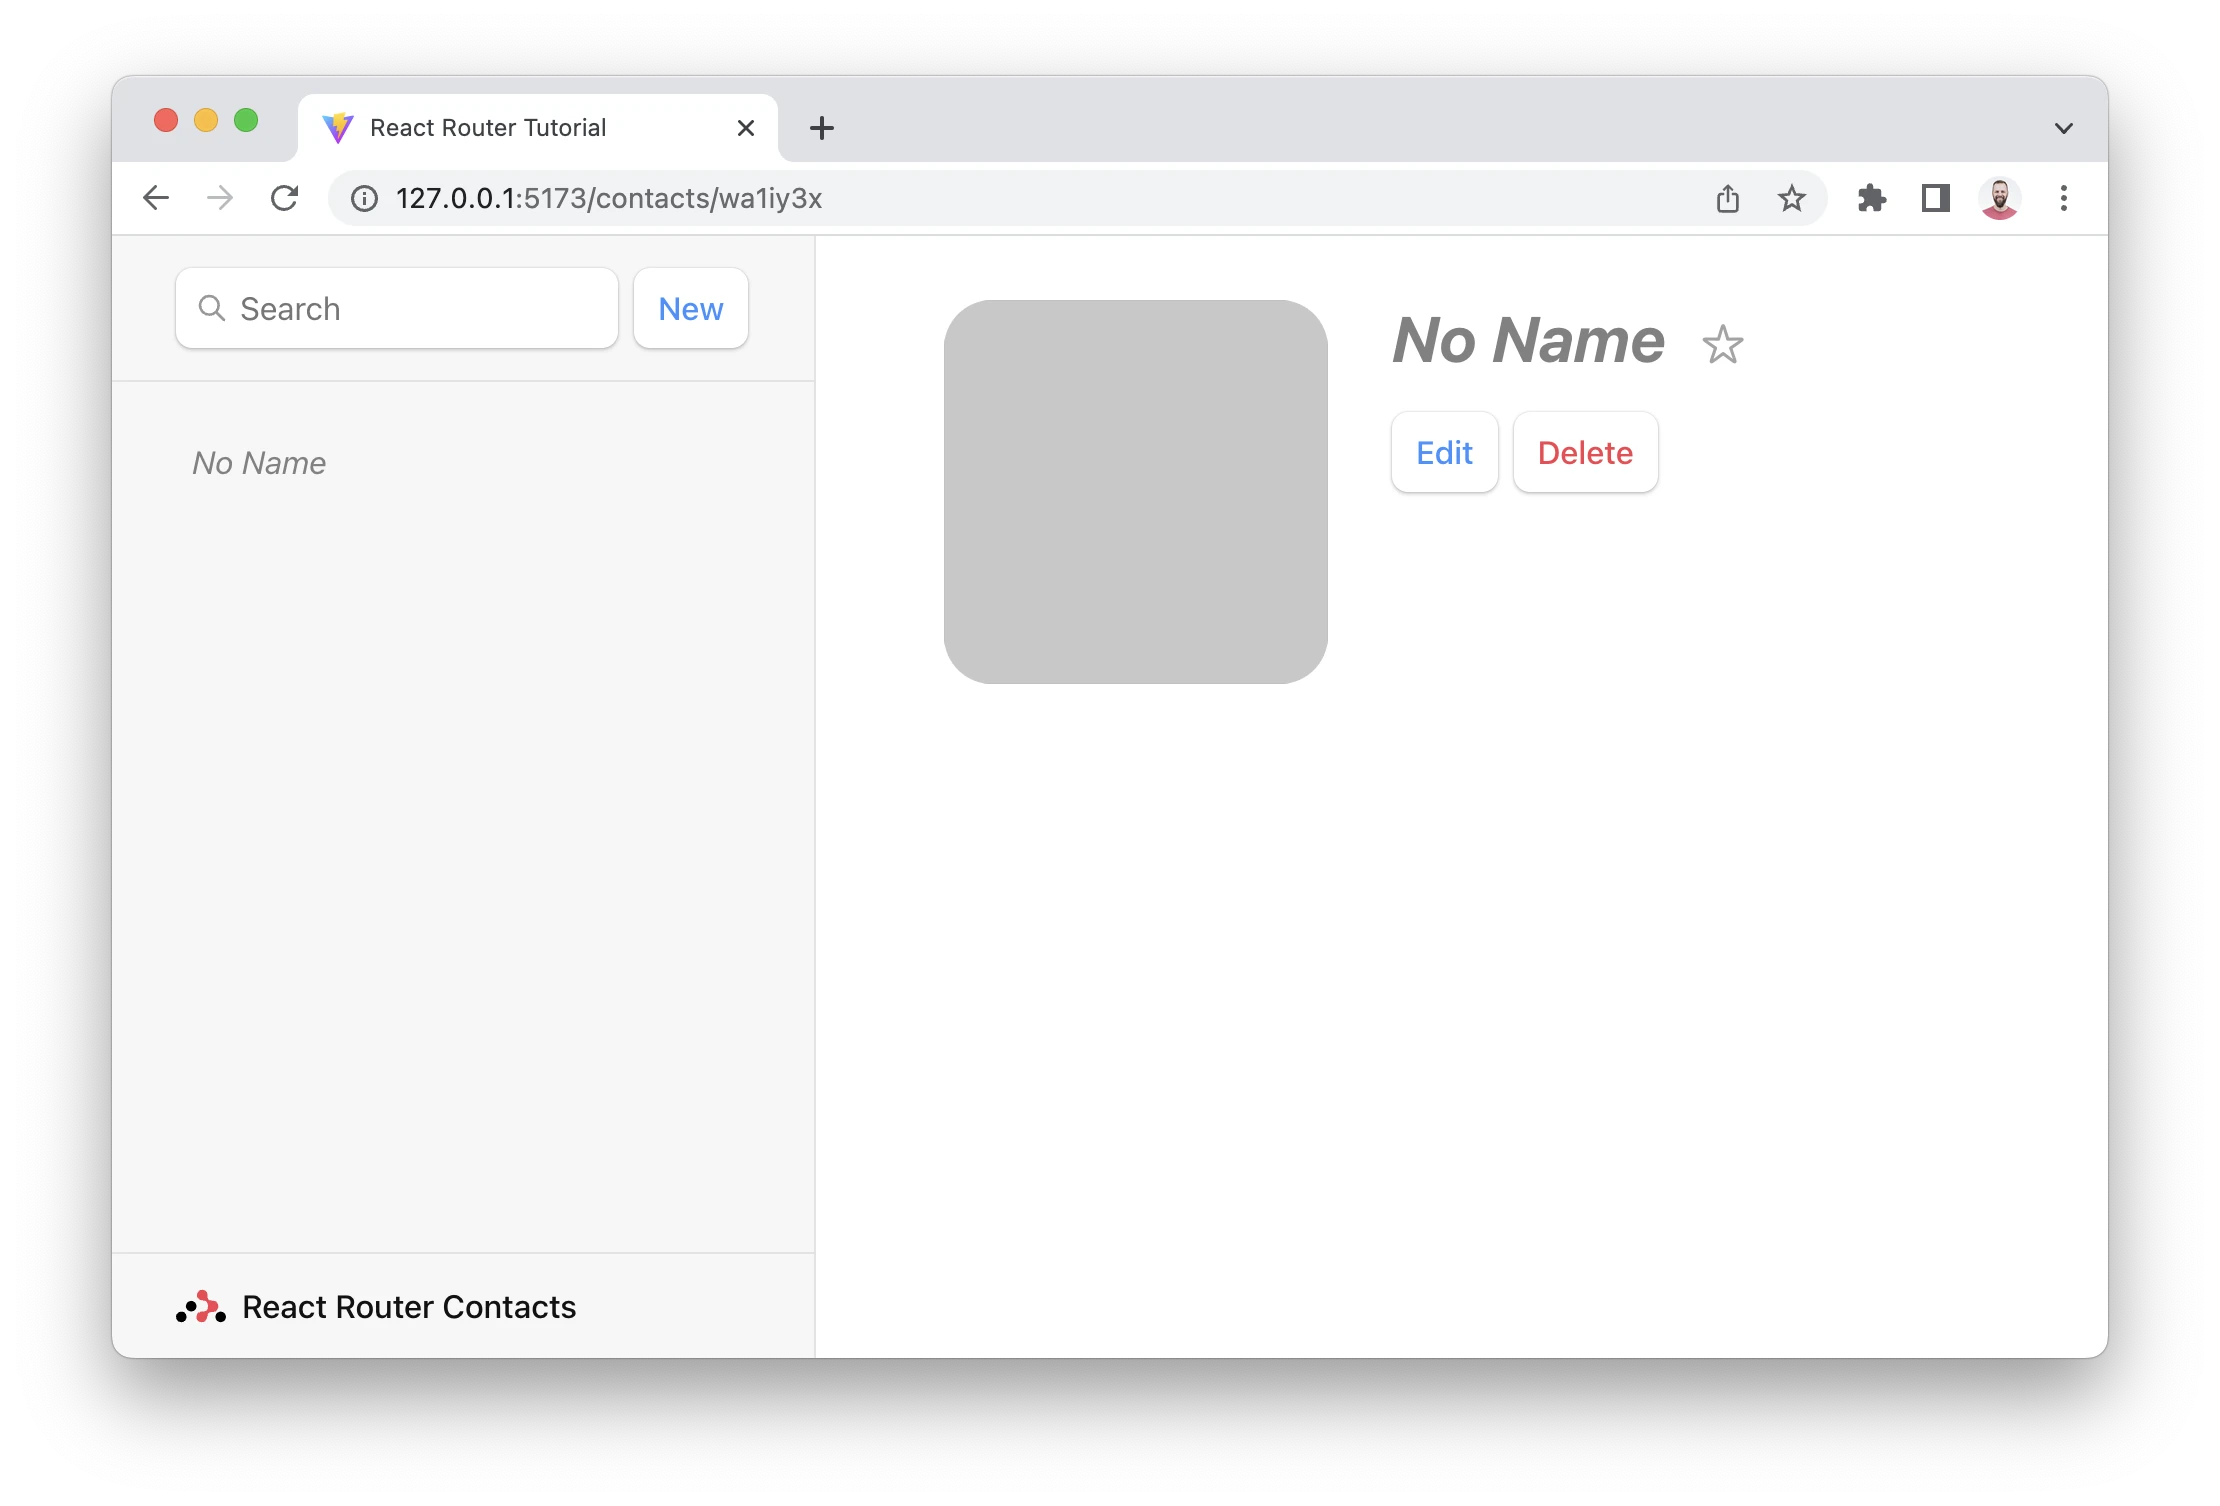
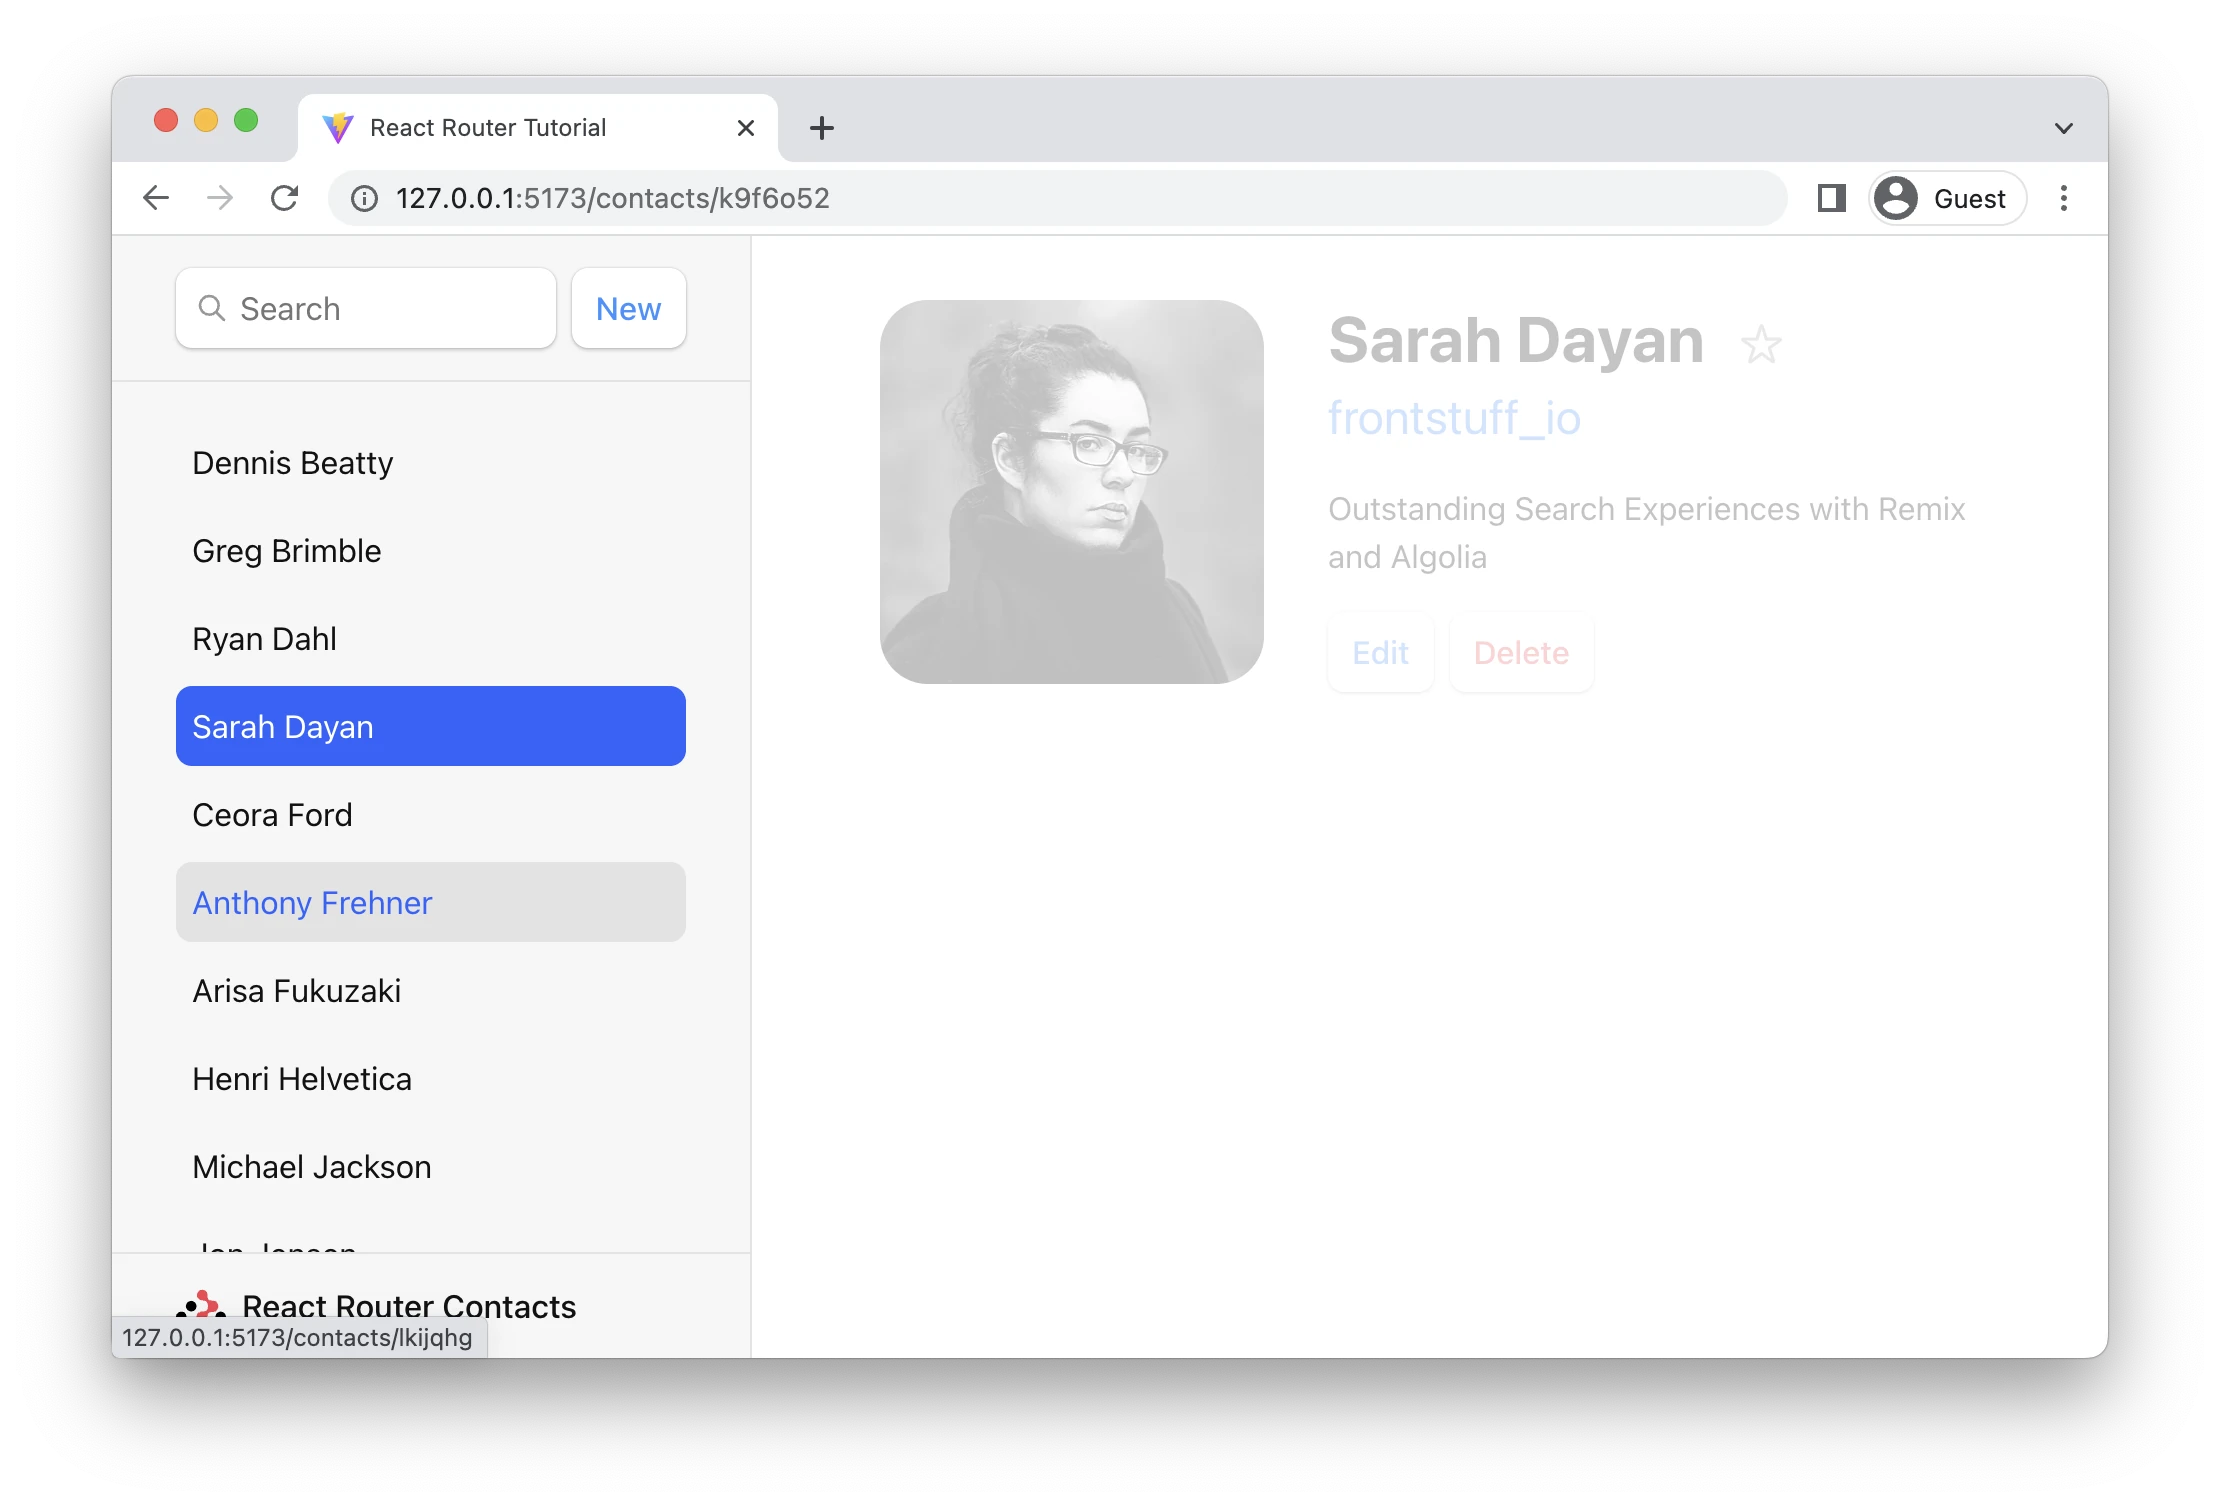
👉 Click on the No Name record
We should be seeing our old static contact page again, with one difference: the URL now has a real ID for the record.
Reviewing the route config, the route looks like this:
[
  {
    path: "contacts/:contactId",
    element: <Contact />,
  },
];
Note the :contactId URL segment. The colon (:) has special meaning, turning it into a "dynamic segment". Dynamic segments will match dynamic (changing) values in that position of the URL, like the contact ID. We call these values in the URL "URL Params", or just "params" for short.
These params are passed to the loader with keys that match the dynamic segment. For example, our segment is named :contactId so the value will be passed as params.contactId.
These params are most often used to find a record by ID. Let's try it out.
👉 Add a loader to the contact page and access data with useLoaderData
import { Form, useLoaderData } from "react-router-dom";
import { getContact } from "../contacts";

export async function loader({ params }) {
  const contact = await getContact(params.contactId);
  return { contact };
}

export default function Contact() {
  const { contact } = useLoaderData();
  // existing code
}
👉 Configure the loader on the route
/* existing code */
import Contact, {
  loader as contactLoader,
} from "./routes/contact";

const router = createBrowserRouter([
  {
    path: "/",
    element: <Root />,
    errorElement: <ErrorPage />,
    loader: rootLoader,
    action: rootAction,
    children: [
      {
        path: "contacts/:contactId",
        element: <Contact />,
        loader: contactLoader,
      },
    ],
  },
]);

/* existing code */
Updating Data
Just like creating data, you update data with <Form>. Let's make a new route at contacts/:contactId/edit. Again, we'll start with the component and then wire it up to the route config.
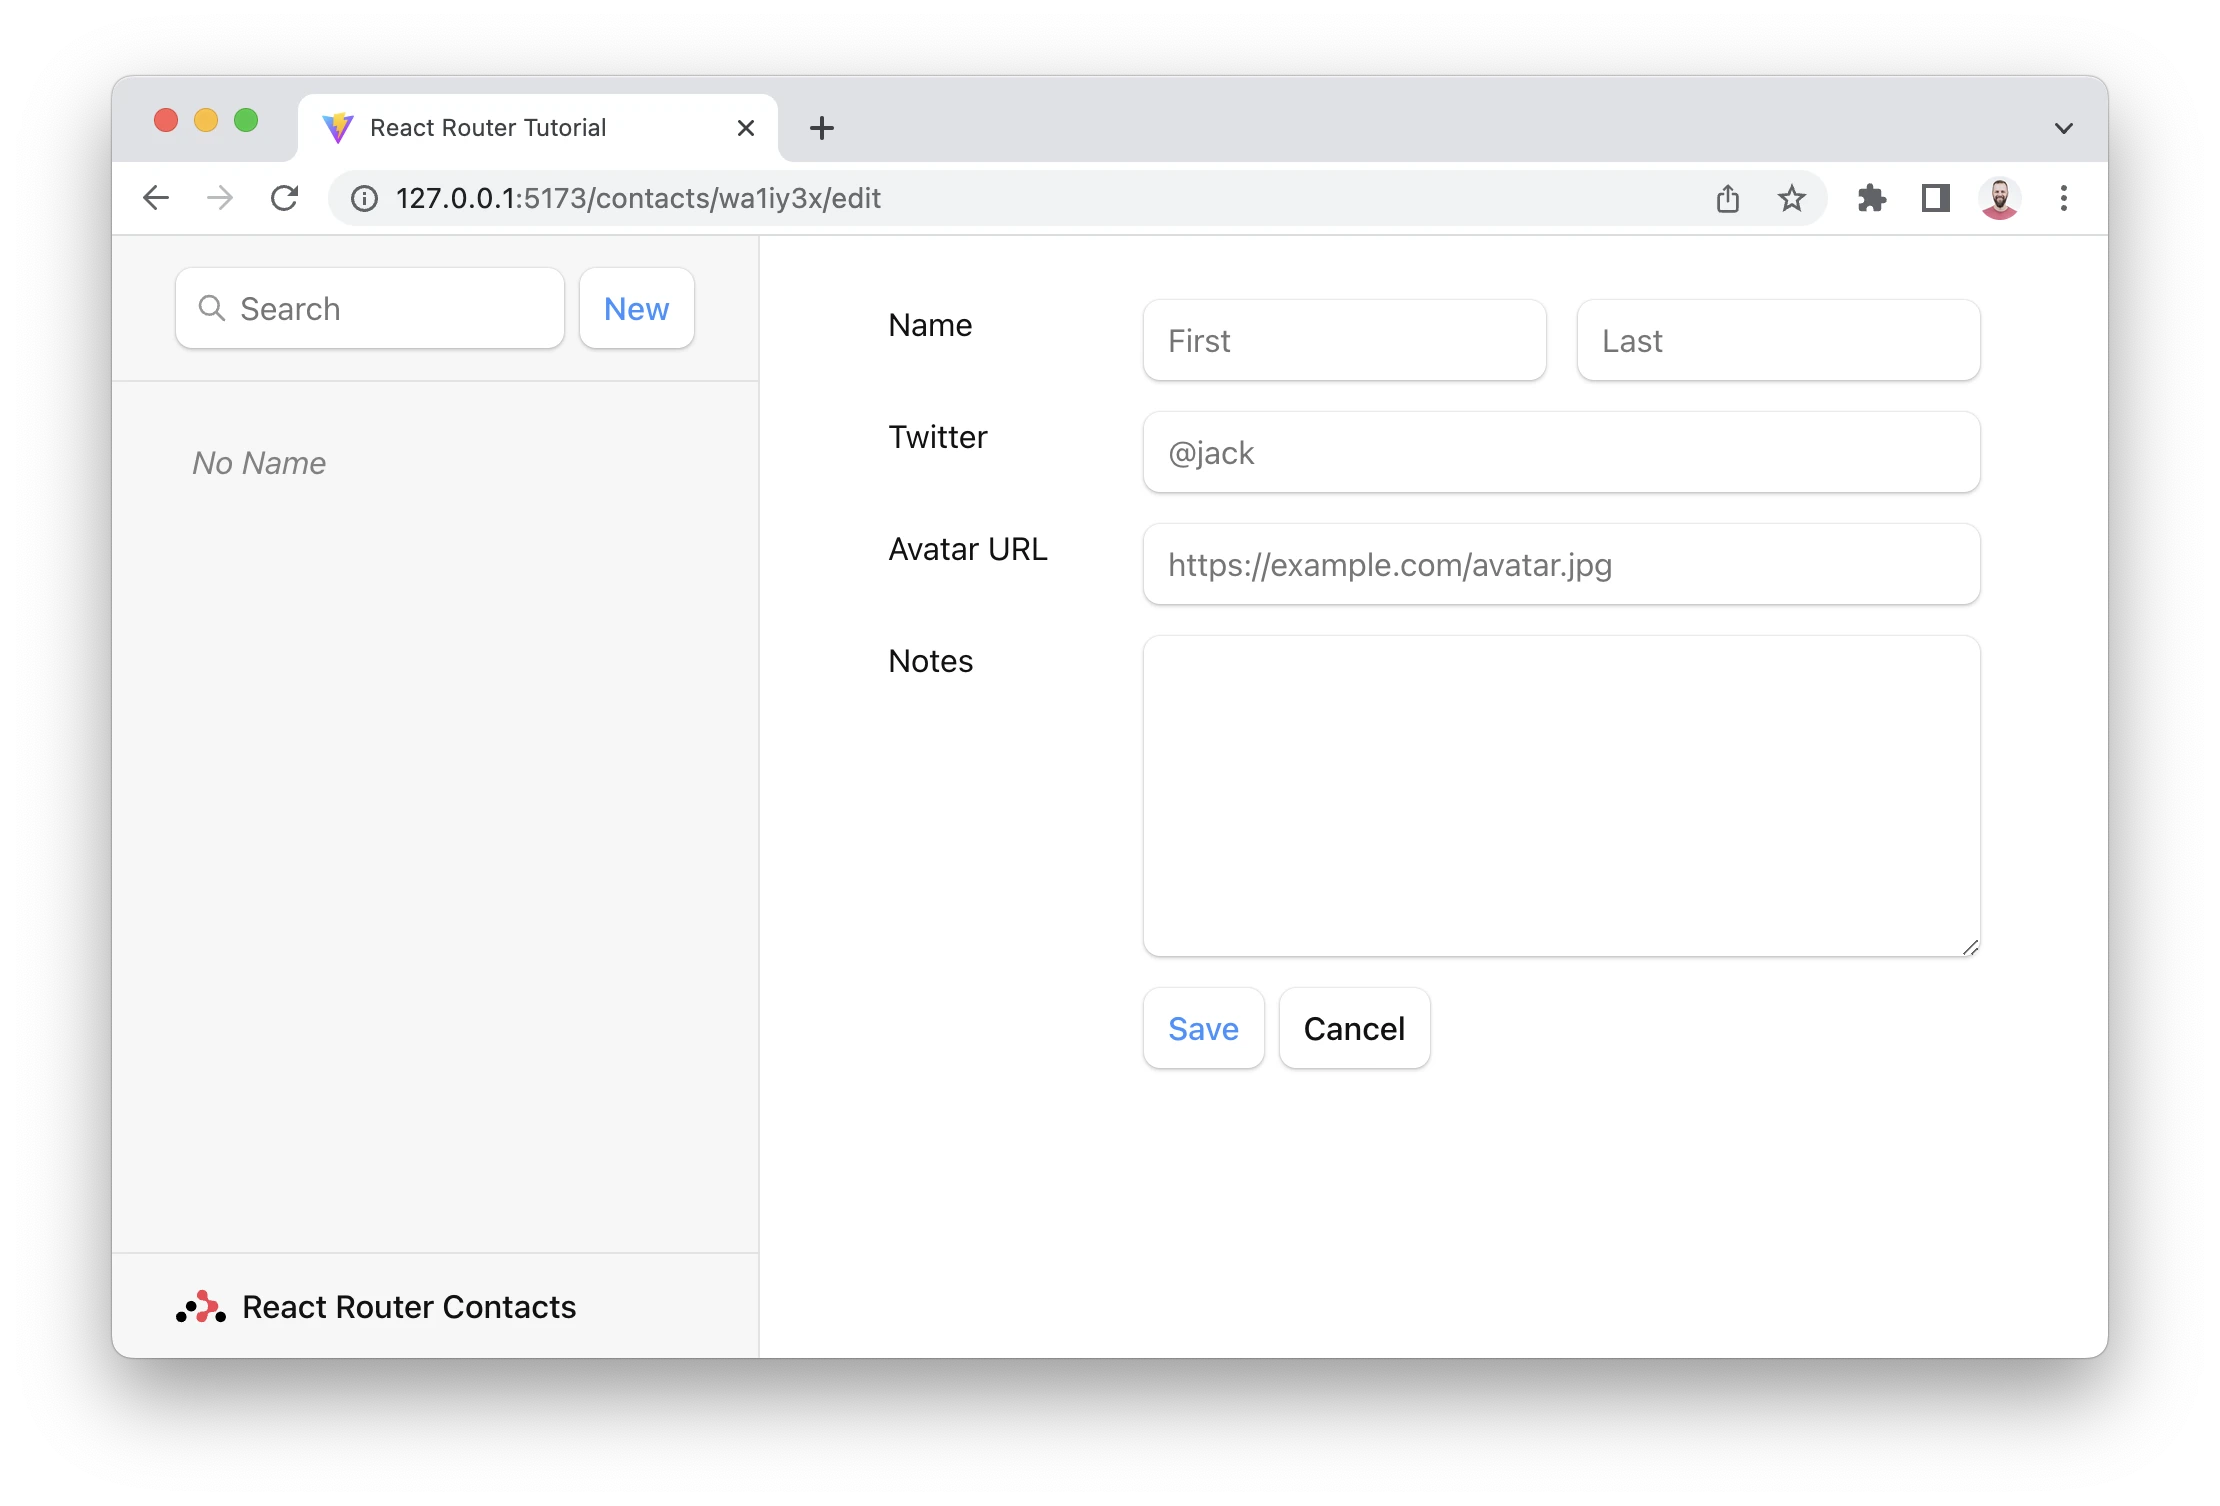
👉 Create the edit component
touch src/routes/edit.jsx
👉 Add the edit page UI
Nothing we haven't seen before, feel free to copy/paste:
import { Form, useLoaderData } from "react-router-dom";

export default function EditContact() {
  const { contact } = useLoaderData();

  return (
    <Form method="post" id="contact-form">
      <p>
        <span>Name</span>
        <input
          placeholder="First"
          aria-label="First name"
          type="text"
          name="first"
          defaultValue={contact.first}
        />
        <input
          placeholder="Last"
          aria-label="Last name"
          type="text"
          name="last"
          defaultValue={contact.last}
        />
      </p>
      <label>
        <span>Twitter</span>
        <input
          type="text"
          name="twitter"
          placeholder="@jack"
          defaultValue={contact.twitter}
        />
      </label>
      <label>
        <span>Avatar URL</span>
        <input
          placeholder="https://example.com/avatar.jpg"
          aria-label="Avatar URL"
          type="text"
          name="avatar"
          defaultValue={contact.avatar}
        />
      </label>
      <label>
        <span>Notes</span>
        <textarea
          name="notes"
          defaultValue={contact.notes}
          rows={6}
        />
      </label>
      <p>
        <button type="submit">Save</button>
        <button type="button">Cancel</button>
      </p>
    </Form>
  );
}
👉 Add the new edit route
/* existing code */
import EditContact from "./routes/edit";

const router = createBrowserRouter([
  {
    path: "/",
    element: <Root />,
    errorElement: <ErrorPage />,
    loader: rootLoader,
    action: rootAction,
    children: [
      {
        path: "contacts/:contactId",
        element: <Contact />,
        loader: contactLoader,
      },
      {
        path: "contacts/:contactId/edit",
        element: <EditContact />,
        loader: contactLoader,
      },
    ],
  },
]);

/* existing code */
We want it to be rendered in the root route's outlet, so we made it a sibling to the existing child route.
(You might note we reused the contactLoader for this route. This is only because we're being lazy in the tutorial. There is no reason to attempt to share loaders among routes, they usually have their own.)
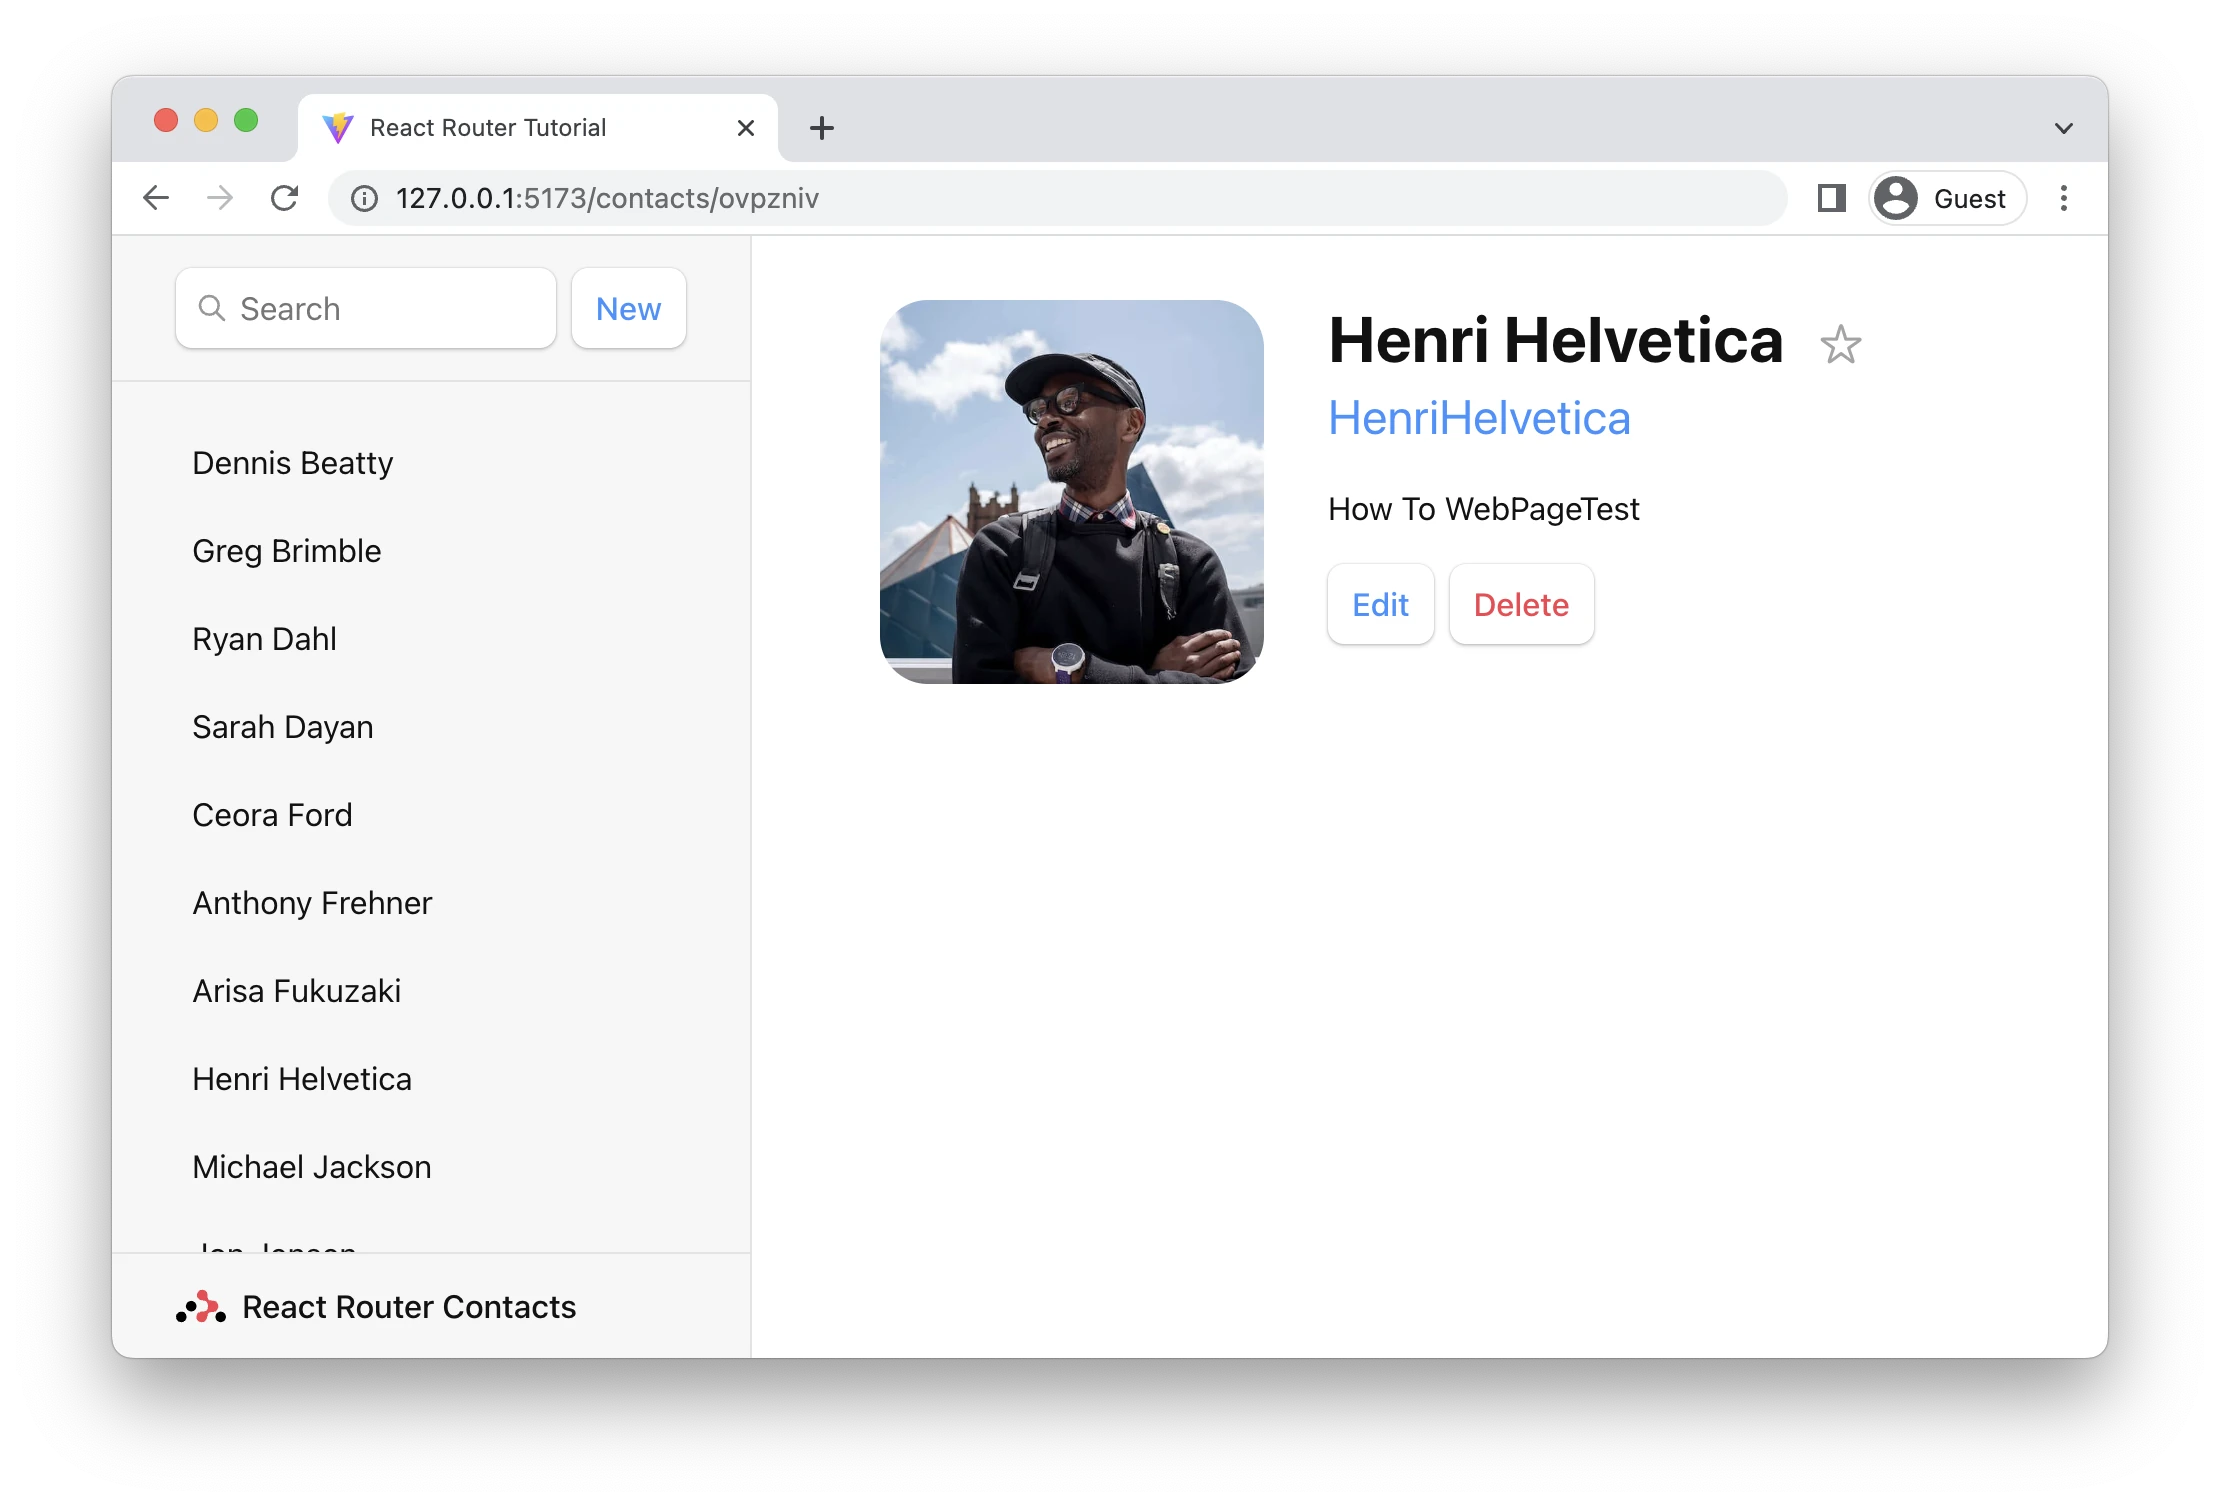
Alright, clicking the "Edit" button gives us this new UI:
Updating Contacts with FormData
The edit route we just created already renders a form. All we need to do to update the record is wire up an action to the route. The form will post to the action and the data will be automatically revalidated.
👉 Add an action to the edit module
import {
  Form,
  useLoaderData,
  redirect,
} from "react-router-dom";
import { updateContact } from "../contacts";

export async function action({ request, params }) {
  const formData = await request.formData();
  const updates = Object.fromEntries(formData);
  await updateContact(params.contactId, updates);
  return redirect(`/contacts/${params.contactId}`);
}

/* existing code */
👉 Wire the action up to the route
/* existing code */
import EditContact, {
  action as editAction,
} from "./routes/edit";

const router = createBrowserRouter([
  {
    path: "/",
    element: <Root />,
    errorElement: <ErrorPage />,
    loader: rootLoader,
    action: rootAction,
    children: [
      {
        path: "contacts/:contactId",
        element: <Contact />,
        loader: contactLoader,
      },
      {
        path: "contacts/:contactId/edit",
        element: <EditContact />,
        loader: contactLoader,
        action: editAction,
      },
    ],
  },
]);

/* existing code */
Fill out the form, hit save, and you should see something like this! (Except easier on the eyes and maybe less hairy.)
Mutation Discussion
😑 It worked, but I have no idea what is going on here...
Let's dig in a bit...
Open up src/routes/edit.jsx and look at the form elements. Notice how they each have a name:
<input
  placeholder="First"
  aria-label="First name"
  type="text"
  name="first"
  defaultValue={contact.first}
/>
Without JavaScript, when a form is submitted, the browser will create FormData and set it as the body of the request when it sends it to the server. As mentioned before, React Router prevents that and sends the request to your action instead, including the FormData.
Each field in the form is accessible with formData.get(name). For example, given the input field from above, you could access the first and last names like this:
export async function action({ request, params }) {
  const formData = await request.formData();
  const firstName = formData.get("first");
  const lastName = formData.get("last");
  // ...
}
Since we have a handful of form fields, we used Object.fromEntries to collect them all into an object, which is exactly what our updateContact function wants.
const updates = Object.fromEntries(formData);
updates.first; // "Some"
updates.last; // "Name"
Aside from action, none of these APIs we're discussing are provided by React Router: request, request.formData, Object.fromEntries are all provided by the web platform.
After we finished the action, note the redirect at the end:
export async function action({ request, params }) {
  const formData = await request.formData();
  const updates = Object.fromEntries(formData);
  await updateContact(params.contactId, updates);
  return redirect(`/contacts/${params.contactId}`);
}
Loaders and actions can both return a Response (makes sense, since they received a Request!). The redirect helper just makes it easier to return a response that tells the app to change locations.
Without client side routing, if a server redirected after a POST request, the new page would fetch the latest data and render. As we learned before, React Router emulates this model and automatically revalidates the data on the page after the action. That's why the sidebar automatically updates when we save the form. The extra revalidation code doesn't exist without client side routing, so it doesn't need to exist with client side routing either!
Redirecting new records to the edit page
Now that we know how to redirect, let's update the action that creates new contacts to redirect to the edit page:
👉 Redirect to the new record's edit page
import {
  Outlet,
  Link,
  useLoaderData,
  Form,
  redirect,
} from "react-router-dom";
import { getContacts, createContact } from "../contacts";

export async function action() {
  const contact = await createContact();
  return redirect(`/contacts/${contact.id}/edit`);
}
Now when we click "New", we should end up on the edit page:
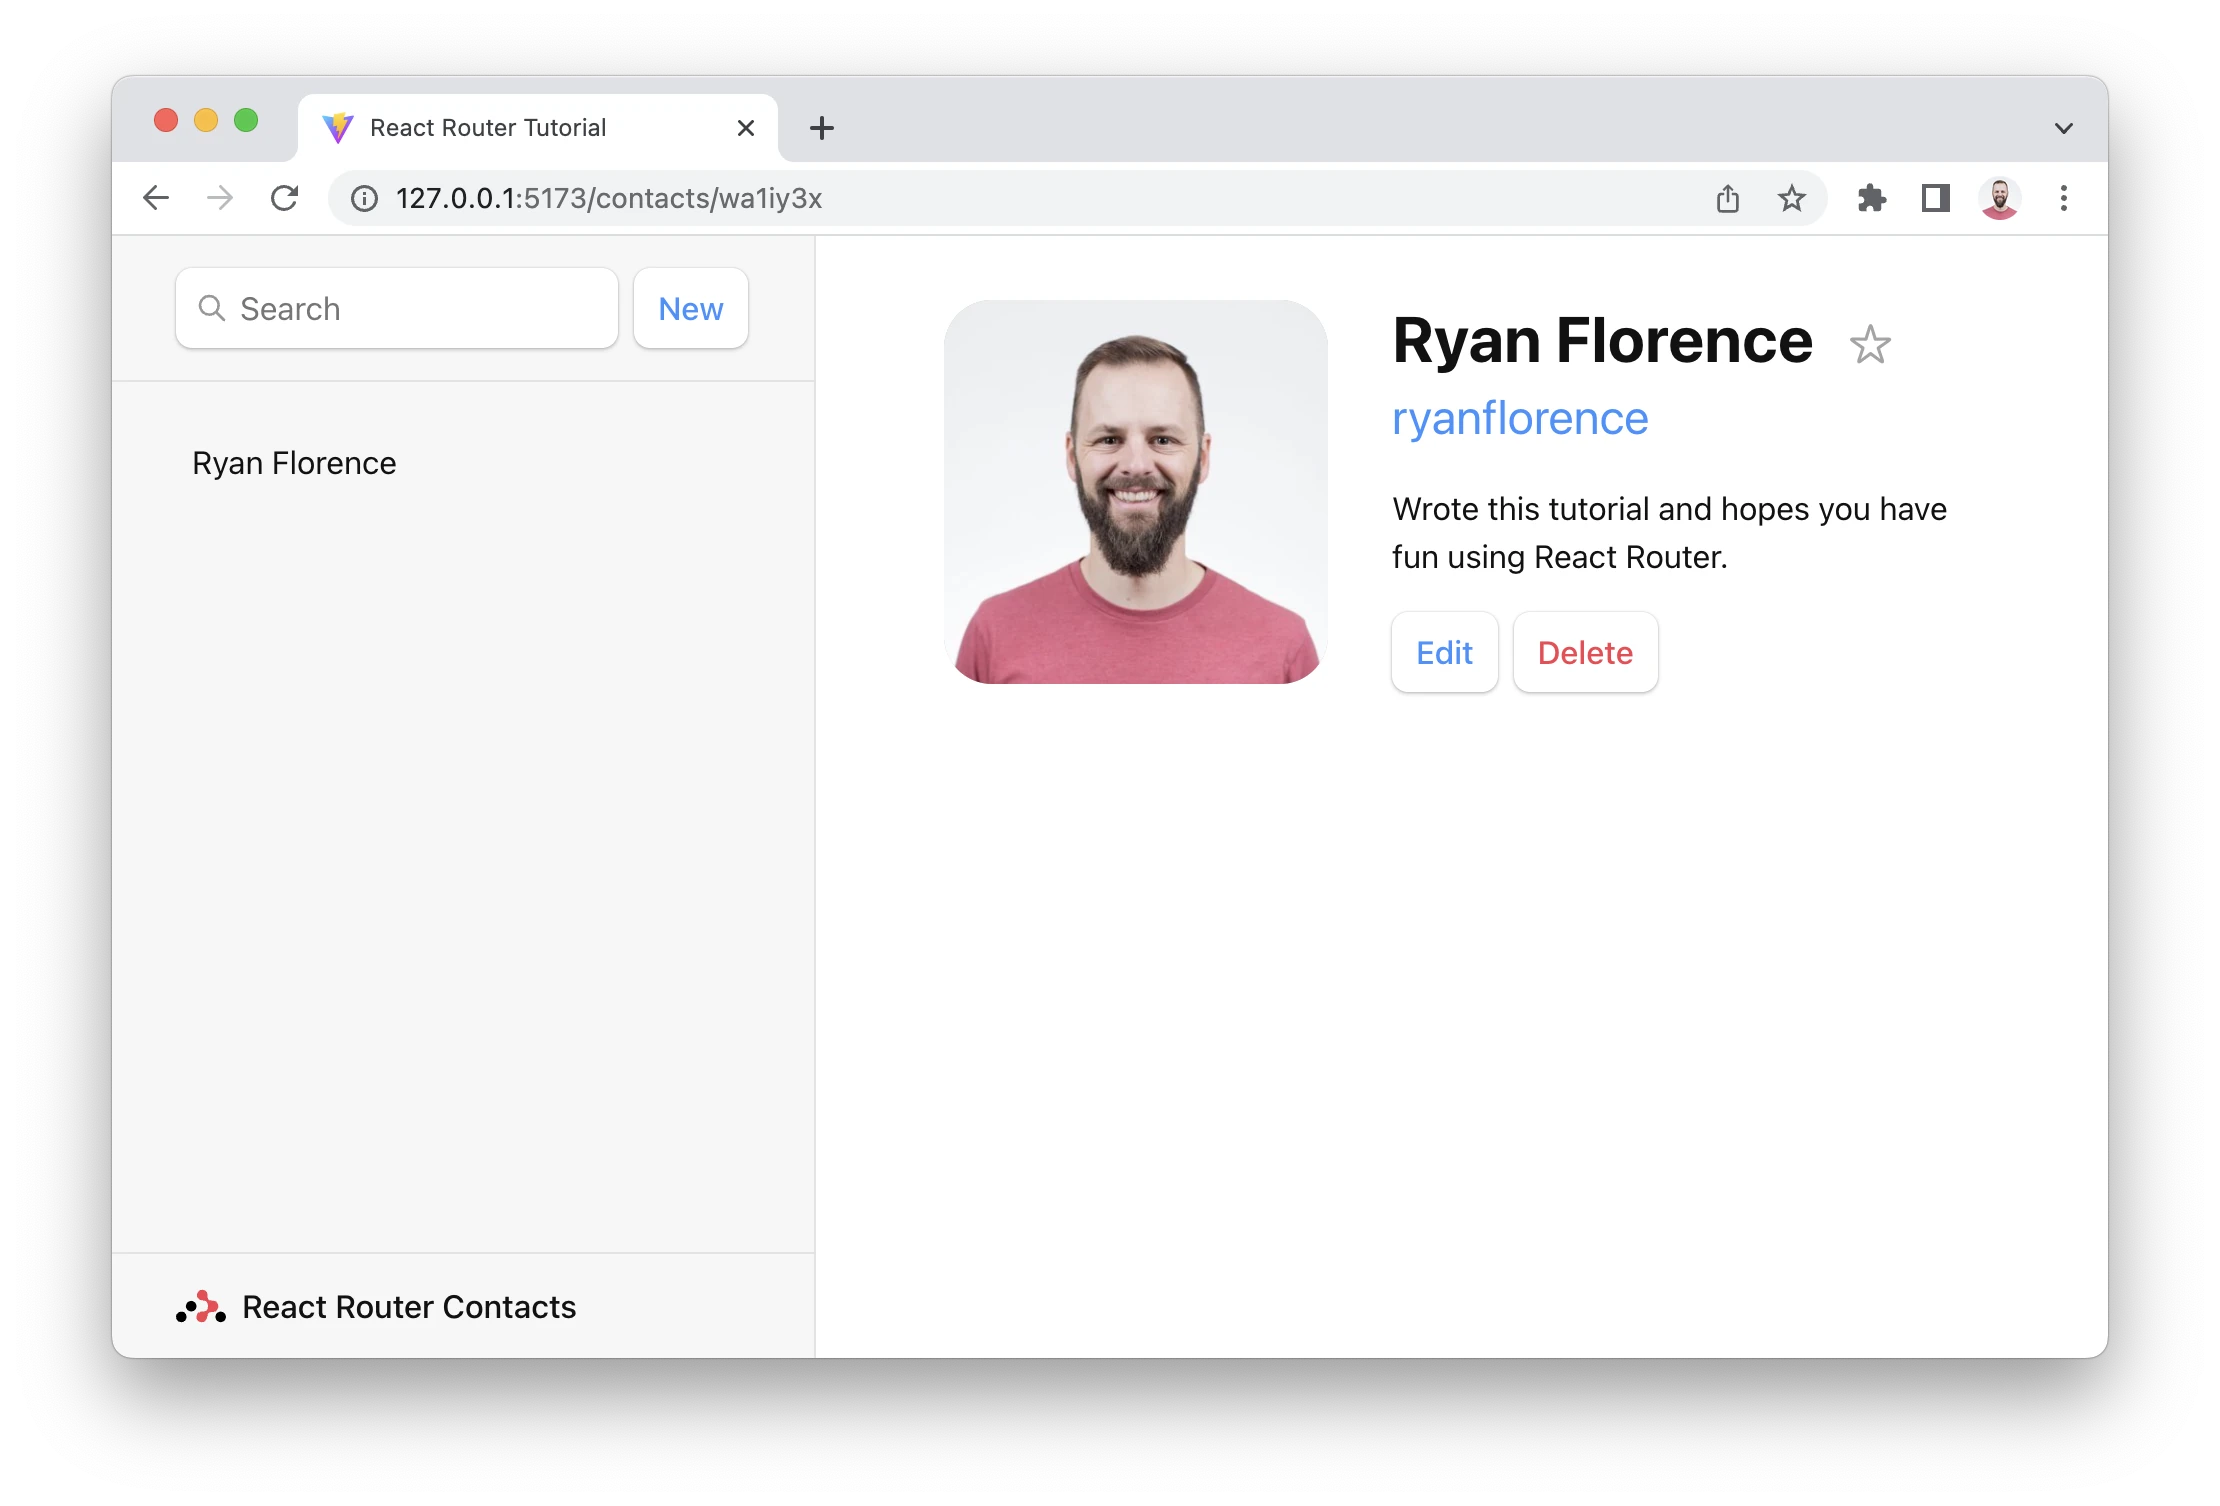
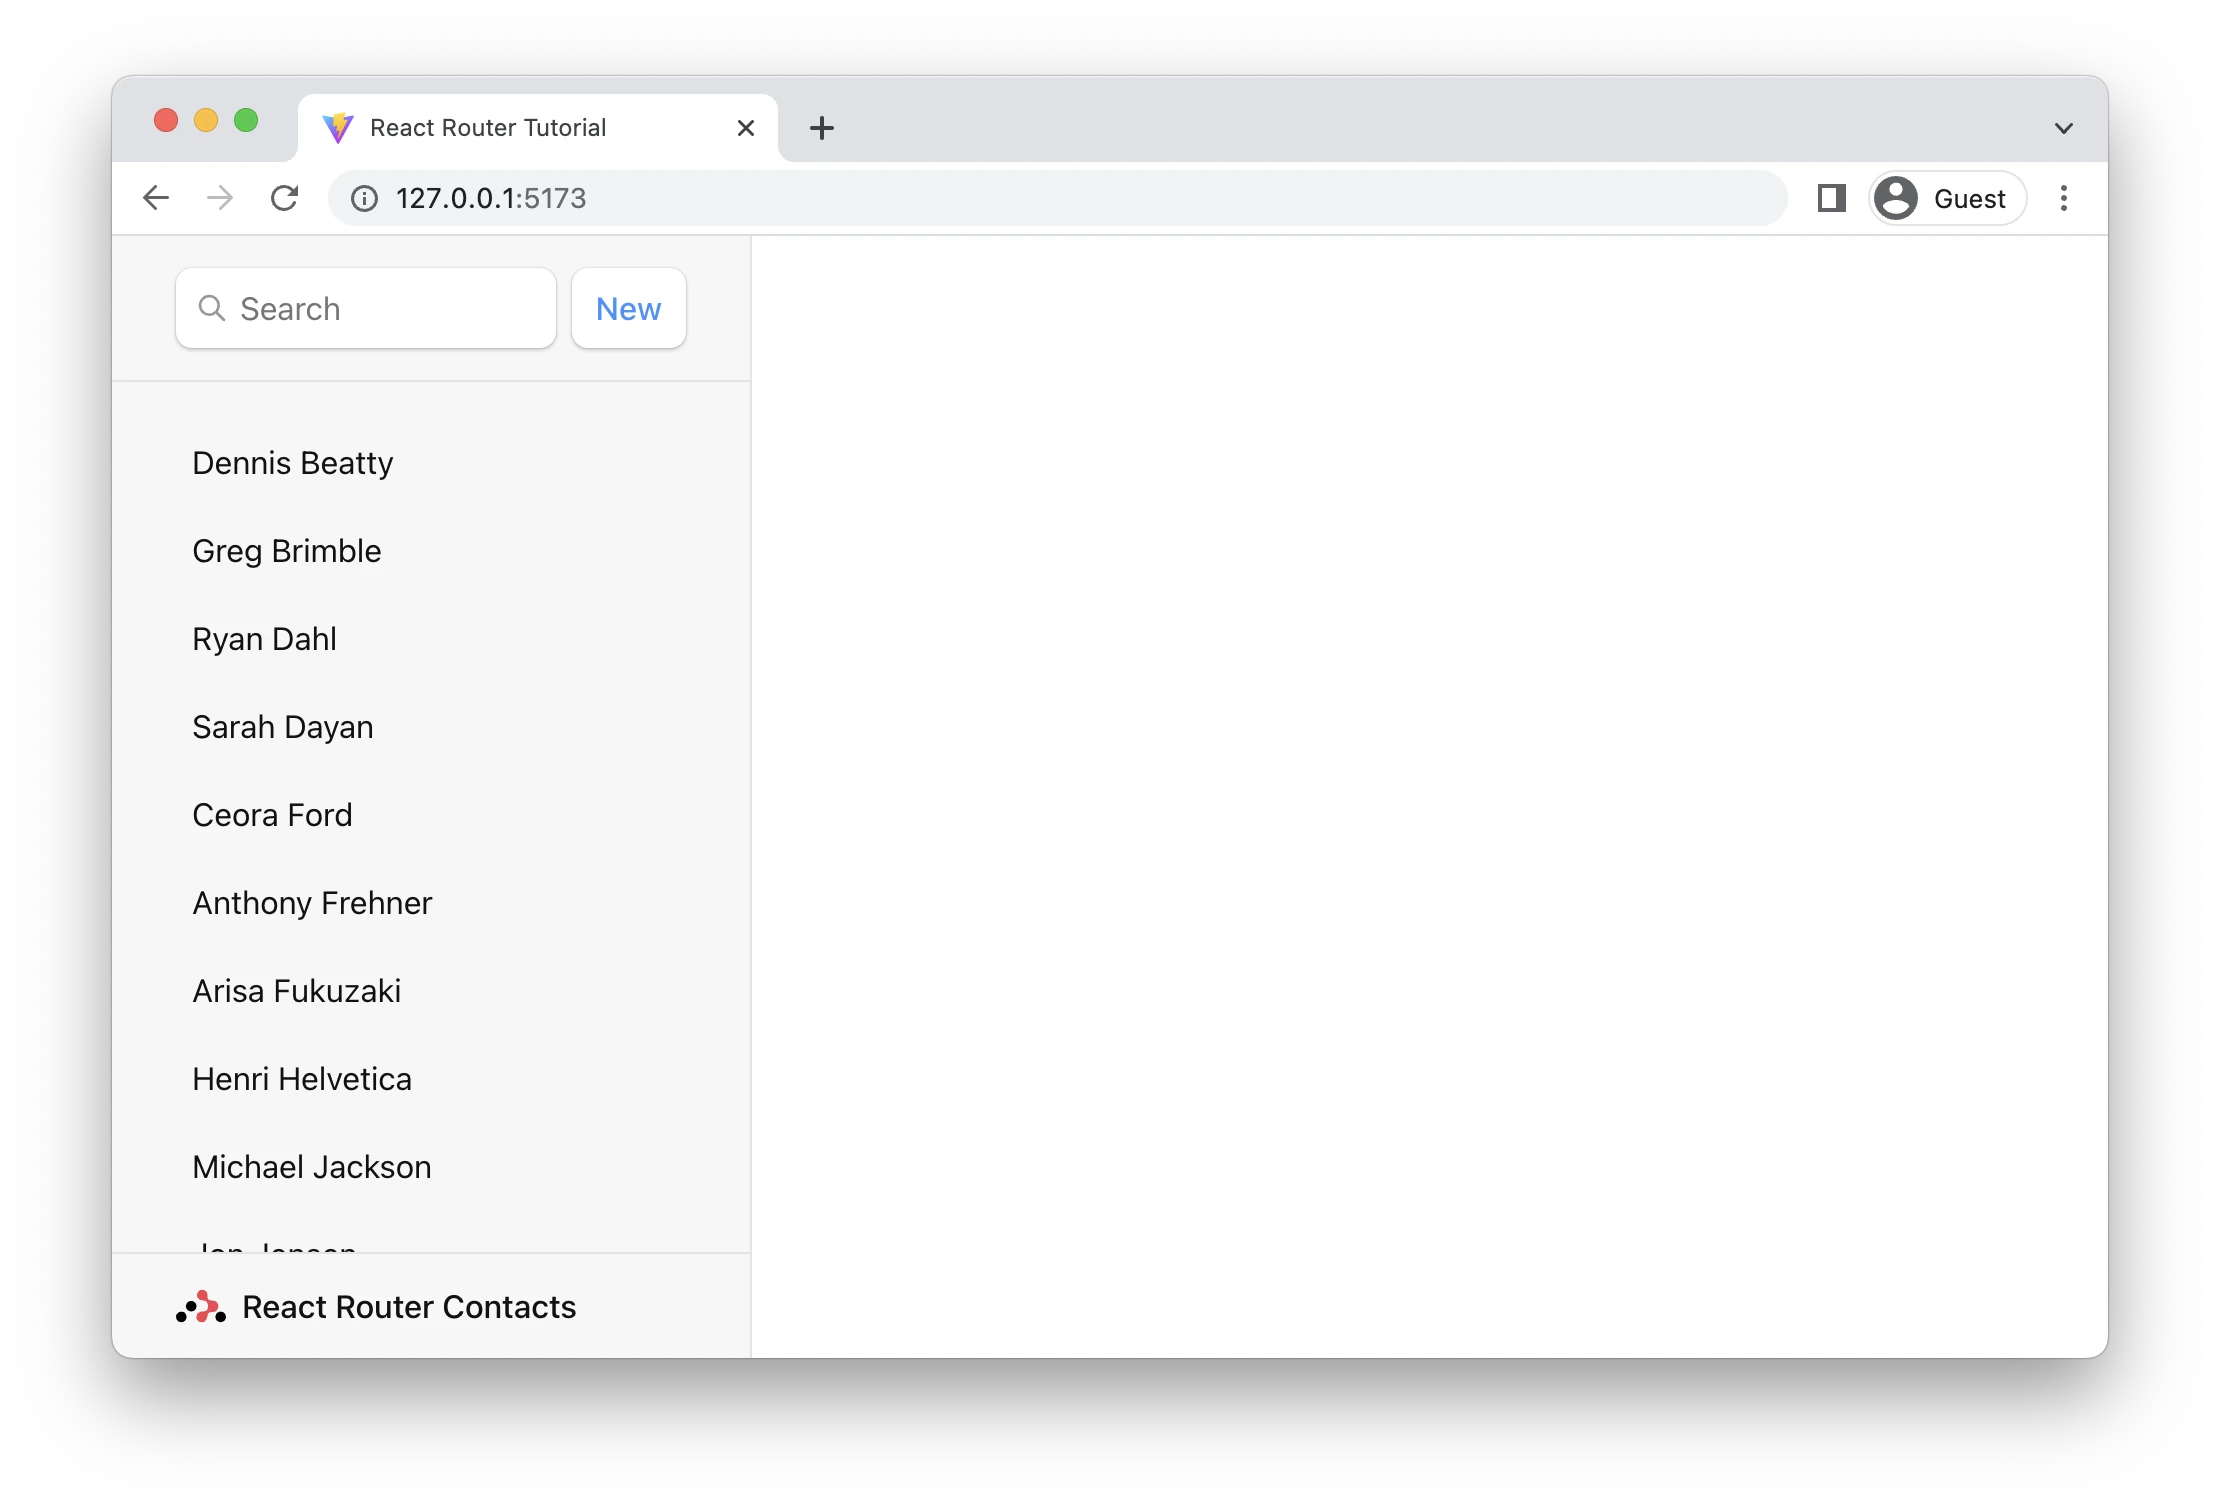
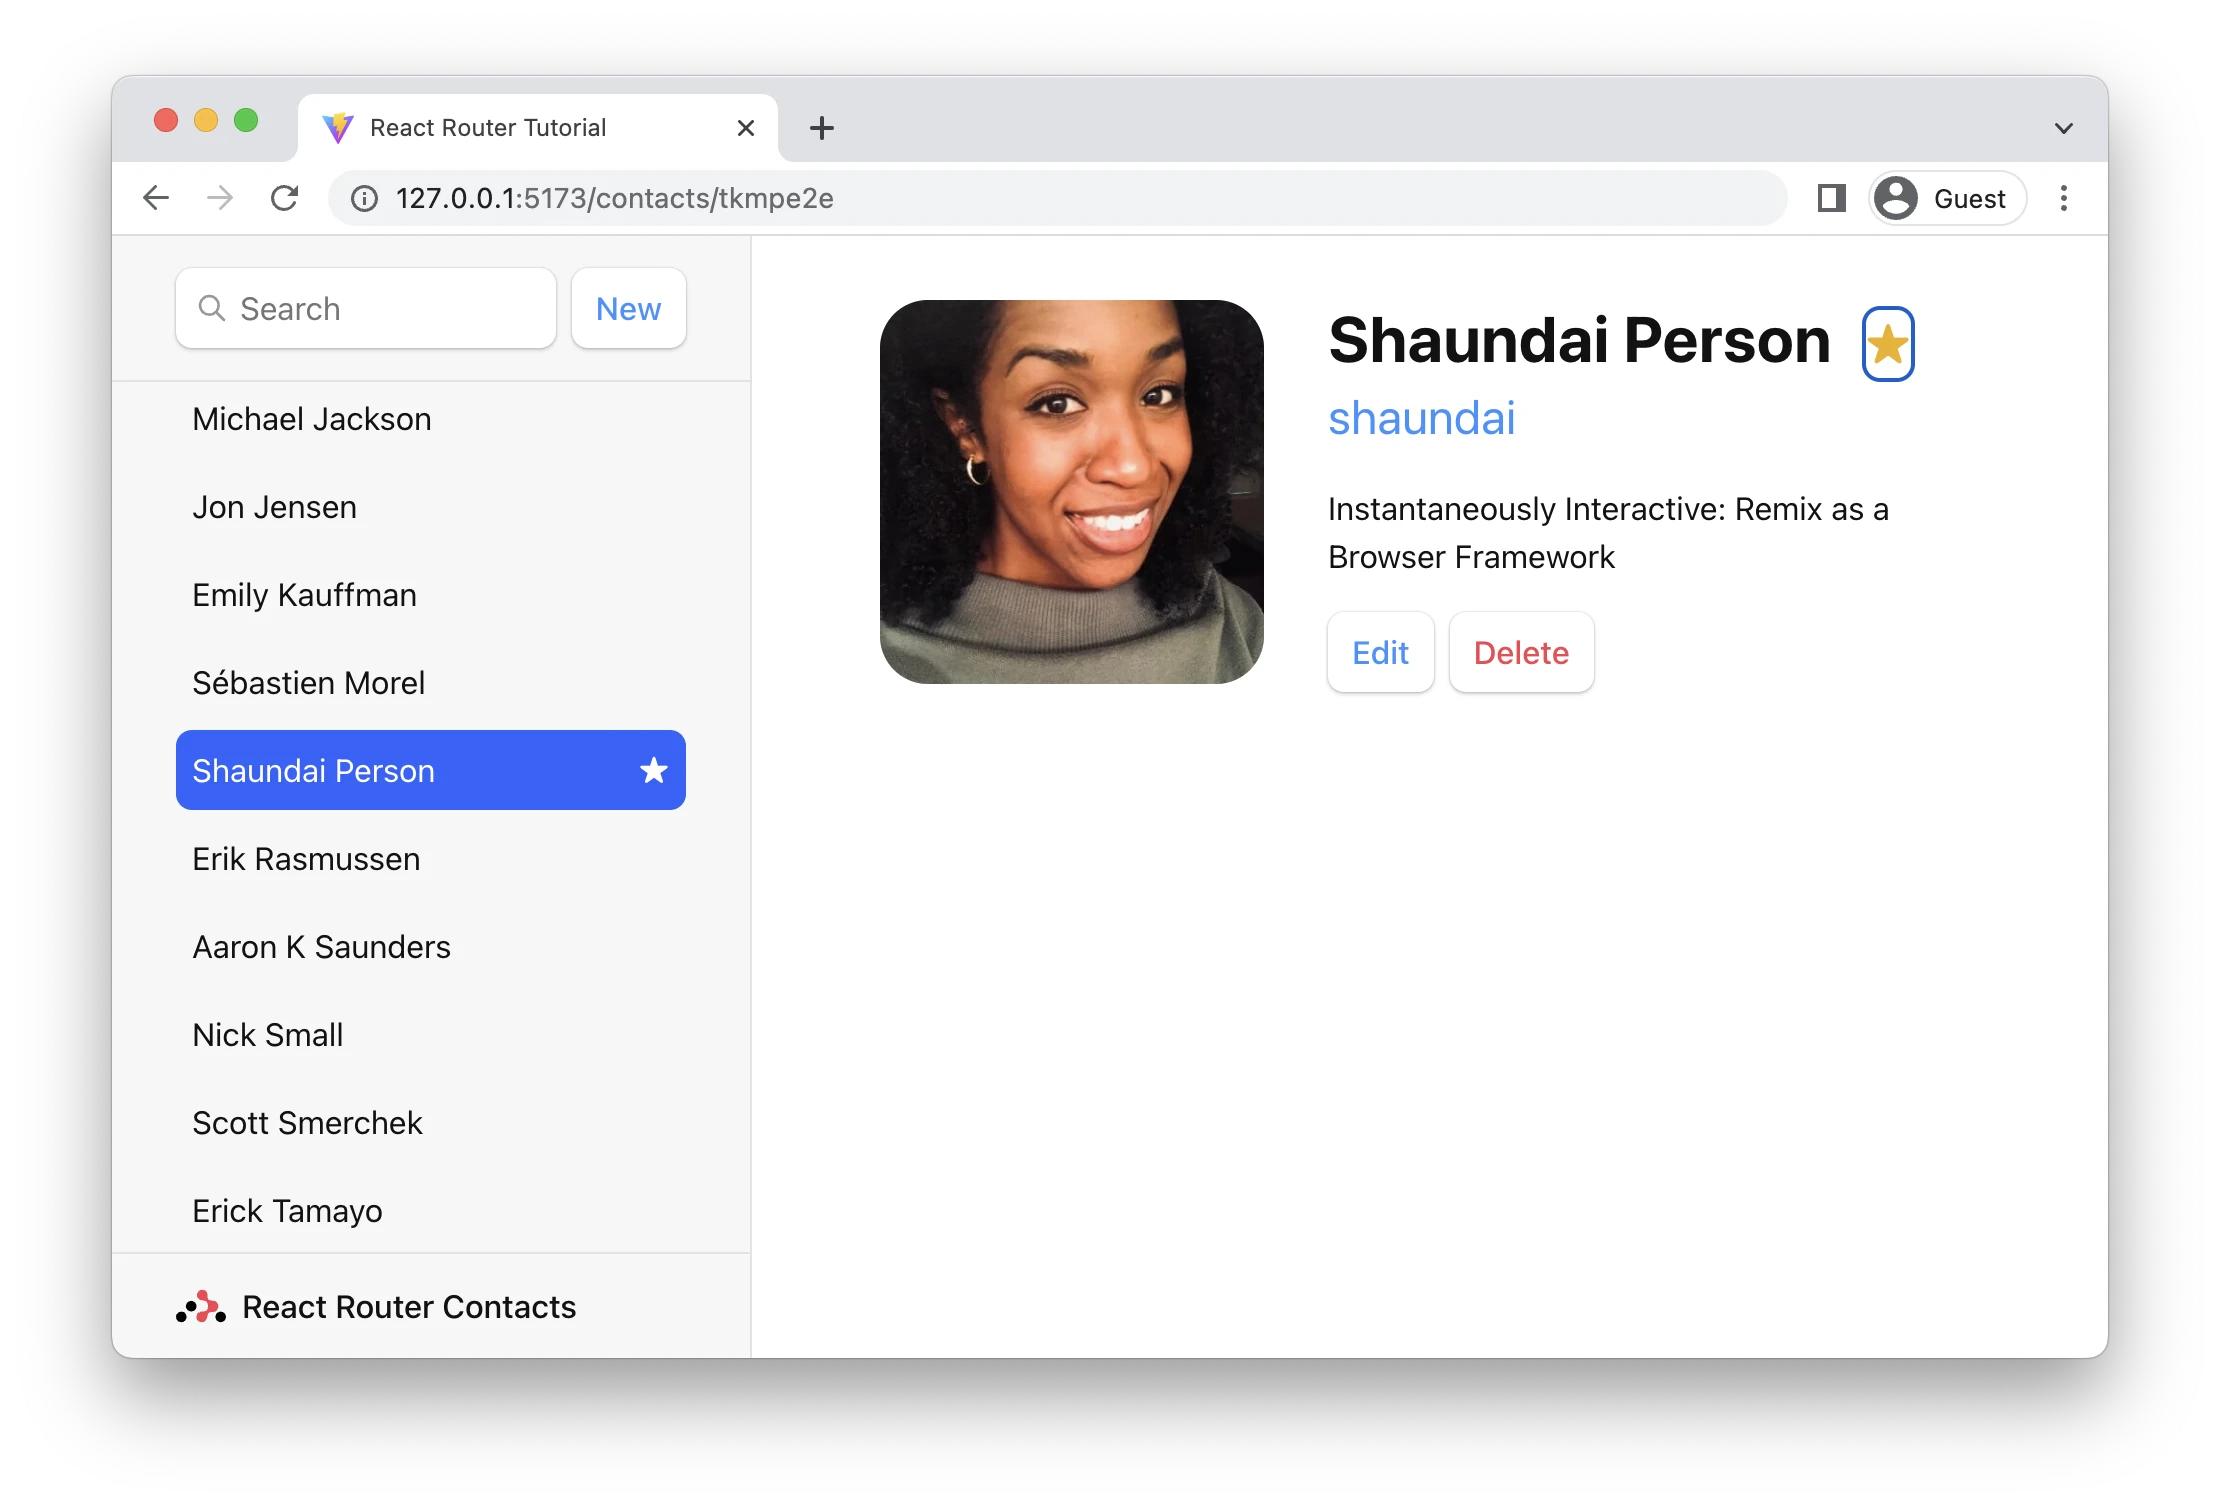
👉 Add a handful of records
I'm going to use the stellar lineup of speakers from the first Remix Conference 😁
Active Link Styling
Now that we have a bunch of records, it's not clear which one we're looking at in the sidebar. We can use NavLink to fix this.
👉 Use a NavLink in the sidebar
import {
  Outlet,
  NavLink,
  useLoaderData,
  Form,
  redirect,
} from "react-router-dom";

export default function Root() {
  return (
    <>
      <div id="sidebar">
        {/* other code */}

        <nav>
          {contacts.length ? (
            <ul>
              {contacts.map((contact) => (
                <li key={contact.id}>
                  <NavLink
                    to={`contacts/${contact.id}`}
                    className={({ isActive, isPending }) =>
                      isActive
                        ? "active"
                        : isPending
                        ? "pending"
                        : ""
                    }
                  >
                    {/* other code */}
                  </NavLink>
                </li>
              ))}
            </ul>
          ) : (
            <p>{/* other code */}</p>
          )}
        </nav>
      </div>
    </>
  );
}
Note that we are passing a function to className. When the user is at the URL in the NavLink, then isActive will be true. When it's about to be active (the data is still loading) then isPending will be true. This allows us to easily indicate where the user is, as well as provide immediate feedback on links that have been clicked but we're still waiting for data to load.
Global Pending UI
As the user navigates the app, React Router will leave the old page up as data is loading for the next page. You may have noticed the app feels a little unresponsive as you click between the list. Let's provide the user with some feedback so the app doesn't feel unresponsive.
React Router is managing all of the state behind the scenes and reveals the pieces of it you need to build dynamic web apps. In this case, we'll use the useNavigation hook.
👉 useNavigation to add global pending UI
import {
  // existing code
  useNavigation,
} from "react-router-dom";

// existing code

export default function Root() {
  const { contacts } = useLoaderData();
  const navigation = useNavigation();

  return (
    <>
      <div id="sidebar">{/* existing code */}</div>
      <div
        id="detail"
        className={
          navigation.state === "loading" ? "loading" : ""
        }
      >
        <Outlet />
      </div>
    </>
  );
}
useNavigation returns the current navigation state: it can be one of "idle" | "submitting" | "loading".
In our case, we add a "loading" class to the main part of the app if we're not idle. The CSS then adds a nice fade after a short delay (to avoid flickering the UI for fast loads). You could do anything you want though, like show a spinner or loading bar across the top.
Note that our data model (src/contacts.js) has a clientside cache, so navigating to the same contact is fast the second time. This behavior is not React Router, it will re-load data for changing routes no matter if you've been there before or not. It does, however, avoid calling the loaders for unchanging routes (like the list) during a navigation.
Deleting Records
If we review code in the contact route, we can find the delete button looks like this:
<Form
  method="post"
  action="destroy"
  onSubmit={(event) => {
    if (
      !confirm(
        "Please confirm you want to delete this record."
      )
    ) {
      event.preventDefault();
    }
  }}
>
  <button type="submit">Delete</button>
</Form>
Note the action points to "destroy". Like <Link to>, <Form action> can take a relative value. Since the form is rendered in contact/:contactId, then a relative action with destroy will submit the form to contact/:contactId/destroy when clicked.
At this point you should know everything you need to know to make the delete button work. Maybe give it a shot before moving on? You'll need:
- A new route
- An
actionat that route deleteContactfromsrc/contacts.js
👉 Create the "destroy" route module
touch src/routes/destroy.jsx
👉 Add the destroy action
import { redirect } from "react-router-dom";
import { deleteContact } from "../contacts";

export async function action({ params }) {
  await deleteContact(params.contactId);
  return redirect("/");
}
👉 Add the destroy route to the route config
/* existing code */
import { action as destroyAction } from "./routes/destroy";

const router = createBrowserRouter([
  {
    path: "/",
    /* existing root route props */
    children: [
      /* existing routes */
      {
        path: "contacts/:contactId/destroy",
        action: destroyAction,
      },
    ],
  },
]);

/* existing code */
Alright, navigate to a record and click the "Delete" button. It works!
😅 I'm still confused why this all works
When the user clicks the submit button:
<Form>prevents the default browser behavior of sending a new POST request to the server, but instead emulates the browser by creating a POST request with client side routing- The
<Form action="destroy">matches the new route at"contacts/:contactId/destroy"and sends it the request - After the action redirects, React Router calls all of the loaders for the data on the page to get the latest values (this is "revalidation").
useLoaderDatareturns new values and causes the components to update!
Add a form, add an action, React Router does the rest.
Contextual Errors
Just for kicks, throw an error in the destroy action:
export async function action({ params }) {
  throw new Error("oh dang!");
  await deleteContact(params.contactId);
  return redirect("/");
}
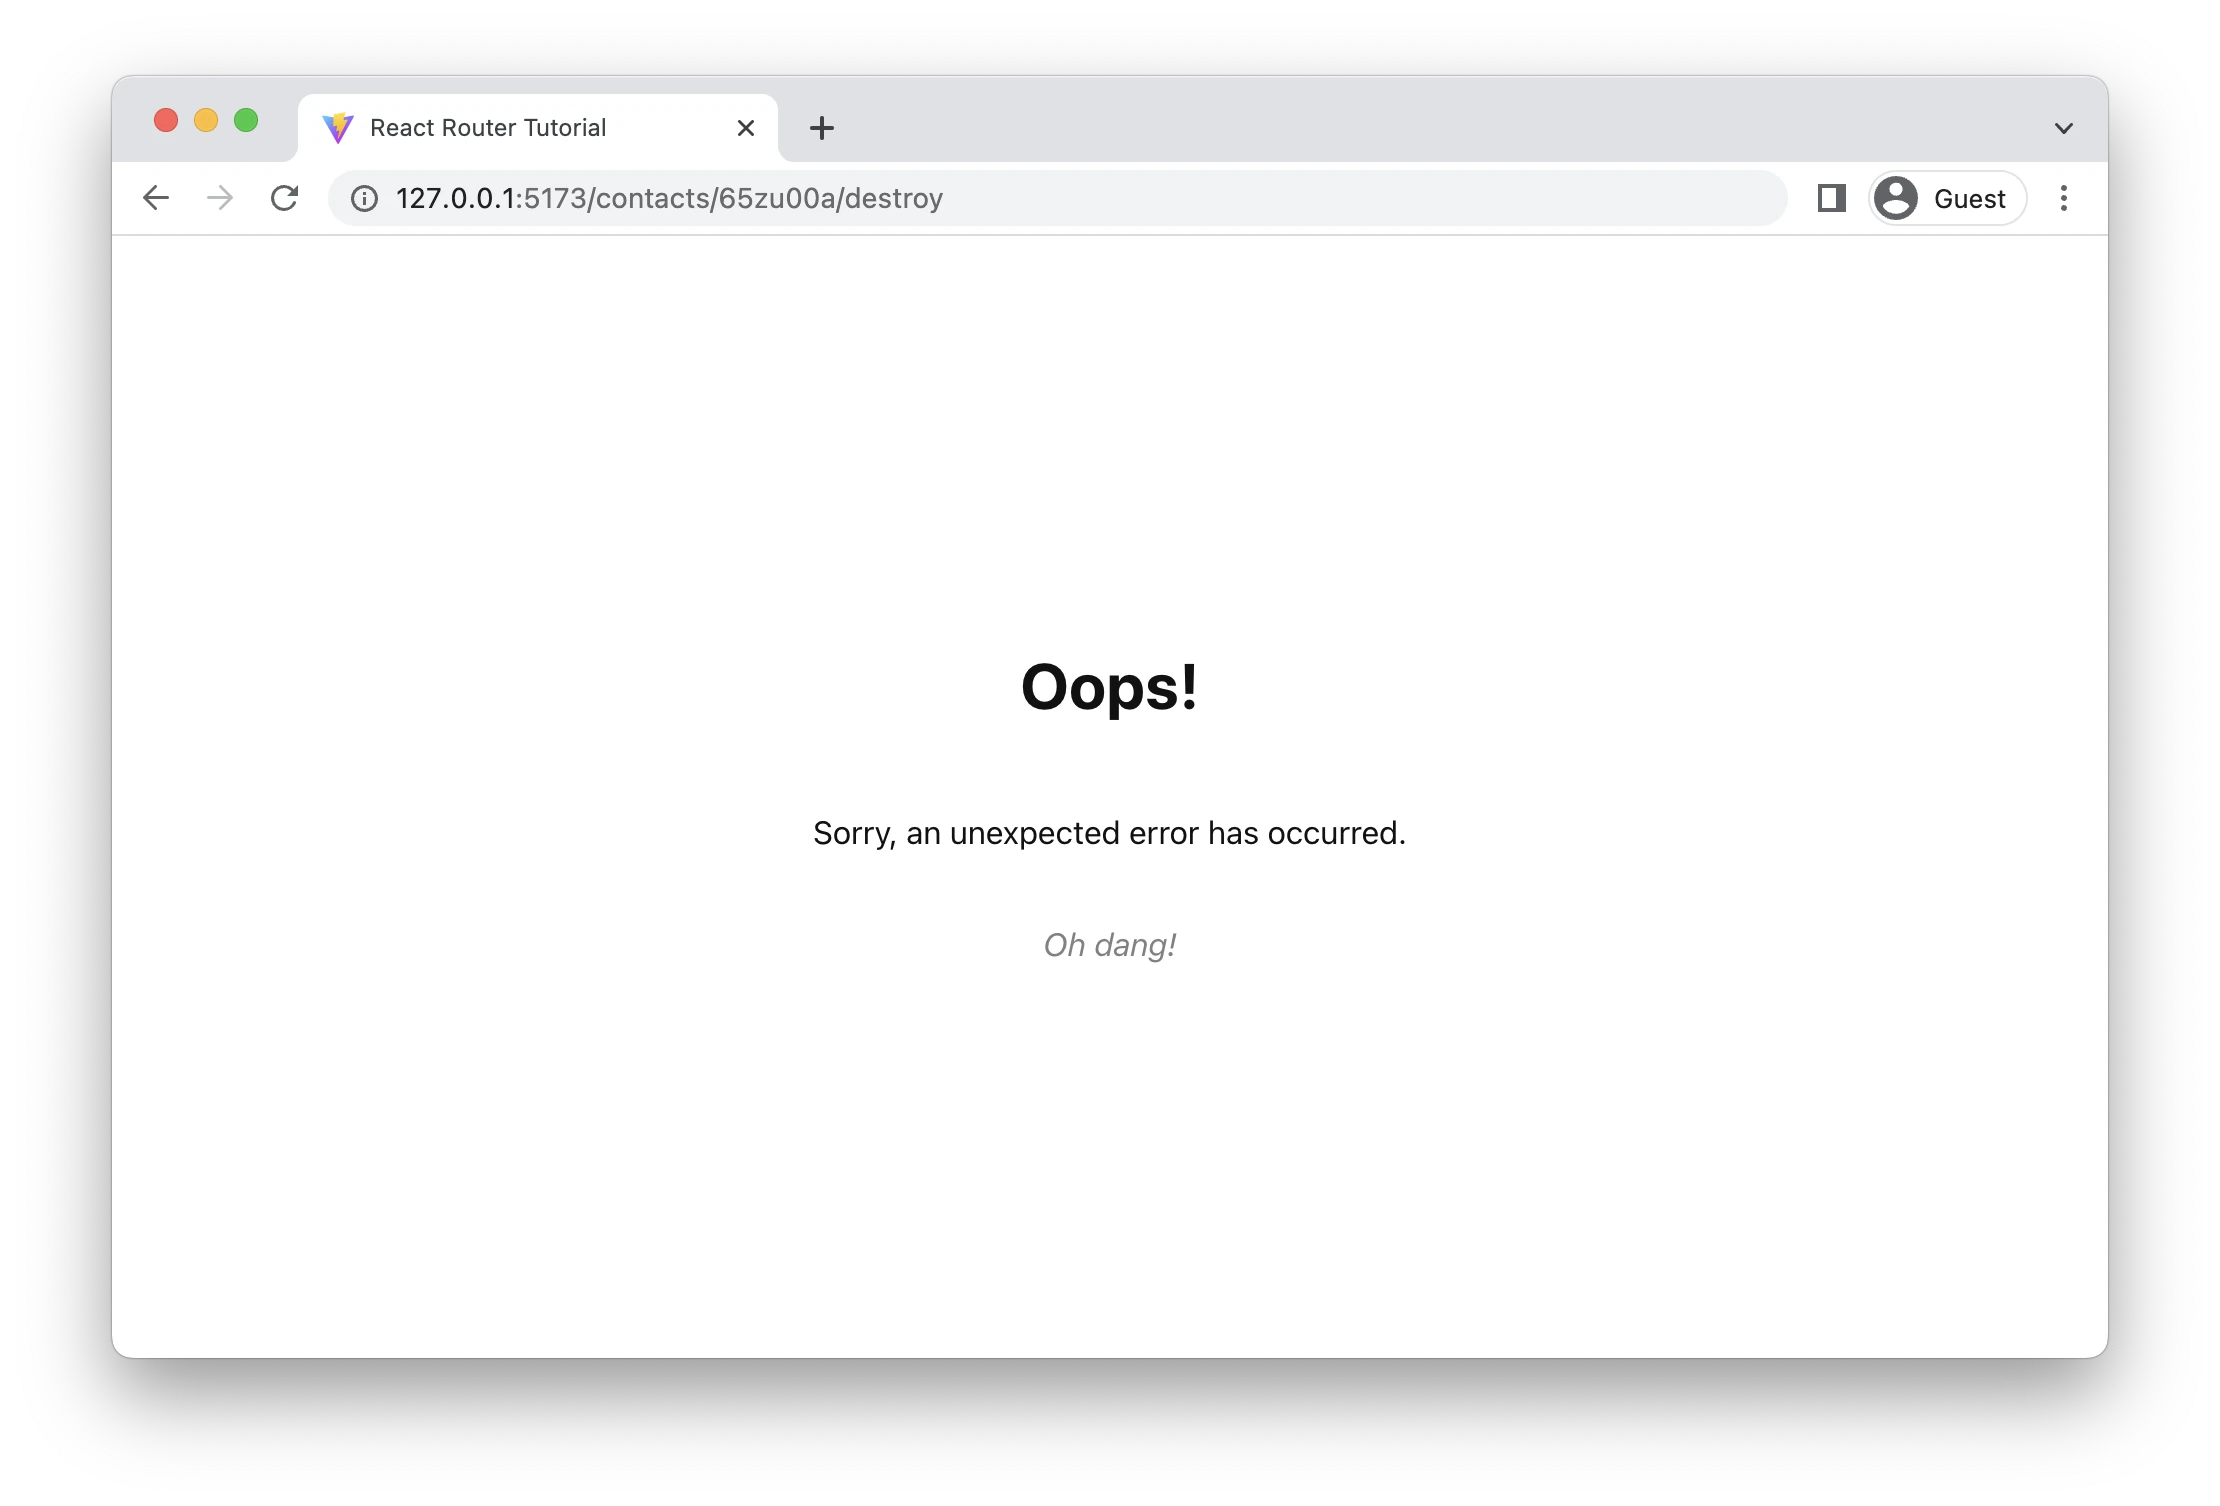
Recognize that screen? It's our errorElement from before. The user, however, can't really do anything to recover from this screen except to hit refresh.
Let's create a contextual error message for the destroy route:
[
  /* other routes */
  {
    path: "contacts/:contactId/destroy",
    action: destroyAction,
    errorElement: <div>Oops! There was an error.</div>,
  },
];
Now try it again:
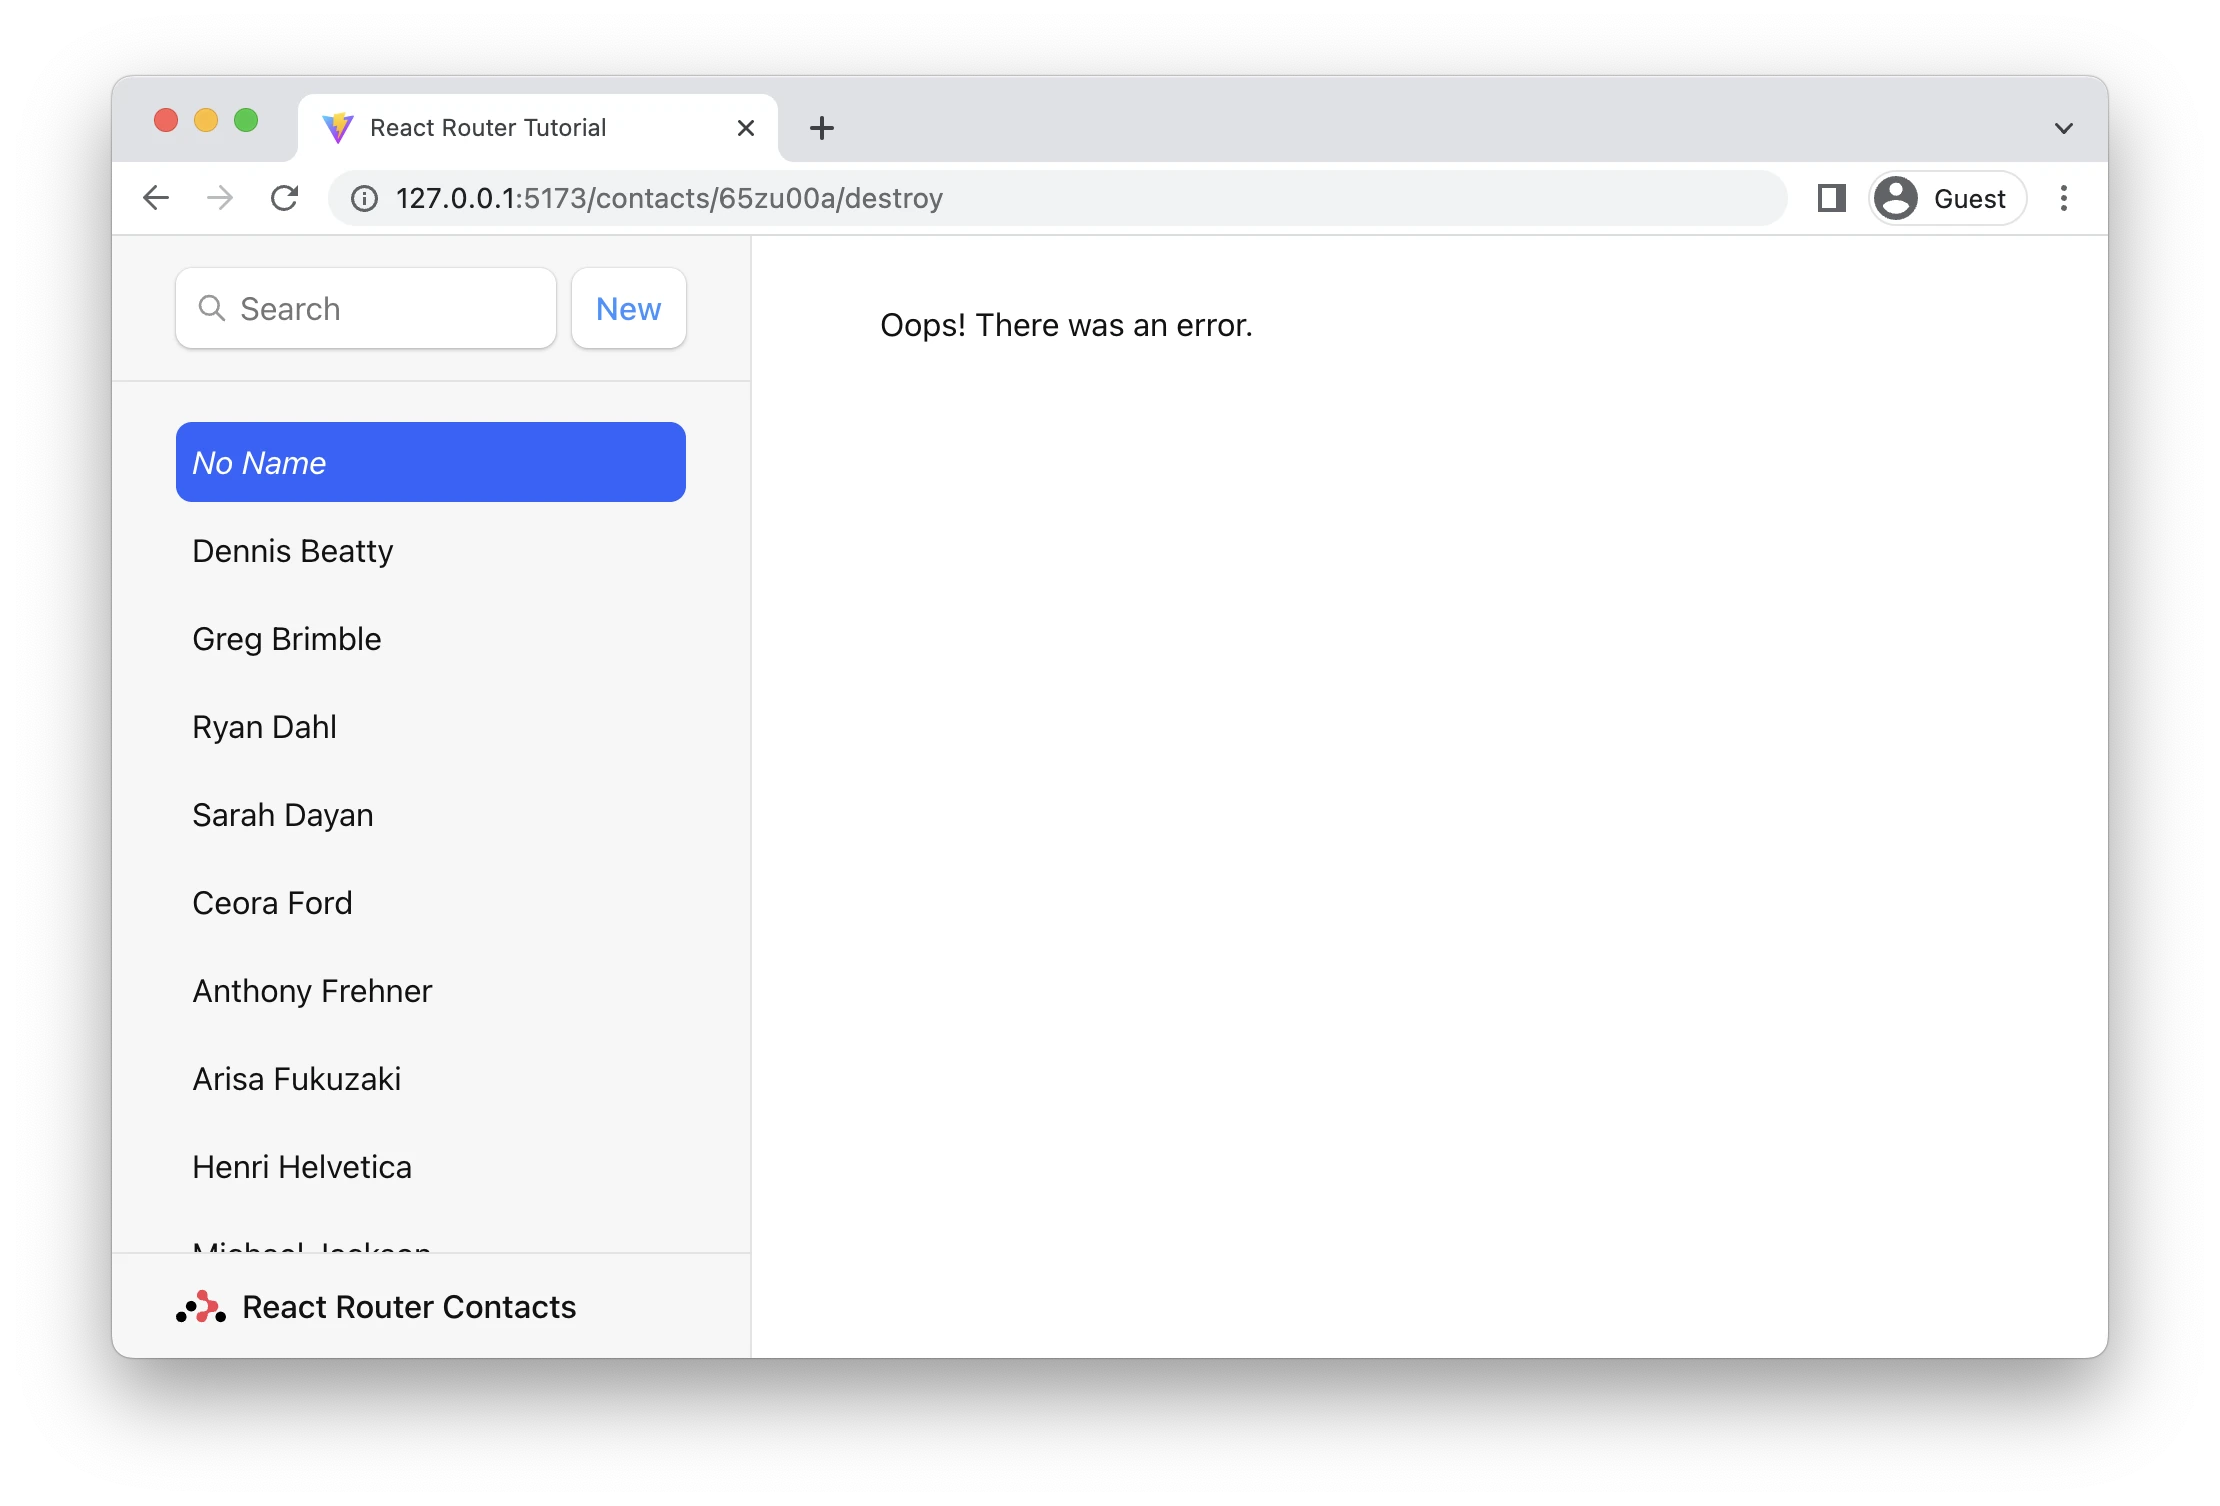
Our user now has more options than slamming refresh, they can continue to interact with the parts of the page that aren't having trouble 🙌
Because the destroy route has its own errorElement and is a child of the root route, the error will render there instead of the root. As you probably noticed, these errors bubble up to the nearest errorElement. Add as many or as few as you like, as long as you've got one at the root.
Index Routes
When we load up the app, you'll notice a big blank page on the right side of our list.
When a route has children, and you're at the parent route's path, the <Outlet> has nothing to render because no children match. You can think of index routes as the default child route to fill in that space.
👉 Create the index route module
touch src/routes/index.jsx
👉 Fill in the index component's elements
Feel free to copy paste, nothing special here.
export default function Index() {
  return (
    <p id="zero-state">
      This is a demo for React Router.
      <br />
      Check out{" "}
      <a href="https://reactrouter.com">
        the docs at reactrouter.com
      </a>
      .
    </p>
  );
}
👉 Configure the index route
// existing code
import Index from "./routes/index";

const router = createBrowserRouter([
  {
    path: "/",
    element: <Root />,
    errorElement: <ErrorPage />,
    loader: rootLoader,
    action: rootAction,
    children: [
      { index: true, element: <Index /> },
      /* existing routes */
    ],
  },
]);
Note the { index:true } instead of { path: "" }. That tells the router to match and render this route when the user is at the parent route's exact path, so there are no other child routes to render in the <Outlet>.
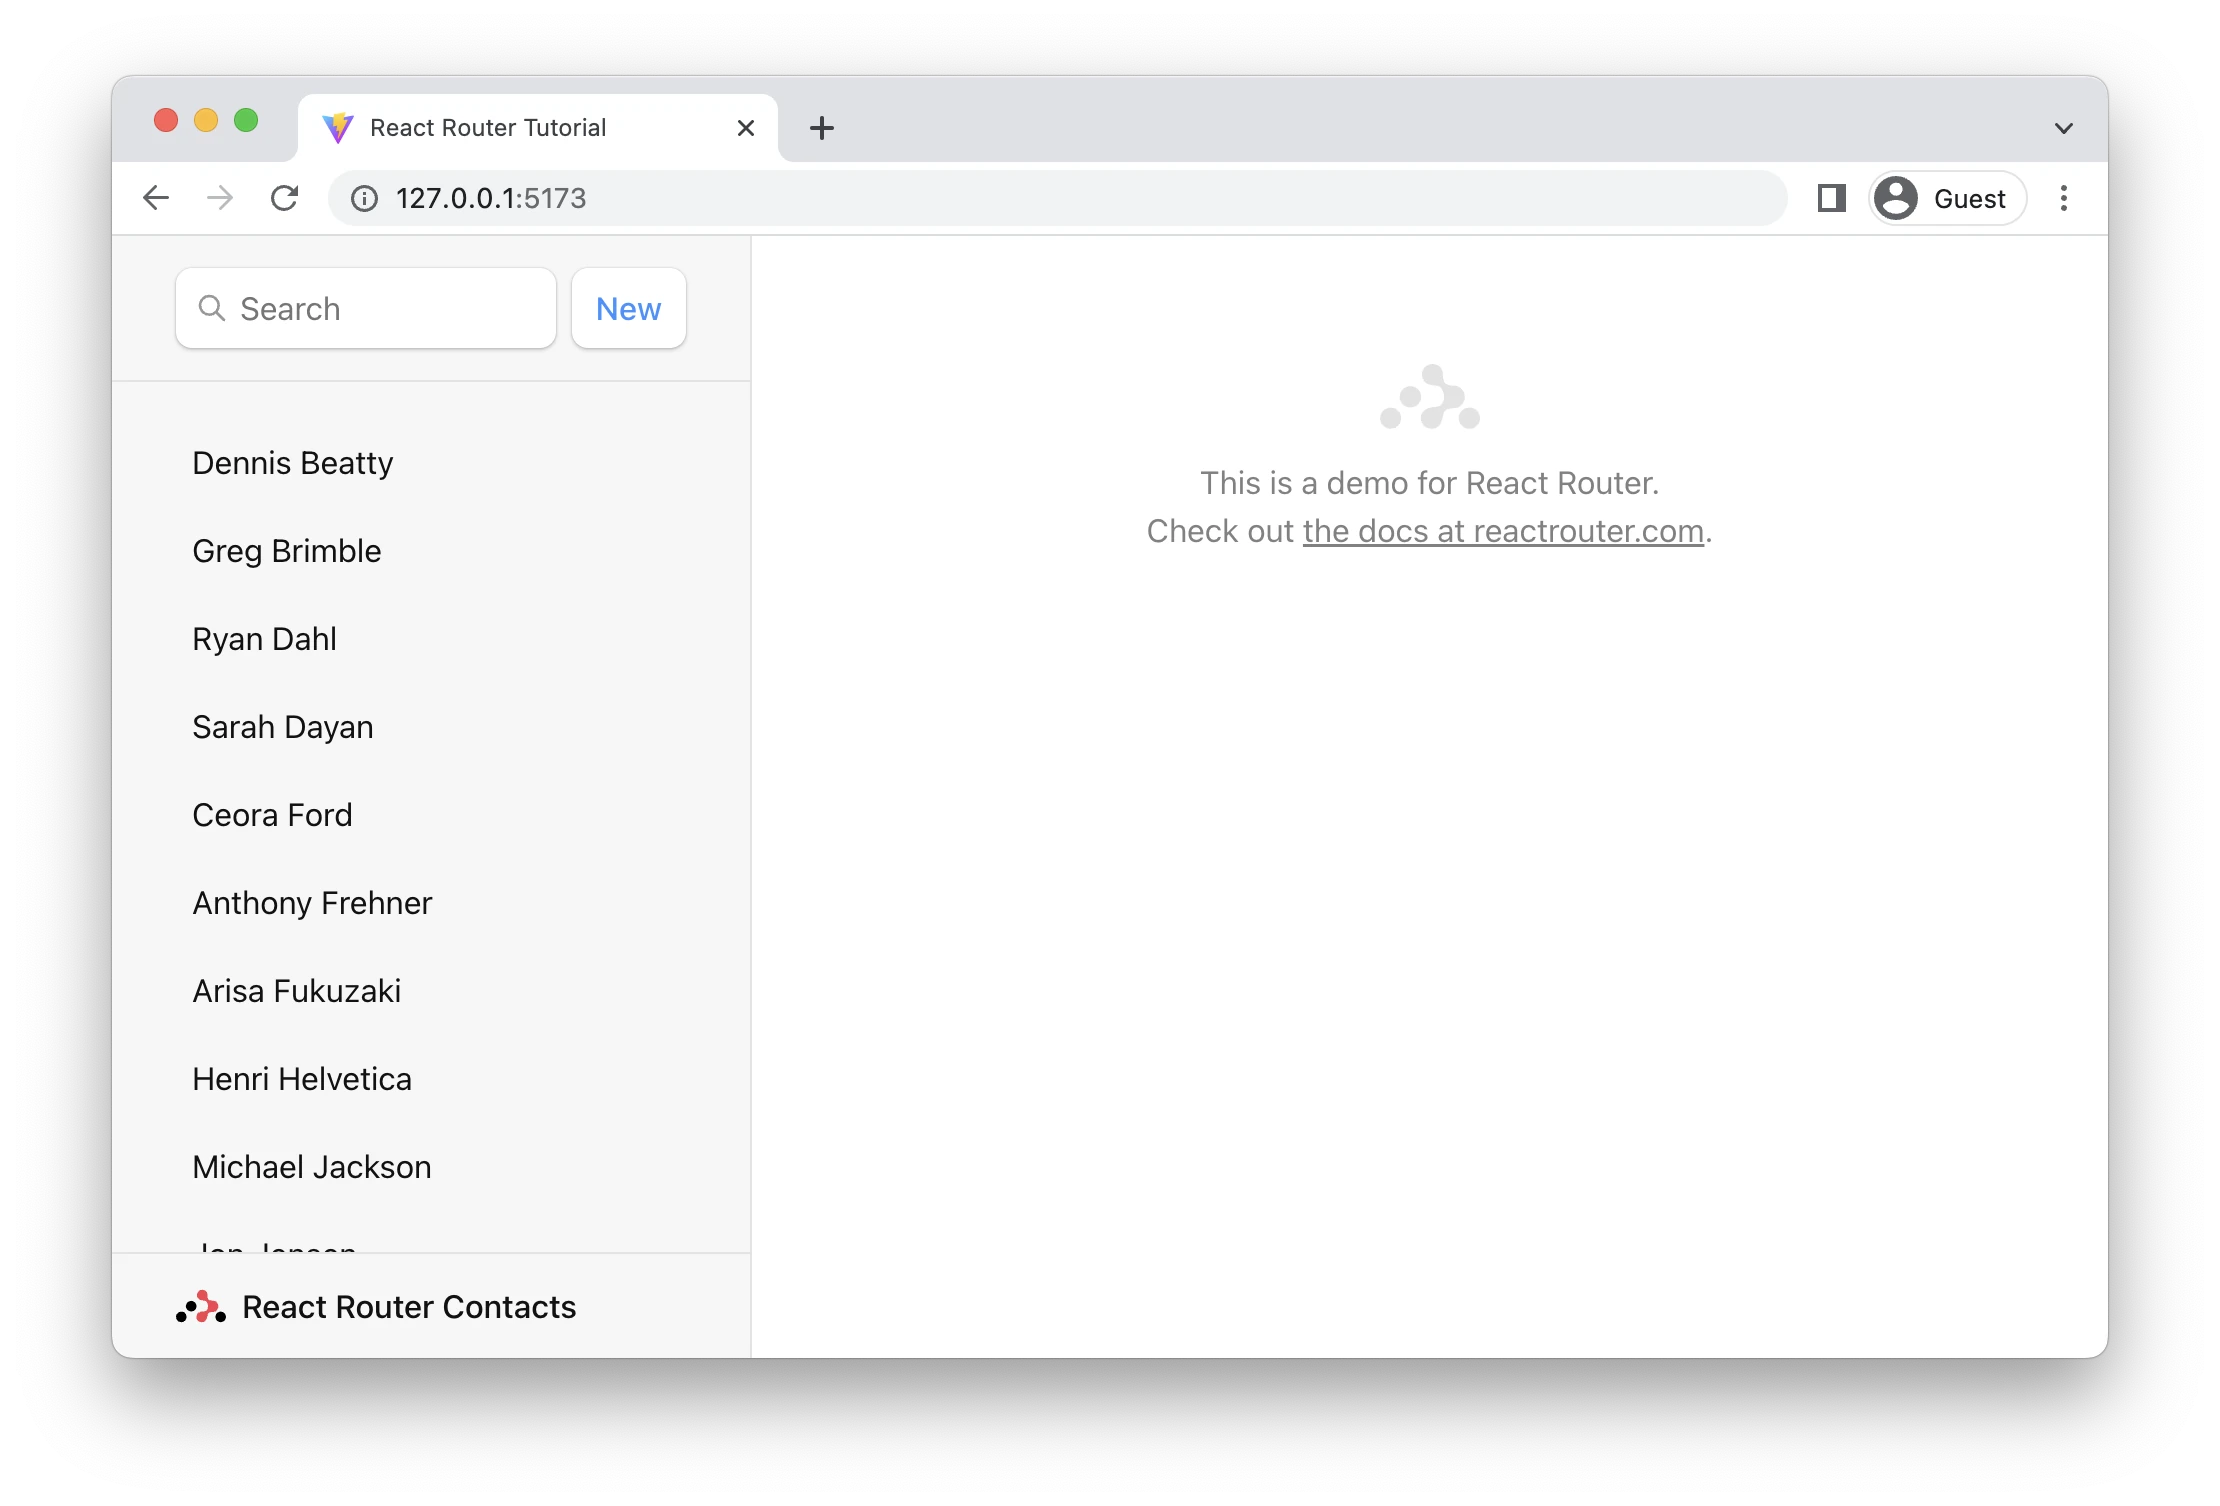
Voila! No more blank space. It's common to put dashboards, stats, feeds, etc. at index routes. They can participate in data loading as well.
Cancel Button
On the edit page we've got a cancel button that doesn't do anything yet. We'd like it to do the same thing as the browser's back button.
We'll need a click handler on the button as well as useNavigate from React Router.
👉 Add the cancel button click handler with useNavigate
import {
  Form,
  useLoaderData,
  redirect,
  useNavigate,
} from "react-router-dom";

export default function EditContact() {
  const { contact } = useLoaderData();
  const navigate = useNavigate();

  return (
    <Form method="post" id="contact-form">
      {/* existing code */}

      <p>
        <button type="submit">Save</button>
        <button
          type="button"
          onClick={() => {
            navigate(-1);
          }}
        >
          Cancel
        </button>
      </p>
    </Form>
  );
}
Now when the user clicks "Cancel", they'll be sent back one entry in the browser's history.
🧐 Why is there no
event.preventDefaulton the button?
A <button type="button">, while seemingly redundant, is the HTML way of preventing a button from submitting its form.
Two more features to go. We're on the home stretch!
URL Search Params and GET Submissions
All of our interactive UI so far have been either links that change the URL or forms that post data to actions. The search field is interesting because it's a mix of both: it's a form but it only changes the URL, it doesn't change data.
Right now it's just a normal HTML <form>, not a React Router <Form>. Let's see what the browser does with it by default:
👉 Type a name into the search field and hit the enter key
Note the browser's URL now contains your query in the URL as URLSearchParams:
http://127.0.0.1:5173/?q=ryan
If we review the search form, it looks like this:
<form id="search-form" role="search">
  <input
    id="q"
    aria-label="Search contacts"
    placeholder="Search"
    type="search"
    name="q"
  />
  <div id="search-spinner" aria-hidden hidden={true} />
  <div className="sr-only" aria-live="polite"></div>
</form>
As we've seen before, browsers can serialize forms by the name attribute of it's input elements. The name of this input is q, that's why the URL has ?q=. If we named it search the URL would be ?search=.
Note that this form is different from the others we've used, it does not have <form method="post">. The default method is "get". That means when the browser creates the request for the next document, it doesn't put the form data into the request POST body, but into the URLSearchParams of a GET request.
GET Submissions with Client Side Routing
Let's use client side routing to submit this form and filter the list in our existing loader.
👉 Change <form> to <Form>
<Form id="search-form" role="search">
  <input
    id="q"
    aria-label="Search contacts"
    placeholder="Search"
    type="search"
    name="q"
  />
  <div id="search-spinner" aria-hidden hidden={true} />
  <div className="sr-only" aria-live="polite"></div>
</Form>
👉 Filter the list if there are URLSearchParams
export async function loader({ request }) {
  const url = new URL(request.url);
  const q = url.searchParams.get("q");
  const contacts = await getContacts(q);
  return { contacts };
}

Because this is a GET, not a POST, React Router does not call the action. Submitting a GET form is the same as clicking a link: only the URL changes. That's why the code we added for filtering is in the loader, not the action of this route.
This also means it's a normal page navigation. You can click the back button to get back to where you were.
Synchronizing URLs to Form State
There are a couple of UX issues here that we can take care of quickly.
- If you click back after a search, the form field still has the value you entered even though the list is no longer filtered.
- If you refresh the page after searching, the form field no longer has the value in it, even though the list is filtered
In other words, the URL and our form state are out of sync.
👉 Return q from your loader and set it as the search field default value
// existing code

export async function loader({ request }) {
  const url = new URL(request.url);
  const q = url.searchParams.get("q");
  const contacts = await getContacts(q);
  return { contacts, q };
}

export default function Root() {
  const { contacts, q } = useLoaderData();
  const navigation = useNavigation();

  return (
    <>
      <div id="sidebar">
        <h1>React Router Contacts</h1>
        <div>
          <Form id="search-form" role="search">
            <input
              id="q"
              aria-label="Search contacts"
              placeholder="Search"
              type="search"
              name="q"
              defaultValue={q}
            />
            {/* existing code */}
          </Form>
          {/* existing code */}
        </div>
        {/* existing code */}
      </div>
      {/* existing code */}
    </>
  );
}
That solves problem (2). If you refresh the page now, the input field will show the query.
Now for problem (1), clicking the back button and updating the input. We can bring in useEffect from React to manipulate the form's state in the DOM directly.
👉 Synchronize input value with the URL Search Params
import { useEffect } from "react";

// existing code

export default function Root() {
  const { contacts, q } = useLoaderData();
  const navigation = useNavigation();

  useEffect(() => {
    document.getElementById("q").value = q;
  }, [q]);

  // existing code
}
🤔 Shouldn't you use a controlled component and React State for this?
You could certainly do this as a controlled component, but you'll end up with more complexity for the same behavior. You don't control the URL, the user does with the back/forward buttons. There would be more synchronization points with a controlled component.
If you're still concerned, expand this to see what it would look like
Notice how controlling the input requires three points of synchronization now instead of just one. The behavior is identical but the code is more complex.
import { useEffect, useState } from "react";
// existing code

export default function Root() {
  const { contacts, q } = useLoaderData();
  const [query, setQuery] = useState(q);
  const navigation = useNavigation();

  useEffect(() => {
    setQuery(q);
  }, [q]);

  return (
    <>
      <div id="sidebar">
        <h1>React Router Contacts</h1>
        <div>
          <Form id="search-form" role="search">
            <input
              id="q"
              aria-label="Search contacts"
              placeholder="Search"
              type="search"
              name="q"
              value={query}
              onChange={(e) => {
                setQuery(e.target.value);
              }}
            />
            {/* existing code */}
          </Form>
          {/* existing code */}
        </div>
        {/* existing code */}
      </div>
    </>
  );
}
Submitting Forms onChange
We've got a product decision to make here. For this UI, we'd probably rather have the filtering happen on every key stroke instead of when the form is explicitly submitted.
We've seen useNavigate already, we'll use its cousin, useSubmit, for this.
// existing code
import {
  // existing code
  useSubmit,
} from "react-router-dom";

export default function Root() {
  const { contacts, q } = useLoaderData();
  const navigation = useNavigation();
  const submit = useSubmit();

  return (
    <>
      <div id="sidebar">
        <h1>React Router Contacts</h1>
        <div>
          <Form id="search-form" role="search">
            <input
              id="q"
              aria-label="Search contacts"
              placeholder="Search"
              type="search"
              name="q"
              defaultValue={q}
              onChange={(event) => {
                submit(event.currentTarget.form);
              }}
            />
            {/* existing code */}
          </Form>
          {/* existing code */}
        </div>
        {/* existing code */}
      </div>
      {/* existing code */}
    </>
  );
}
Now as you type, the form is submitted automatically!
Note the argument to submit. We're passing in event.currentTarget.form. The currentTarget is the DOM node the event is attached to, and the currentTarget.form is the input's parent form node. The submit function will serialize and submit any form you pass to it.
Adding Search Spinner
In a production app, it's likely this search will be looking for records in a database that is too large to send all at once and filter client side. That's why this demo has some faked network latency.
Without any loading indicator, the search feels kinda sluggish. Even if we could make our database faster, we'll always have the user's network latency in the way and out of our control. For a better UX, let's add some immediate UI feedback for the search. For this we'll use useNavigation again.
👉 Add the search spinner
// existing code

export default function Root() {
  const { contacts, q } = useLoaderData();
  const navigation = useNavigation();
  const submit = useSubmit();

  const searching =
    navigation.location &&
    new URLSearchParams(navigation.location.search).has(
      "q"
    );

  useEffect(() => {
    document.getElementById("q").value = q;
  }, [q]);

  return (
    <>
      <div id="sidebar">
        <h1>React Router Contacts</h1>
        <div>
          <Form id="search-form" role="search">
            <input
              id="q"
              className={searching ? "loading" : ""}
              // existing code
            />
            <div
              id="search-spinner"
              aria-hidden
              hidden={!searching}
            />
            {/* existing code */}
          </Form>
          {/* existing code */}
        </div>
        {/* existing code */}
      </div>
      {/* existing code */}
    </>
  );
}
The navigation.location will show up when the app is navigating to a new URL and loading the data for it. It then goes away when there is no pending navigation anymore.
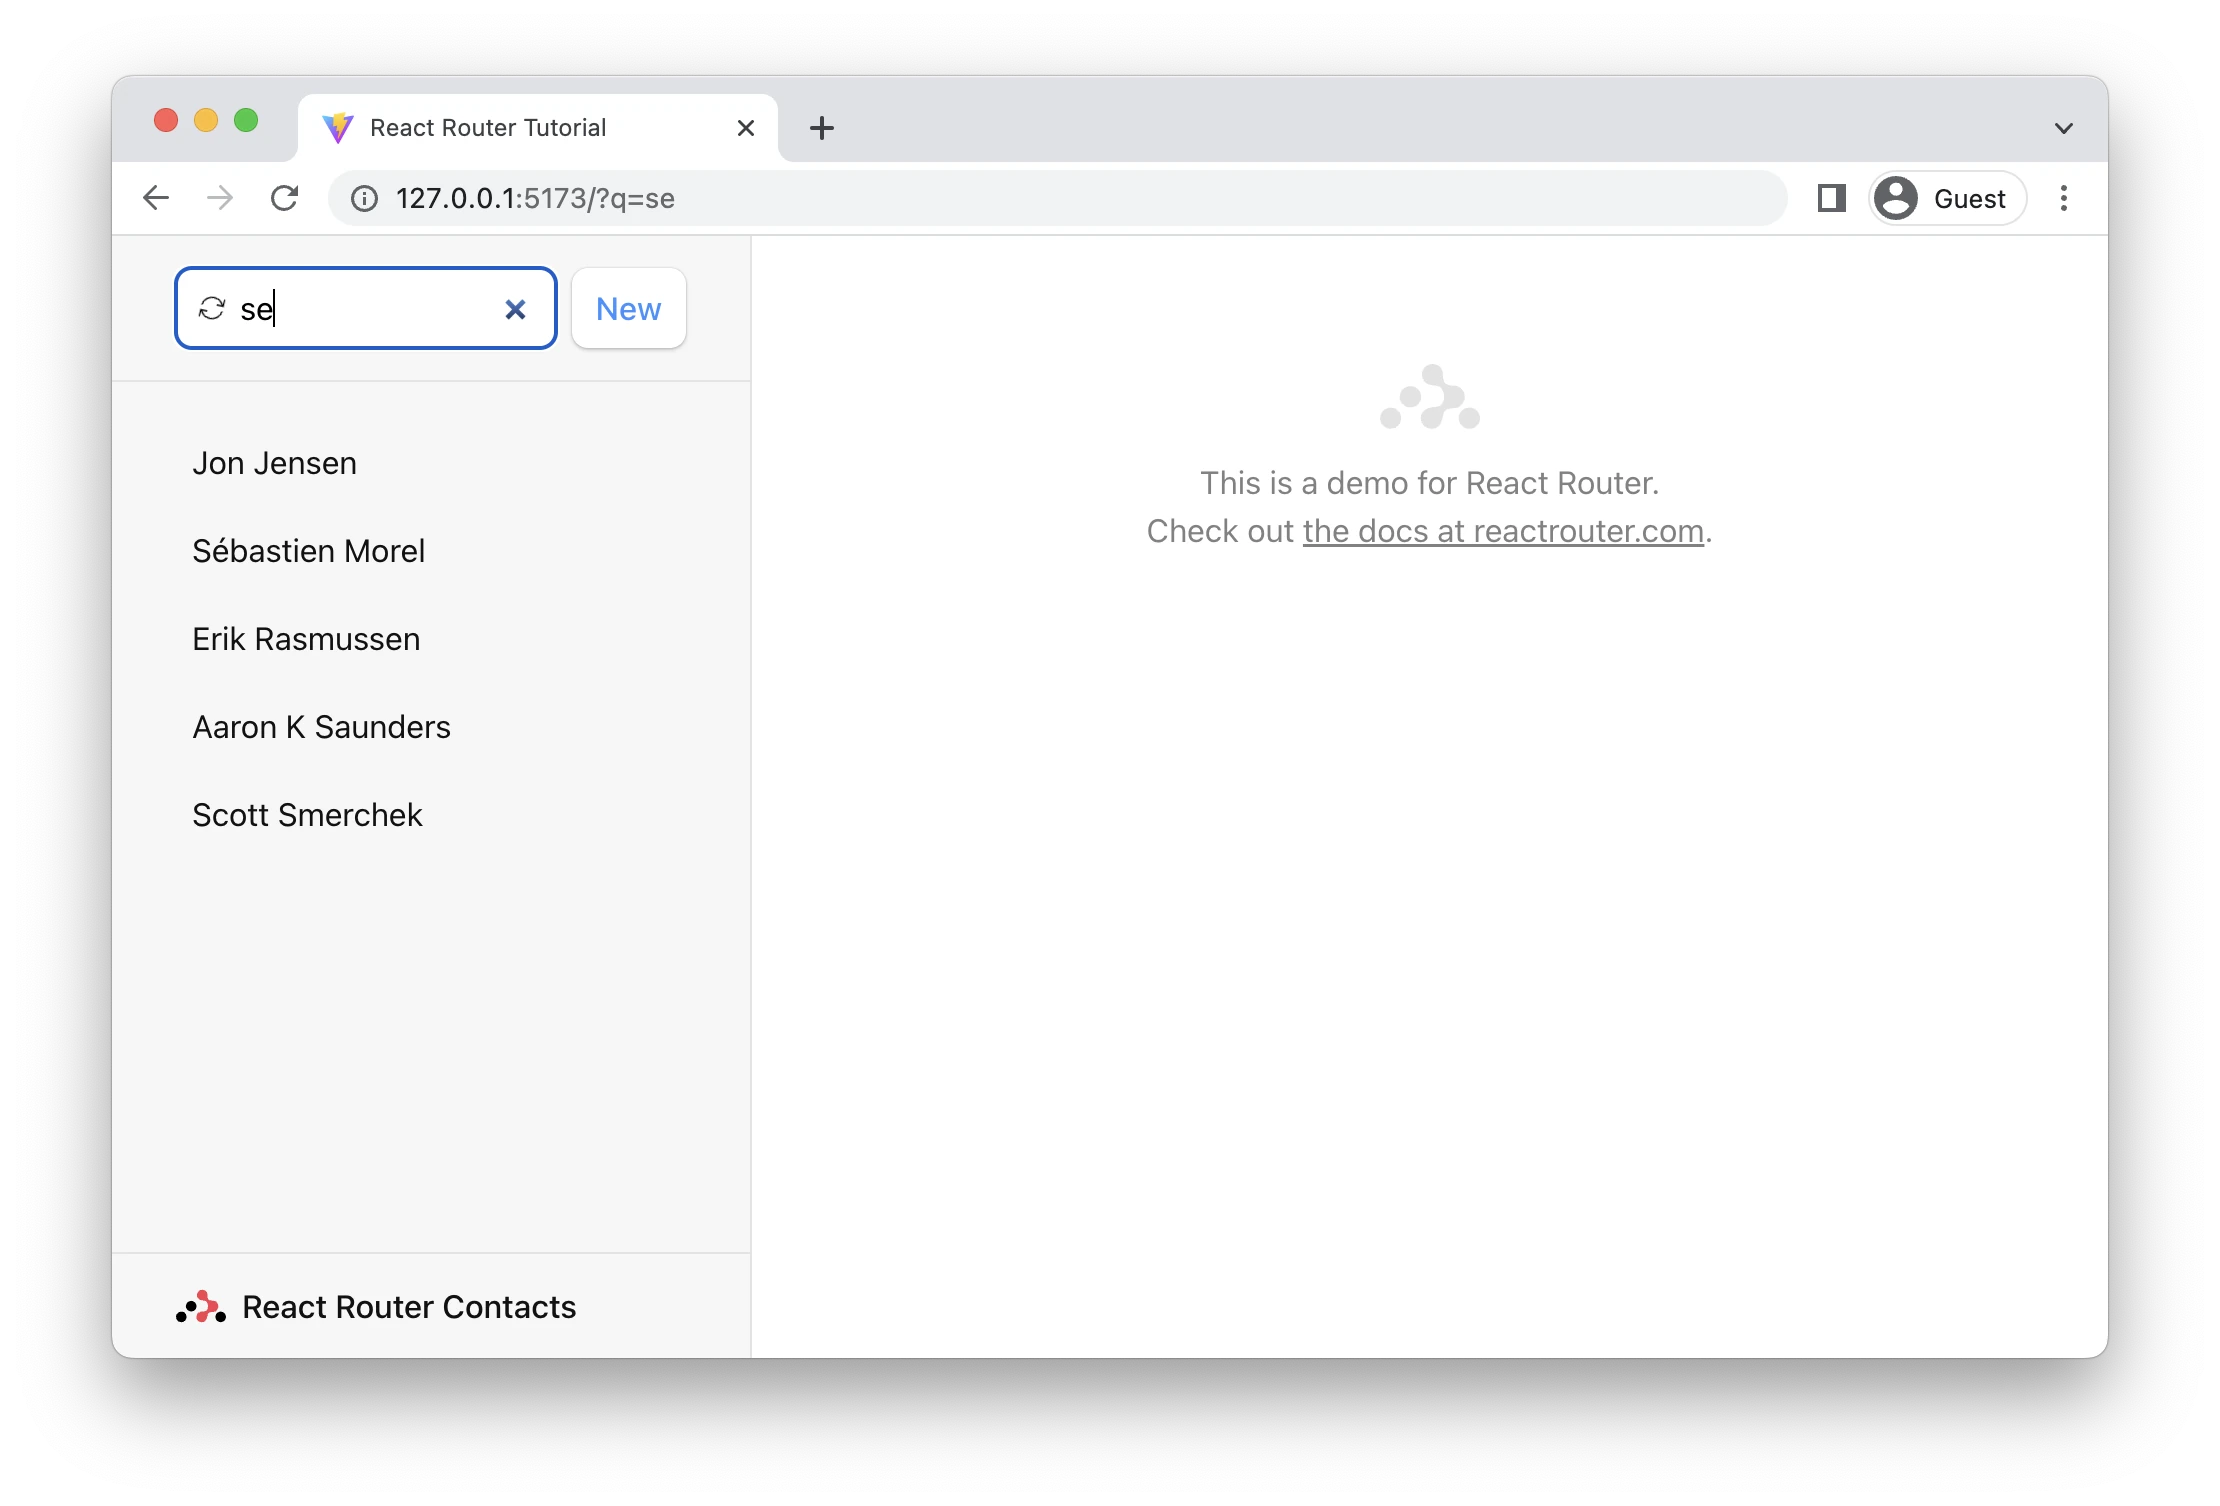
Managing the History Stack
Now that the form is submitted for every key stroke, if we type the characters "seba" and then delete them with backspace, we end up with 7 new entries in the stack 😂. We definitely don't want this
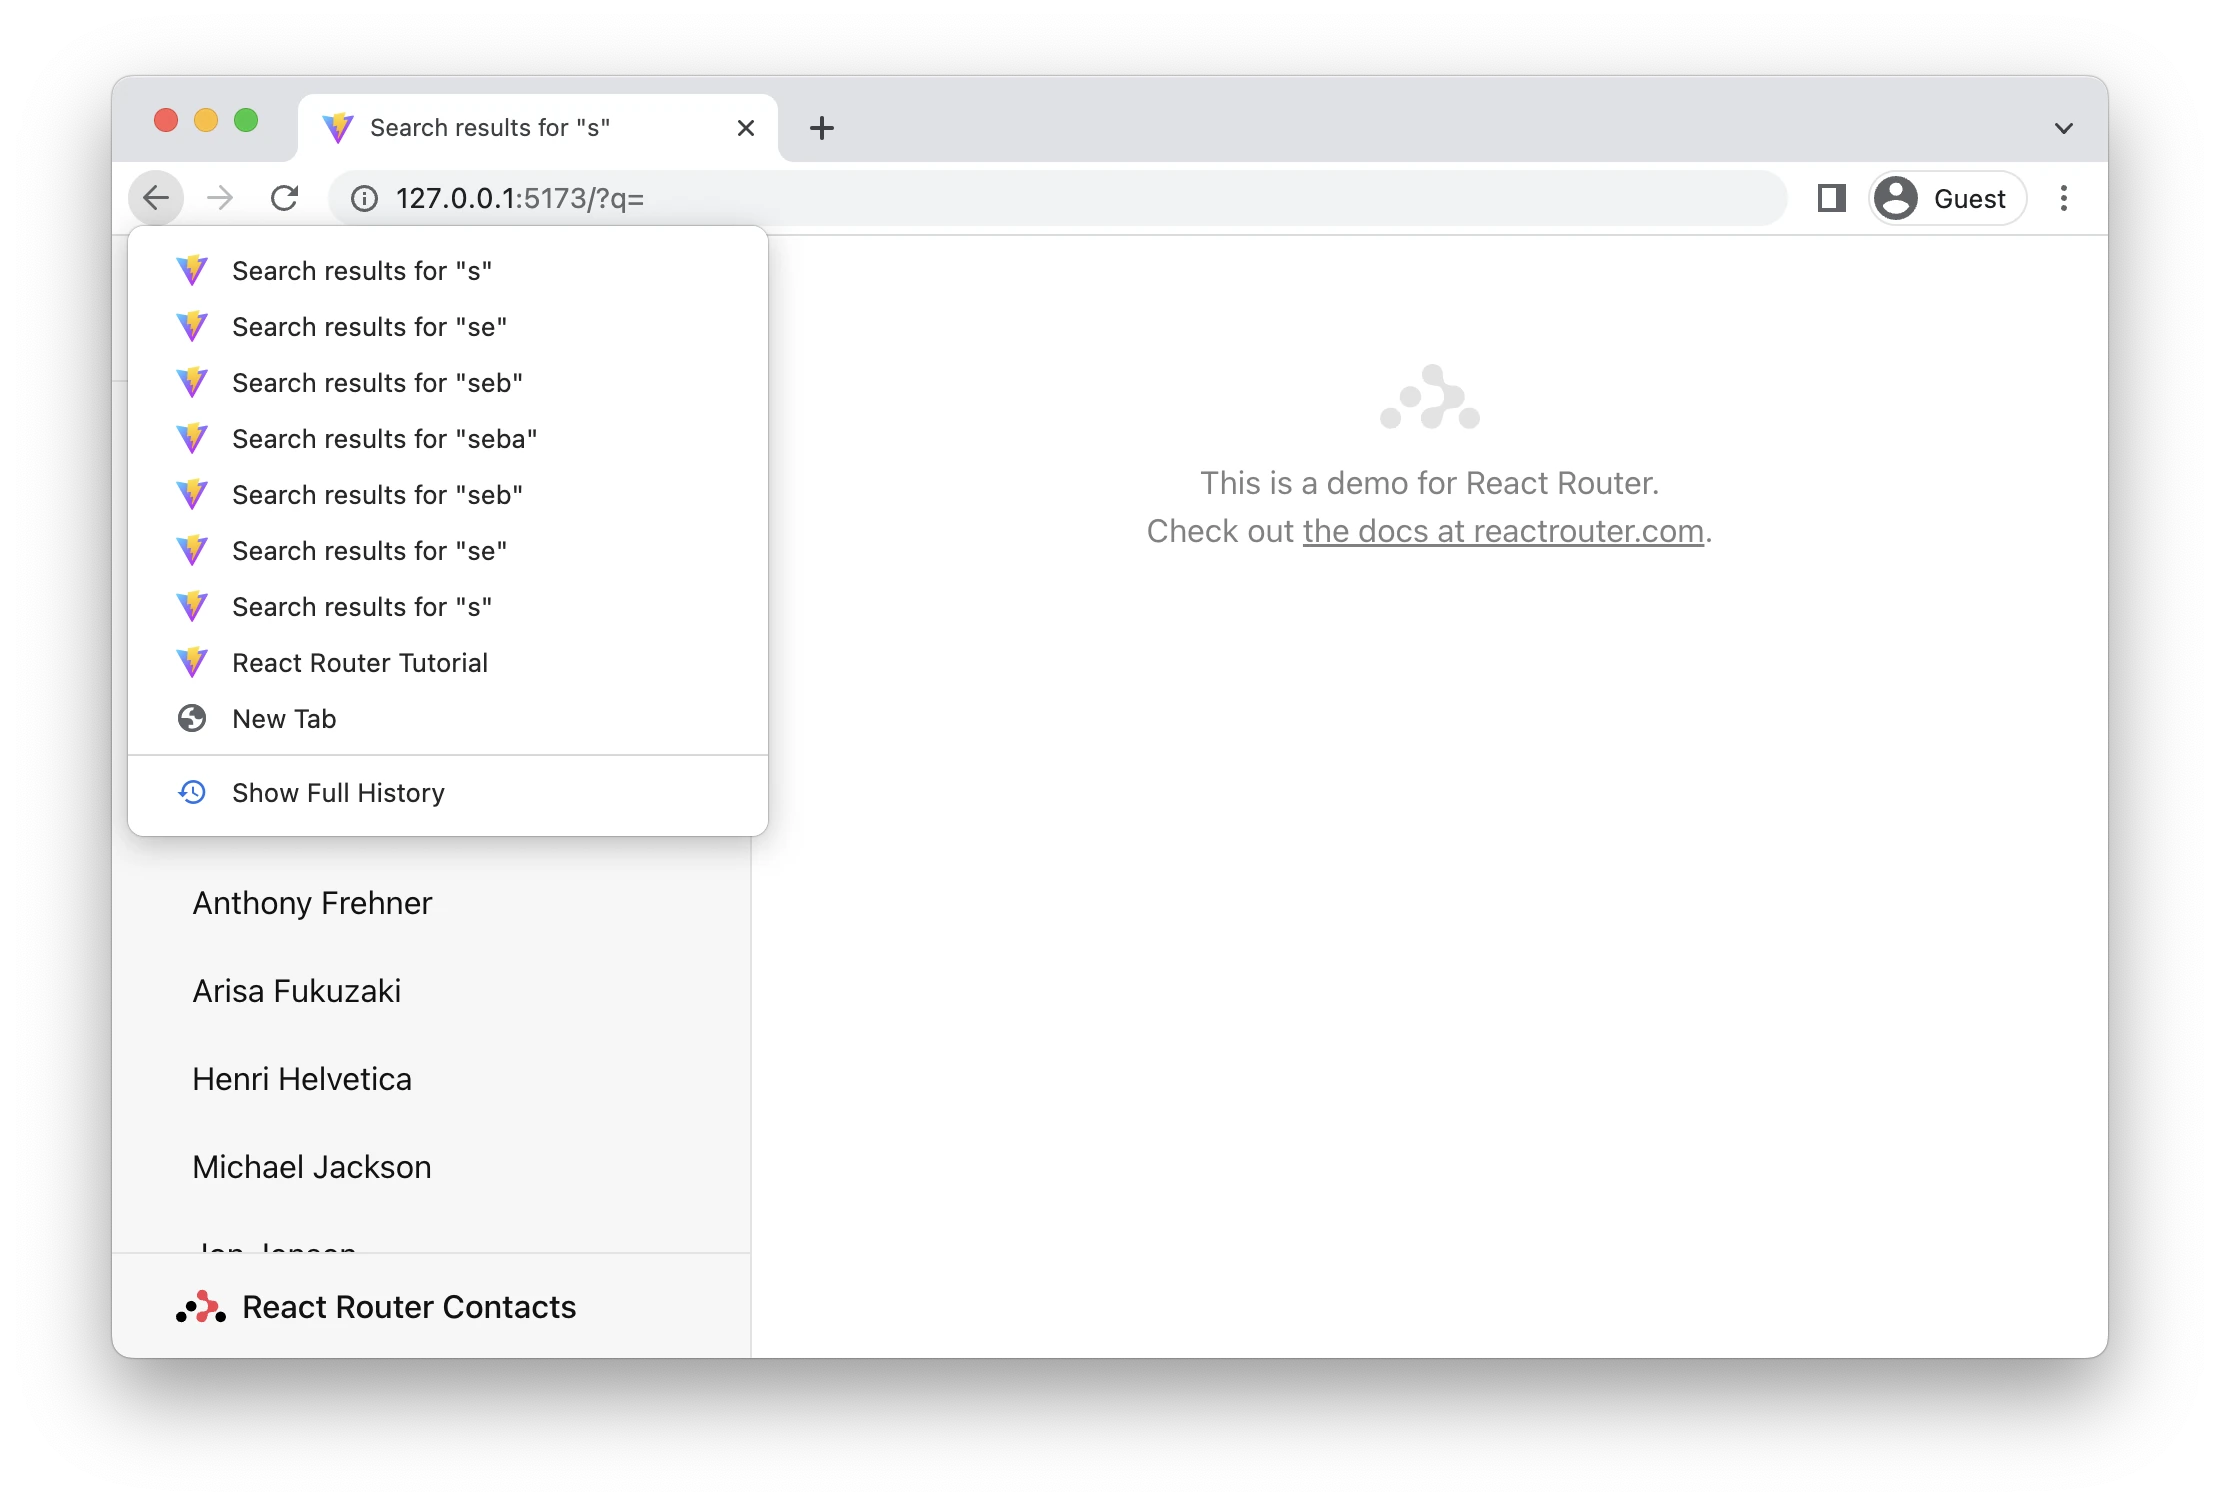
We can avoid this by replacing the current entry in the history stack with the next page, instead of pushing into it.
👉 Use replace in submit
// existing code

export default function Root() {
  // existing code

  return (
    <>
      <div id="sidebar">
        <h1>React Router Contacts</h1>
        <div>
          <Form id="search-form" role="search">
            <input
              id="q"
              // existing code
              onChange={(event) => {
                const isFirstSearch = q == null;
                submit(event.currentTarget.form, {
                  replace: !isFirstSearch,
                });
              }}
            />
            {/* existing code */}
          </Form>
          {/* existing code */}
        </div>
        {/* existing code */}
      </div>
      {/* existing code */}
    </>
  );
}
We only want to replace search results, not the page before we started searching, so we do a quick check if this is the first search or not and then decide to replace.
Each key stroke no longer creates new entries, so the user can click back out of the search results without having to click it 7 times 😅.
Mutations Without Navigation
So far all of our mutations (the times we change data) have used forms that navigate, creating new entries in the history stack. While these user flows are common, it's equally as common to want to change data without causing a navigation.
For these cases, we have the useFetcher hook. It allows us to communicate with loaders and actions without causing a navigation.
The ★ button on the contact page makes sense for this. We aren't creating or deleting a new record, we don't want to change pages, we simply want to change the data on the page we're looking at.
👉 Change the <Favorite> form to a fetcher form
import {
  useLoaderData,
  Form,
  useFetcher,
} from "react-router-dom";

// existing code

function Favorite({ contact }) {
  const fetcher = useFetcher();
  let favorite = contact.favorite;

  return (
    <fetcher.Form method="post">
      <button
        name="favorite"
        value={favorite ? "false" : "true"}
        aria-label={
          favorite
            ? "Remove from favorites"
            : "Add to favorites"
        }
      >
        {favorite ? "★" : "☆"}
      </button>
    </fetcher.Form>
  );
}
Might want to take a look at that form while we're here. As always, our form has fields with a name prop. This form will send formData with a favorite key that's either "true" | "false". Since it's got method="post" it will call the action. Since there is no <fetcher.Form action="..."> prop, it will post to the route where the form is rendered.
👉 Create the action
// existing code
import { getContact, updateContact } from "../contacts";

export async function action({ request, params }) {
  let formData = await request.formData();
  return updateContact(params.contactId, {
    favorite: formData.get("favorite") === "true",
  });
}

export default function Contact() {
  // existing code
}
Pretty simple. Pull the form data off the request and send it to the data model.
👉 Configure the route's new action
// existing code
import Contact, {
  loader as contactLoader,
  action as contactAction,
} from "./routes/contact";

const router = createBrowserRouter([
  {
    path: "/",
    element: <Root />,
    errorElement: <ErrorPage />,
    loader: rootLoader,
    action: rootAction,
    children: [
      { index: true, element: <Index /> },
      {
        path: "contacts/:contactId",
        element: <Contact />,
        loader: contactLoader,
        action: contactAction,
      },
      /* existing code */
    ],
  },
]);
Alright, we're ready to click the star next to the user's name!
Check that out, both stars automatically update. Our new <fetcher.Form method="post"> works almost exactly like the <Form> we've been using: it calls the action and then all data is revalidated automatically--even your errors will be caught the same way.
There is one key difference though, it's not a navigation--the URL doesn't change, the history stack is unaffected.
Optimistic UI
You probably noticed the app felt kind of unresponsive when we clicked the favorite button from the last section. Once again, we added some network latency because you're going to have it in the real world!
To give the user some feedback, we could put the star into a loading state with fetcher.state (a lot like navigation.state from before), but we can do something even better this time. We can use a strategy called "optimistic UI"
The fetcher knows the form data being submitted to the action, so it's available to you on fetcher.formData. We'll use that to immediately update the star's state, even though the network hasn't finished. If the update eventually fails, the UI will revert to the real data.
👉 Read the optimistic value from fetcher.formData
// existing code

function Favorite({ contact }) {
  const fetcher = useFetcher();

  let favorite = contact.favorite;
  if (fetcher.formData) {
    favorite = fetcher.formData.get("favorite") === "true";
  }

  return (
    <fetcher.Form method="post">
      <button
        name="favorite"
        value={favorite ? "false" : "true"}
        aria-label={
          favorite
            ? "Remove from favorites"
            : "Add to favorites"
        }
      >
        {favorite ? "★" : "☆"}
      </button>
    </fetcher.Form>
  );
}
If you click the button now you should see the star immediately change to the new state. Instead of always rendering the actual data, we check if the fetcher has any formData being submitted, if so, we'll use that instead. When the action is done, the fetcher.formData will no longer exist and we're back to using the actual data. So even if you write bugs in your optimistic UI code, it'll eventually go back to the correct state 🥹
Not Found Data
What happens if the contact we're trying to load doesn't exist?
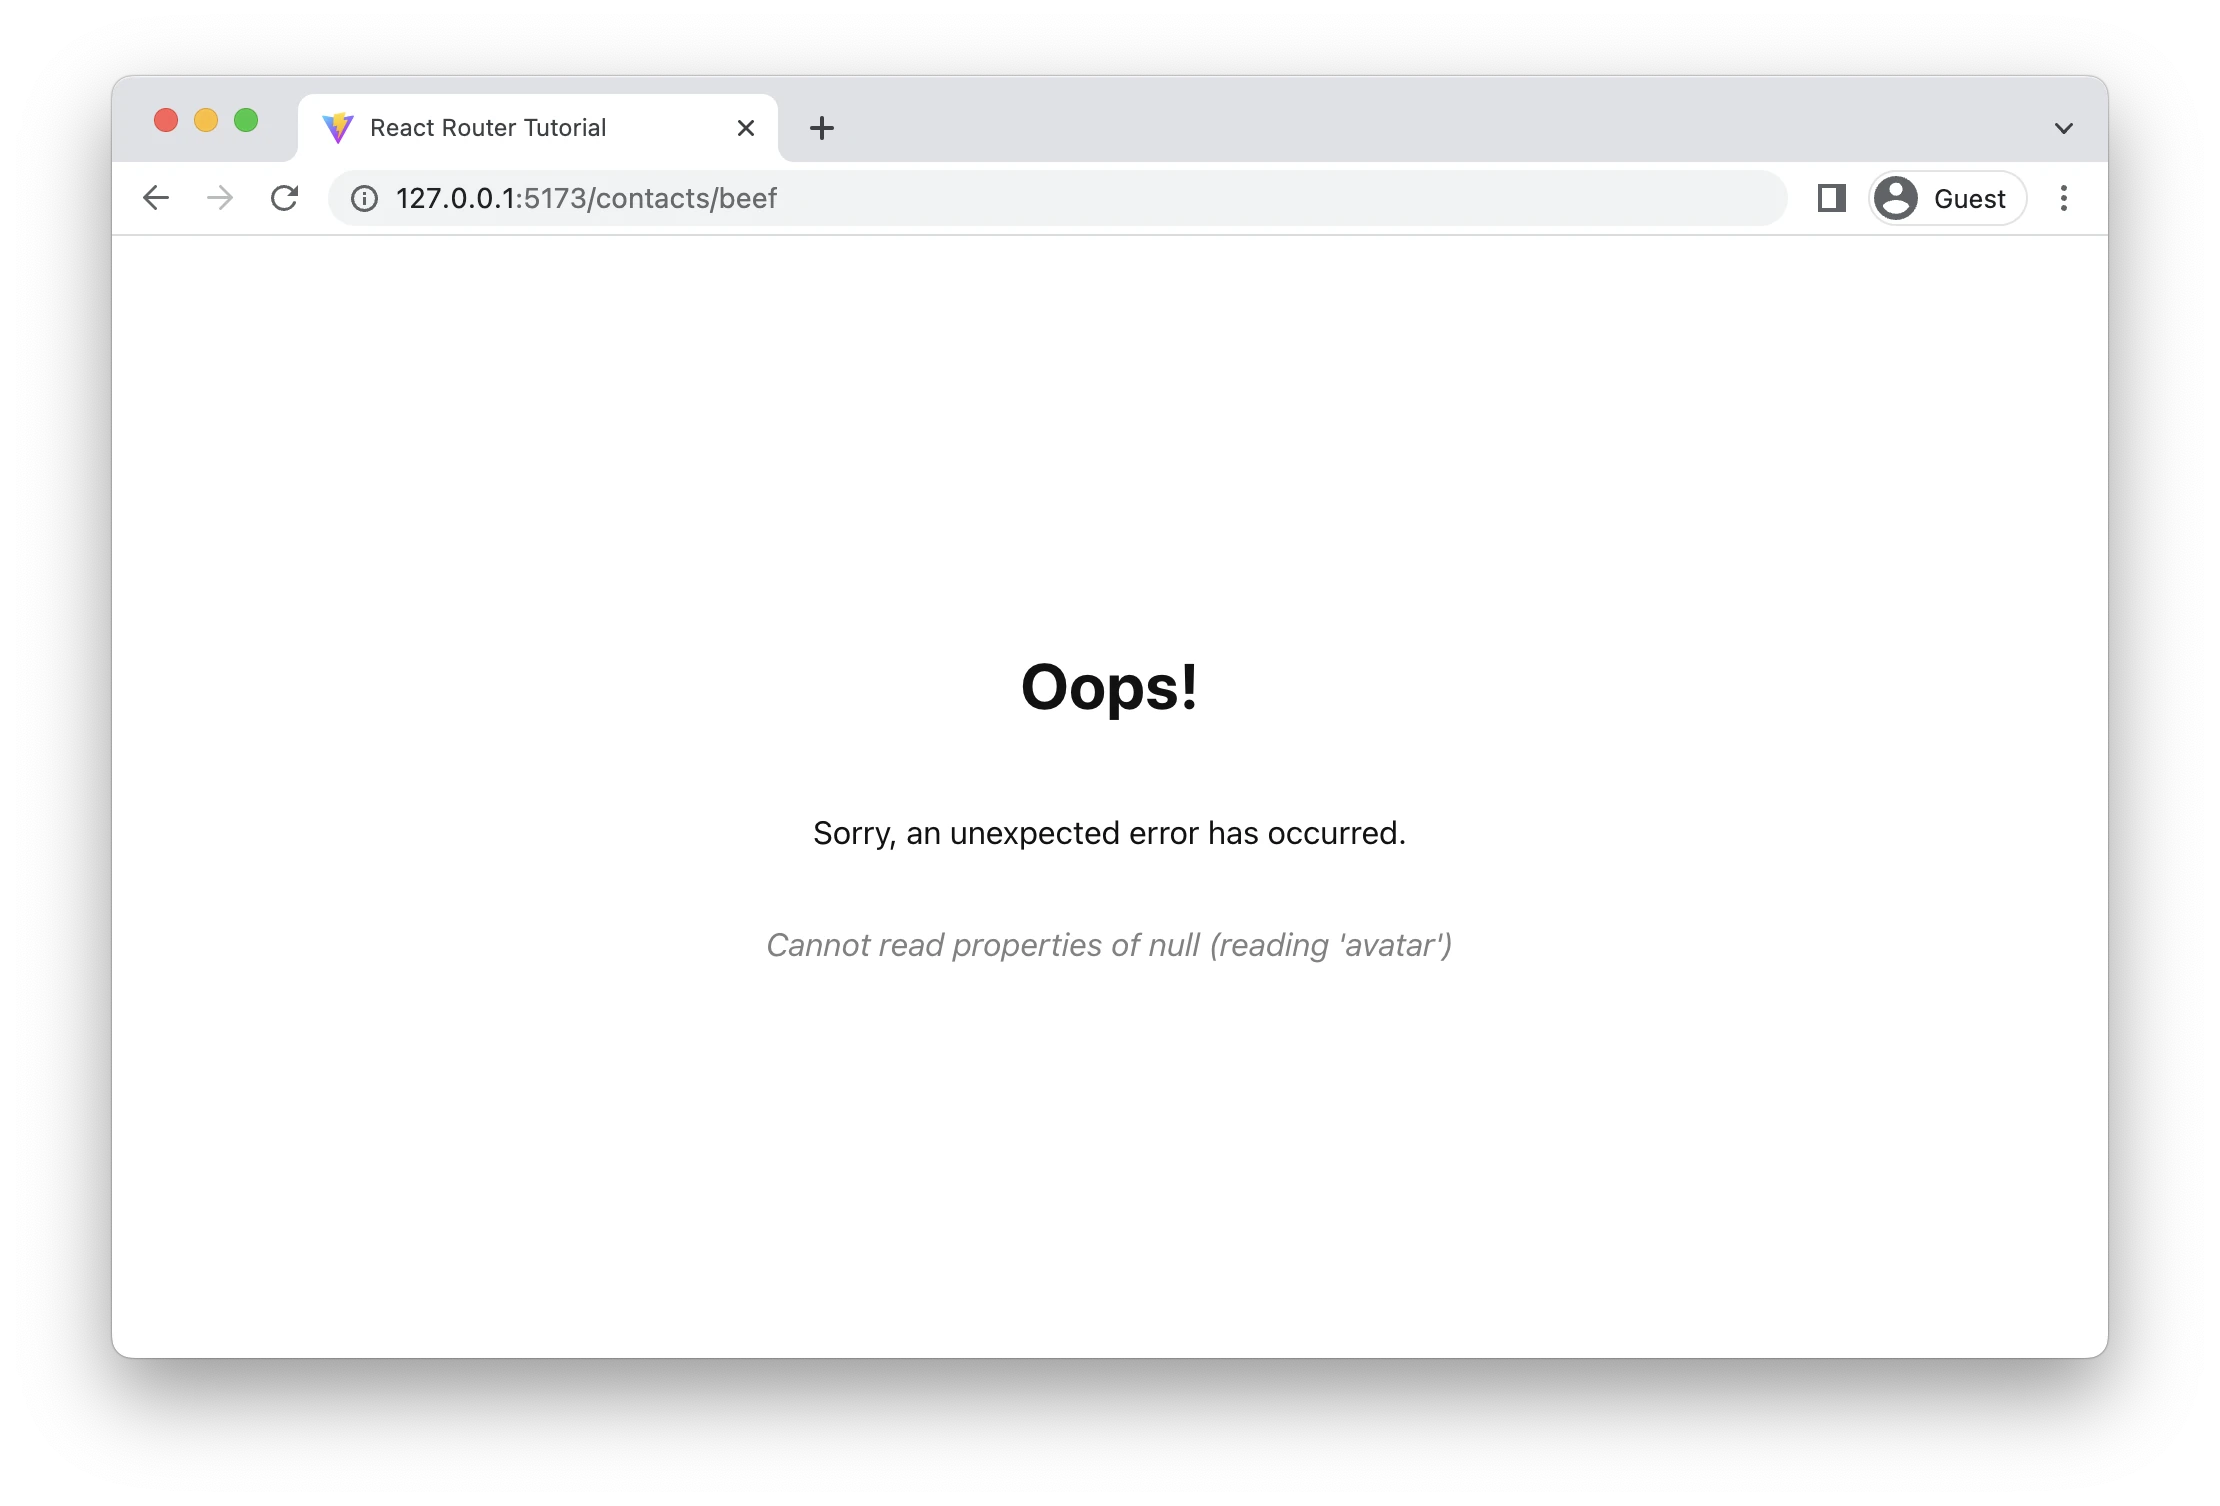
Our root errorElement is catching this unexpected error as we try to render a null contact. Nice the error was properly handled, but we can do better!
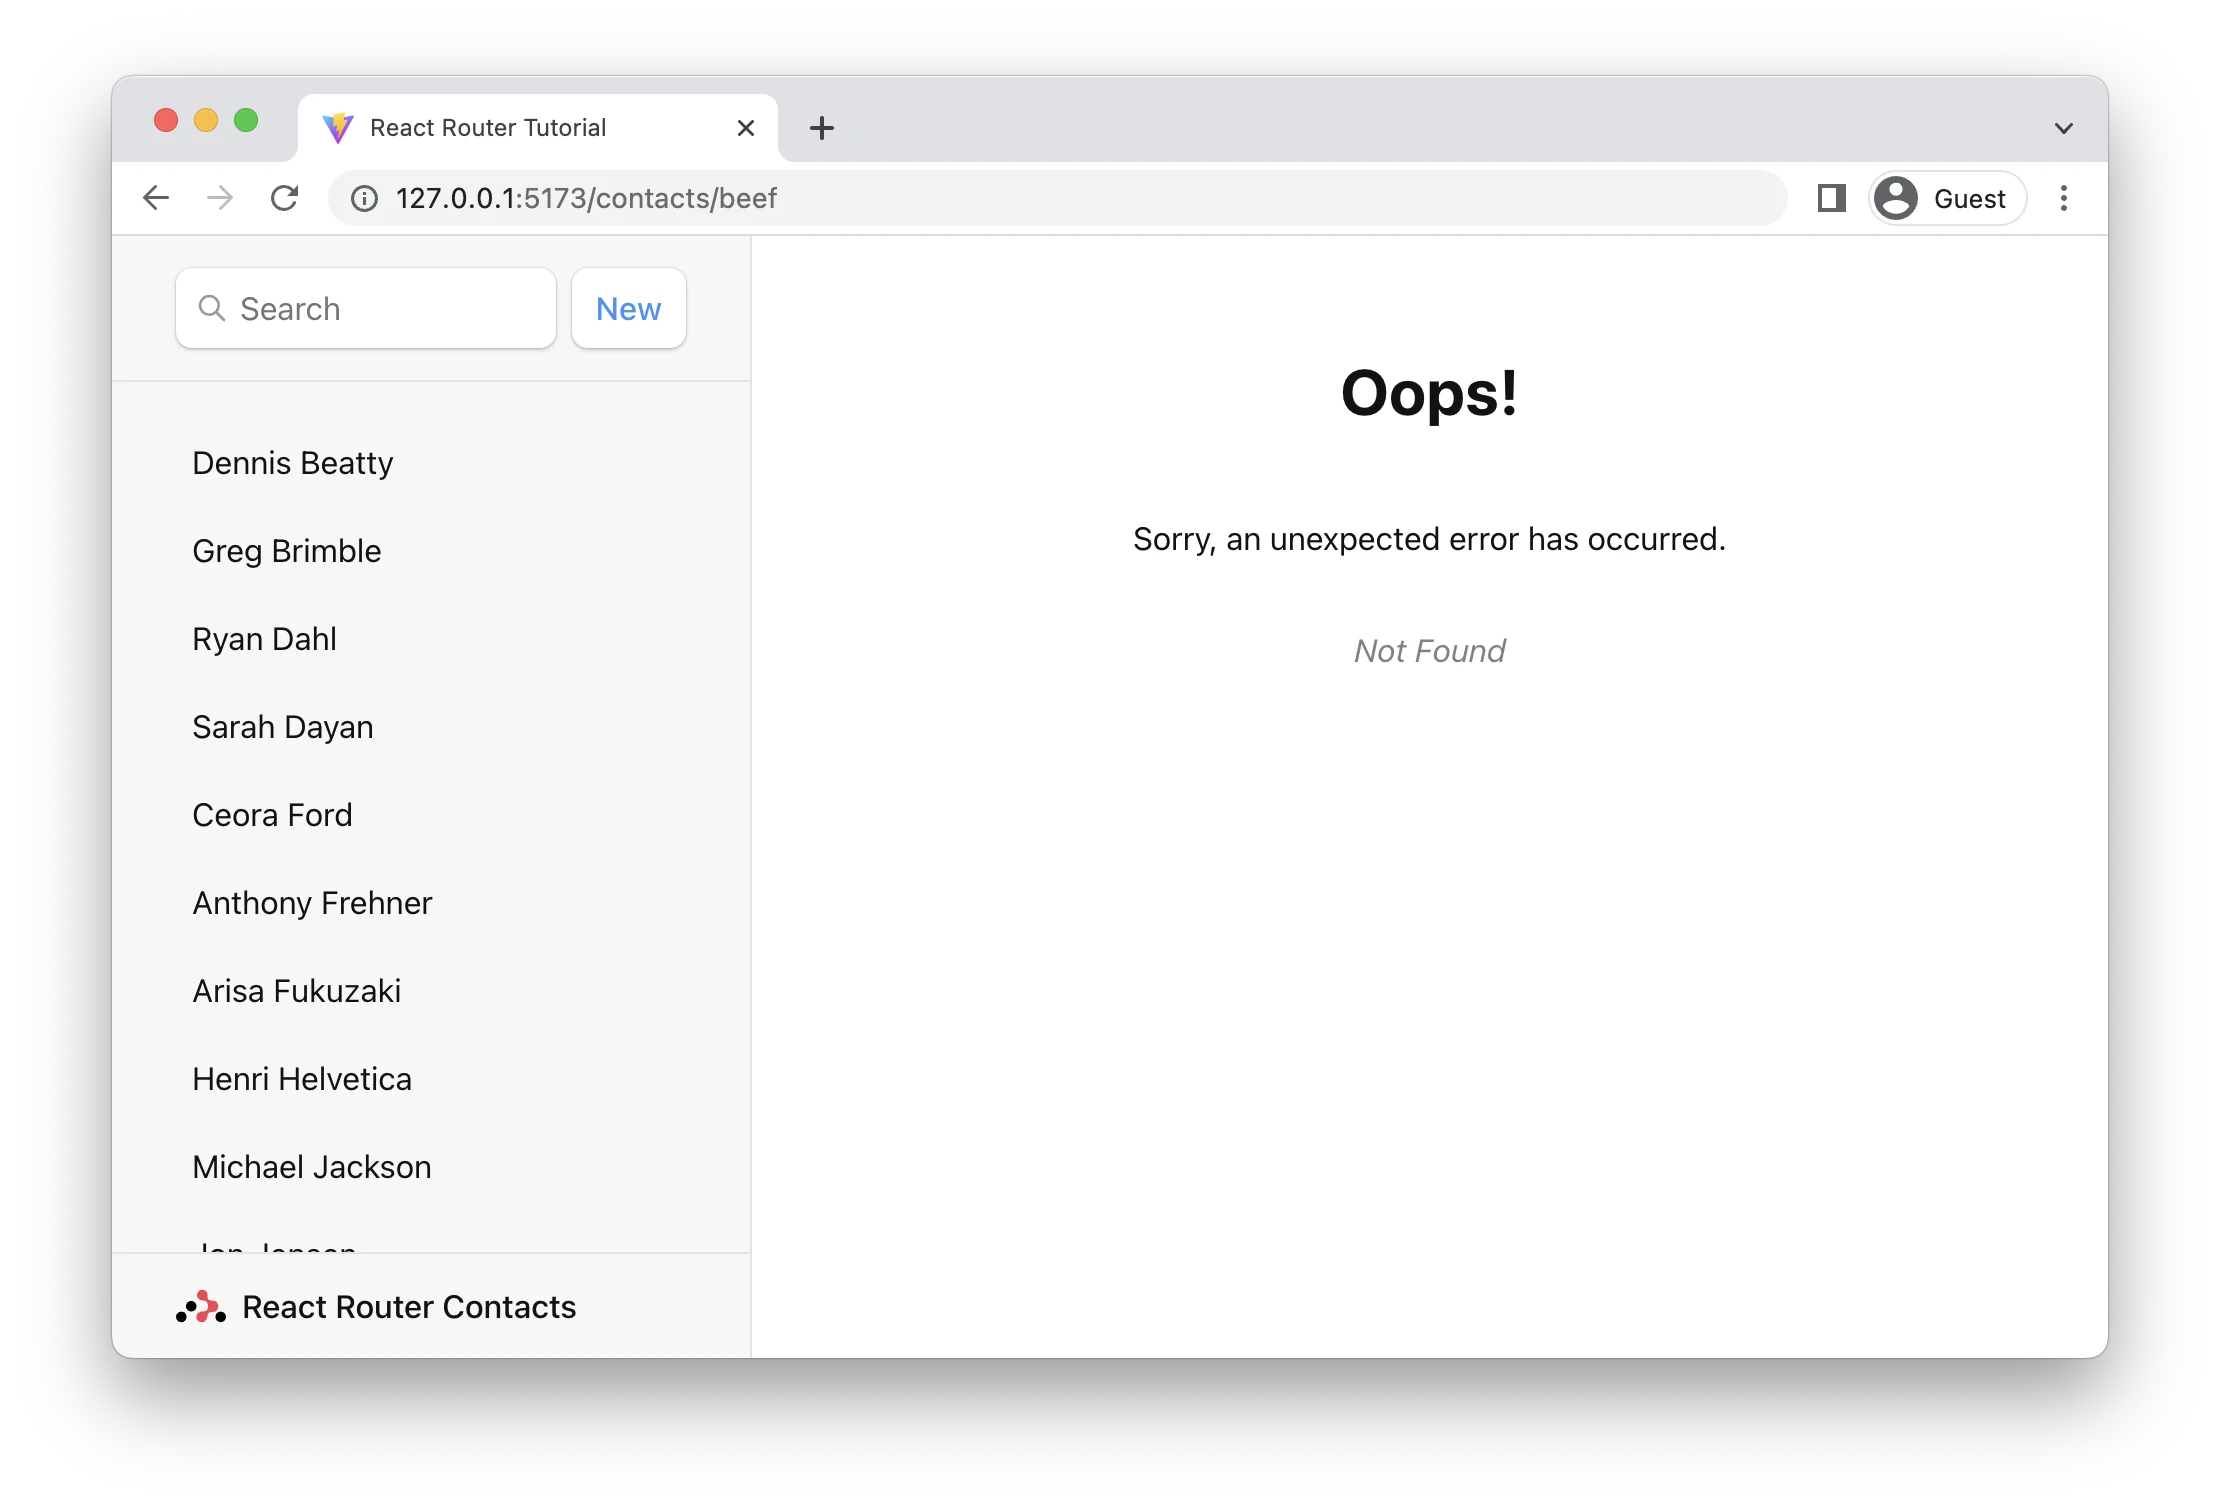
Whenever you have an expected error case in a loader or action–like the data not existing–you can throw. The call stack will break, React Router will catch it, and the error path is rendered instead. We won't even try to render a null contact.
👉 Throw a 404 response in the loader
export async function loader({ params }) {
  const contact = await getContact(params.contactId);
  if (!contact) {
    throw new Response("", {
      status: 404,
      statusText: "Not Found",
    });
  }
  return { contact };
}

Instead of hitting a render error with Cannot read properties of null, we avoid the component completely and render the error path instead, telling the user something more specific.
This keeps your happy paths, happy. Your route elements don't need to concern themselves with error and loading states.
Pathless Routes
One last thing. The last error page we saw would be better if it rendered inside the root outlet, instead of the whole page. In fact, every error in all of our child routes would be better in the outlet, then the user has more options than hitting refresh.
We'd like it to look like this:
We could add the error element to every one of the child routes but, since it's all the same error page, this isn't recommended.
There's a cleaner way. Routes can be used without a path, which lets them participate in the UI layout without requiring new path segments in the URL. Check it out:
👉 Wrap the child routes in a pathless route
createBrowserRouter([
  {
    path: "/",
    element: <Root />,
    loader: rootLoader,
    action: rootAction,
    errorElement: <ErrorPage />,
    children: [
      {
        errorElement: <ErrorPage />,
        children: [
          { index: true, element: <Index /> },
          {
            path: "contacts/:contactId",
            element: <Contact />,
            loader: contactLoader,
            action: contactAction,
          },
          /* the rest of the routes */
        ],
      },
    ],
  },
]);
When any errors are thrown in the child routes, our new pathless route will catch it and render, preserving the root route's UI!
JSX Routes
And for our final trick, many folks prefer to configure their routes with JSX. You can do that with createRoutesFromElements. There is no functional difference between JSX or objects when configuring your routes, it's simply a stylistic preference.
import {
  createRoutesFromElements,
  createBrowserRouter,
} from "react-router-dom";

const router = createBrowserRouter(
  createRoutesFromElements(
    <Route
      path="/"
      element={<Root />}
      loader={rootLoader}
      action={rootAction}
      errorElement={<ErrorPage />}
    >
      <Route errorElement={<ErrorPage />}>
        <Route index element={<Index />} />
        <Route
          path="contacts/:contactId"
          element={<Contact />}
          loader={contactLoader}
          action={contactAction}
        />
        <Route
          path="contacts/:contactId/edit"
          element={<EditContact />}
          loader={contactLoader}
          action={editAction}
        />
        <Route
          path="contacts/:contactId/destroy"
          action={destroyAction}
        />
      </Route>
    </Route>
  )
);
That's it! Thanks for giving React Router a shot. We hope this tutorial gives you a solid start to build great user experiences. There's a lot more you can do with React Router, so make sure to check out all the APIs 😀